
Setting Up Intake Forms
Build a new-patient or consent form from a TCM template, send its answers straight to the client profile, attach it to your appointment types so it goes out with each booking, and read what comes back.
Setting Up Intake Forms
Intake forms collect health history, consent and contact details before a client arrives. Build a form once, attach it to the appointment types that need it, and it goes out with every booking. You read the answers on the client's profile before you see them.
Step 1: Open Intake Forms
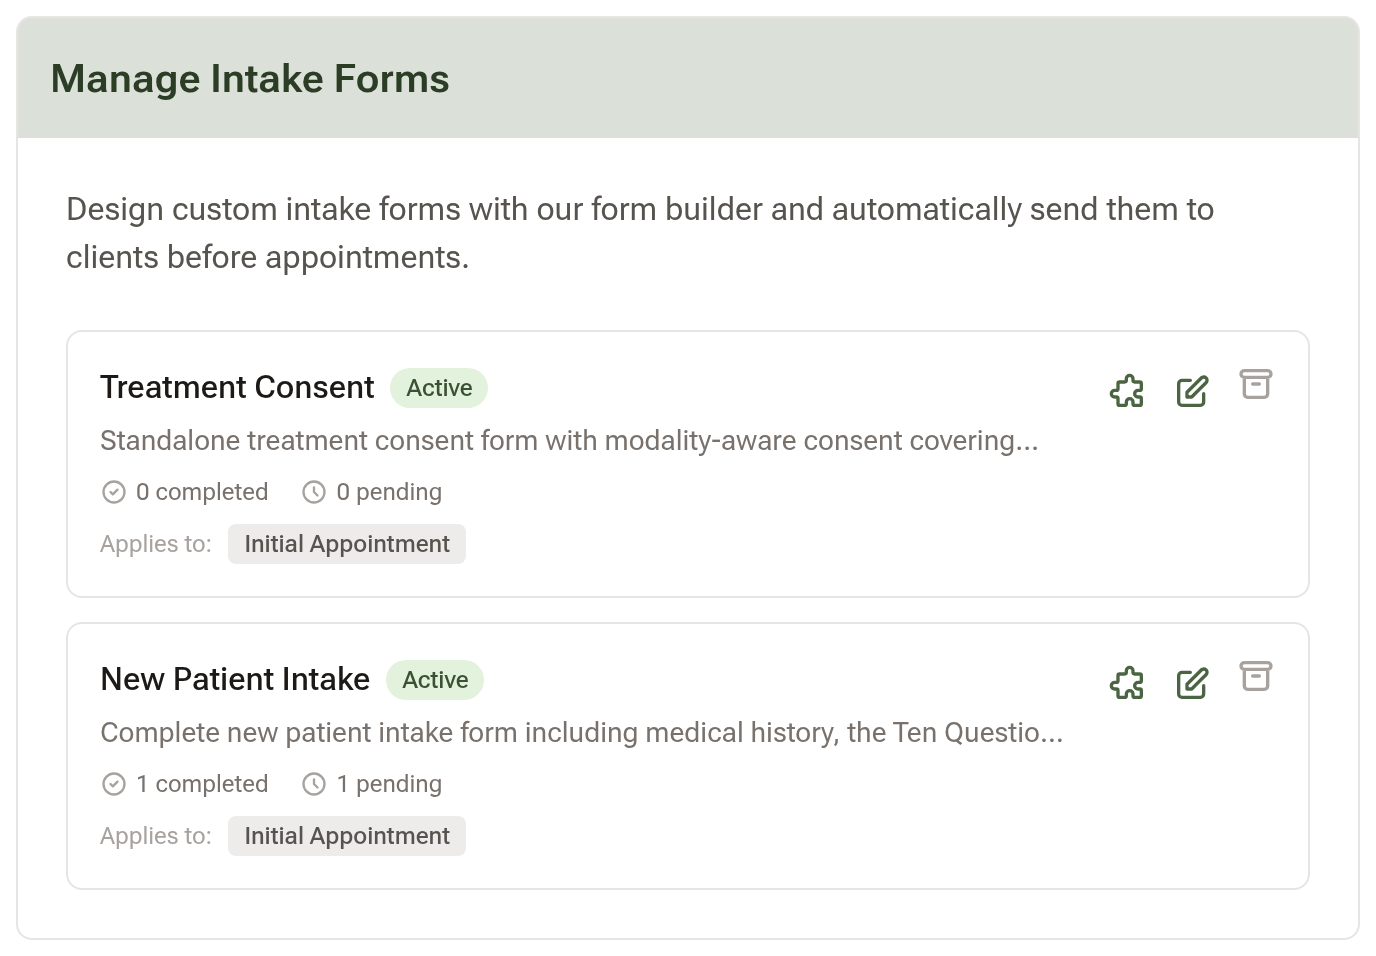
Go to Settings, open the Communications tab and click "Intake Forms". This area is for clinic owners and admins. Each form in the list shows whether it's Active, how many have been completed and are pending, and which appointment types it Applies to. The three icons on the right open the form builder, the form's settings, and archive the form.
Step 2: Start from a template
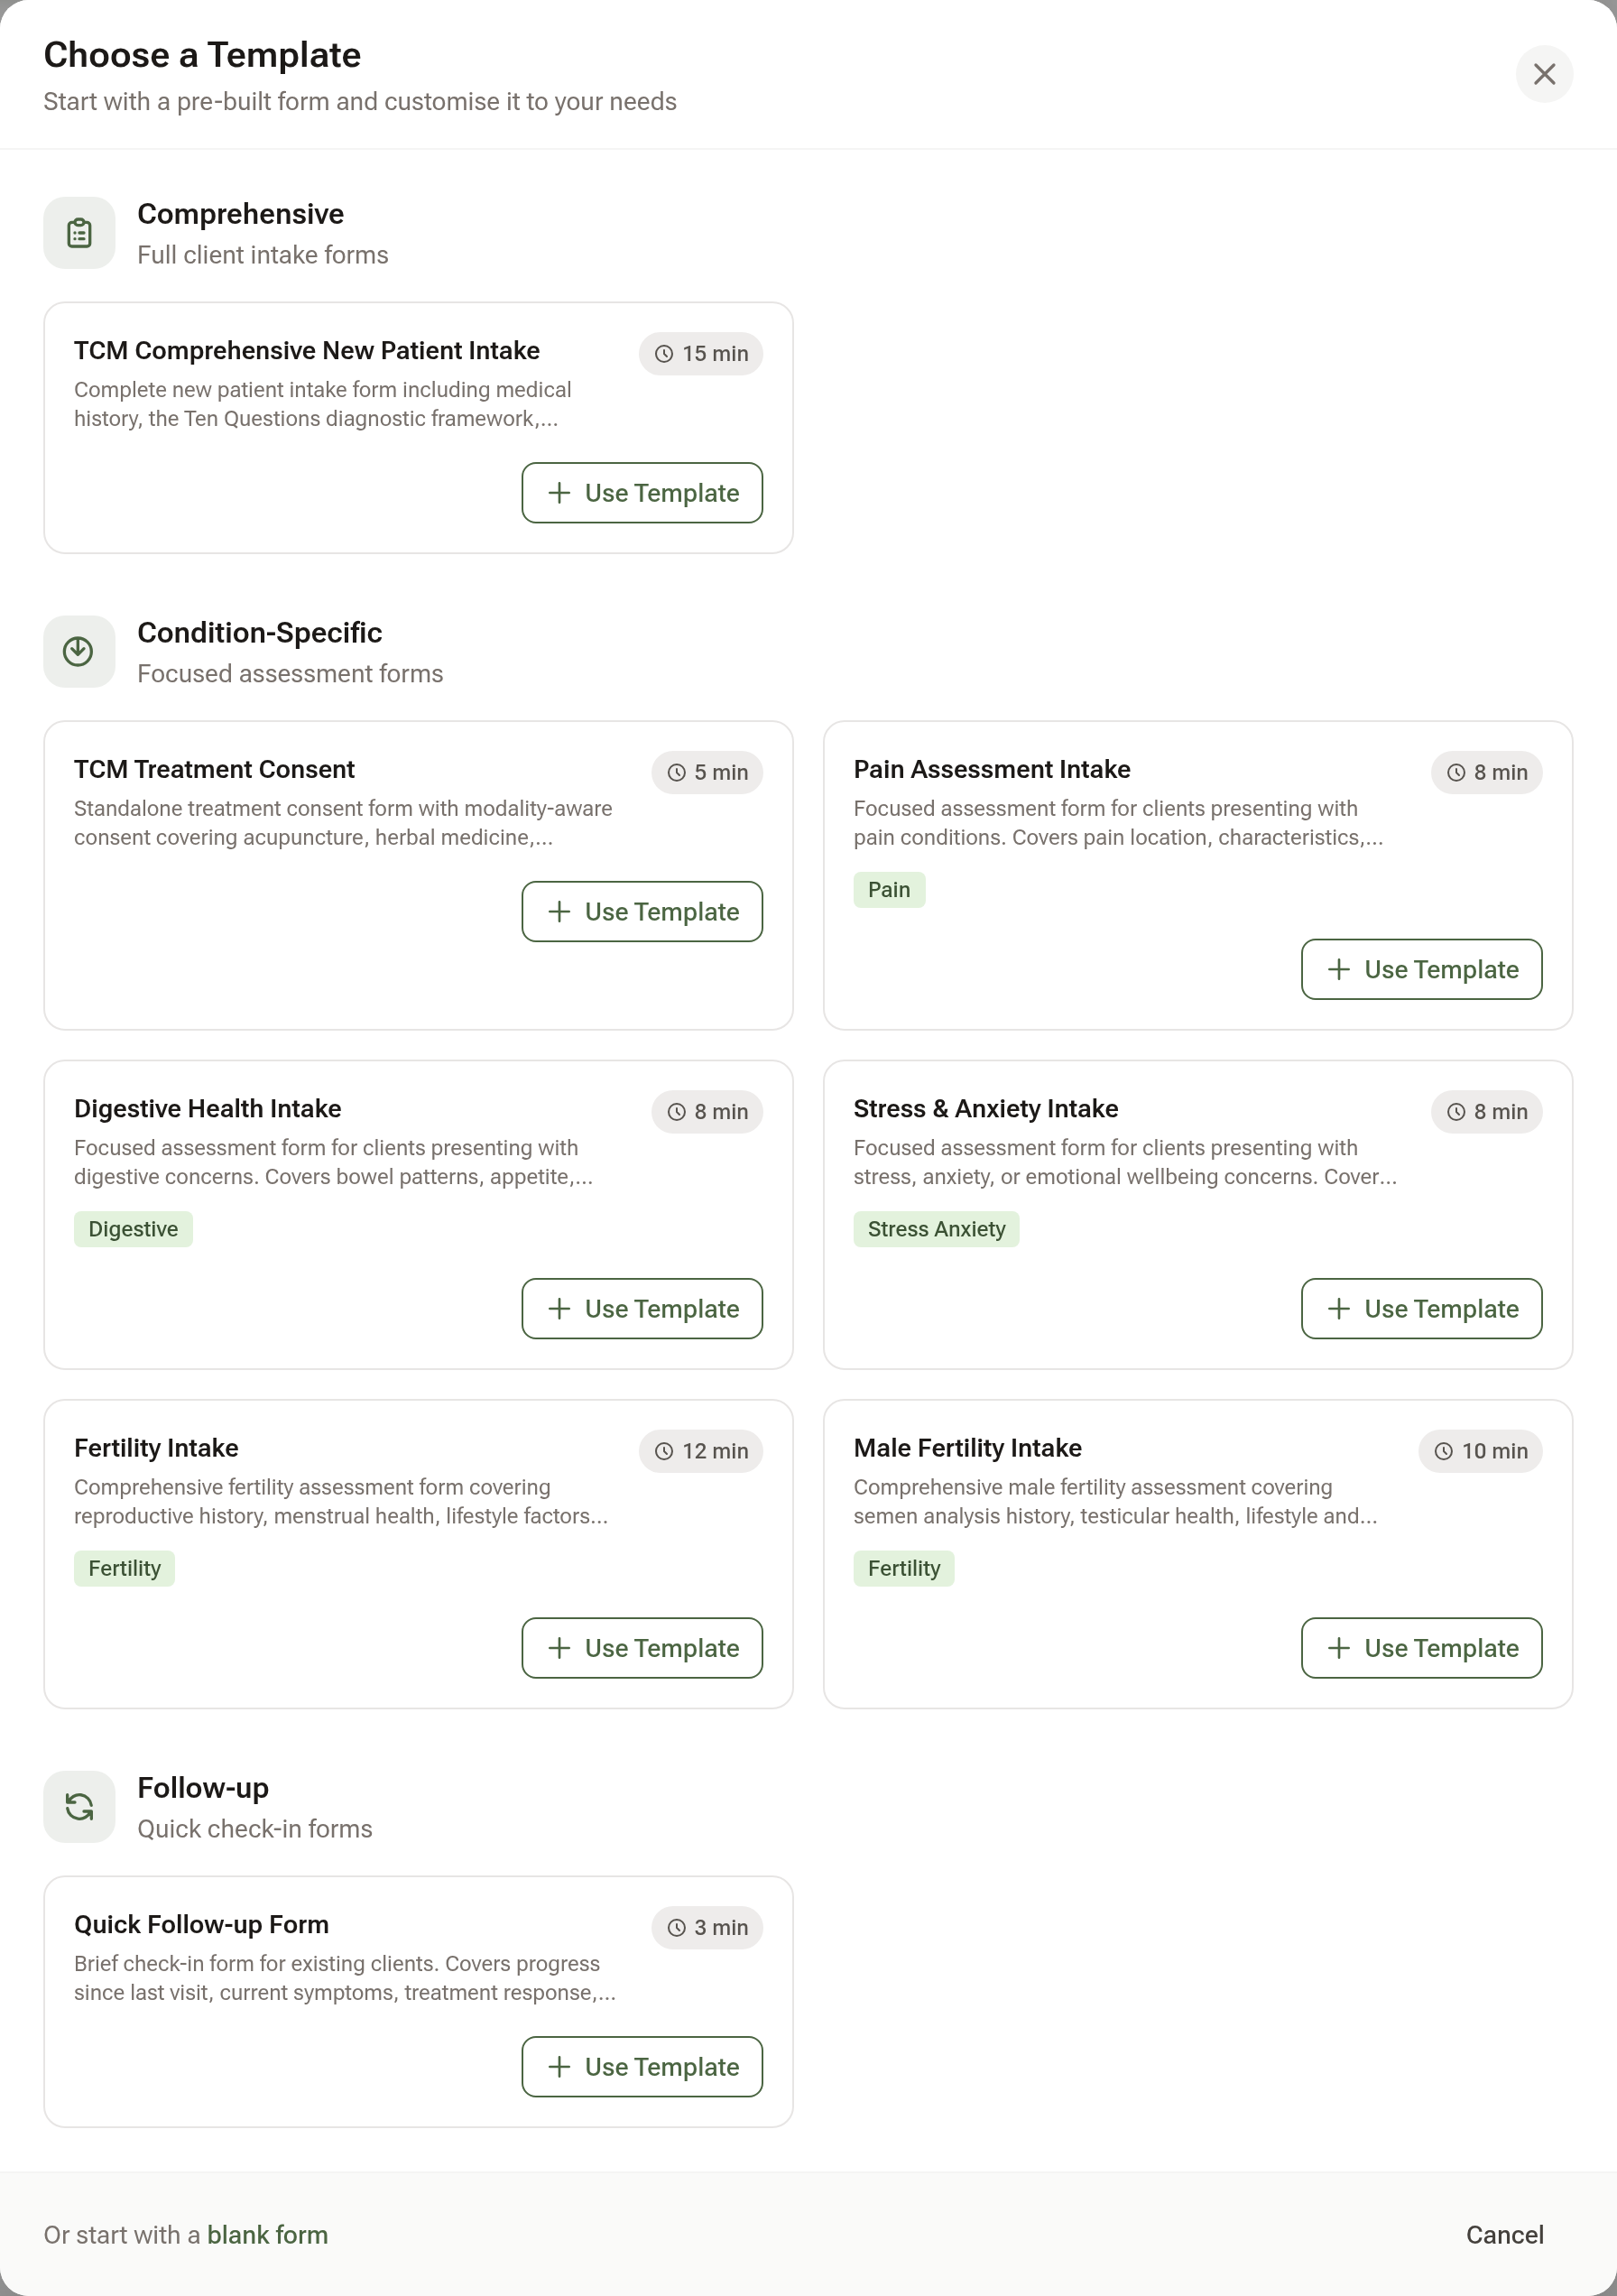
Click "Use Template". The templates are written for Chinese medicine: TCM Comprehensive New Patient Intake covers medical history and the Ten Questions; TCM Treatment Consent covers the modalities you use, and there are focused forms for pain, digestion, stress and anxiety, female and male fertility, and a Quick Follow-up Form. Click "Use Template" on the one you want and it opens in the form builder, ready to change.
To start from nothing instead, click "New Blank Form", give it a name and click "Create & Build".
Step 3: Make it yours
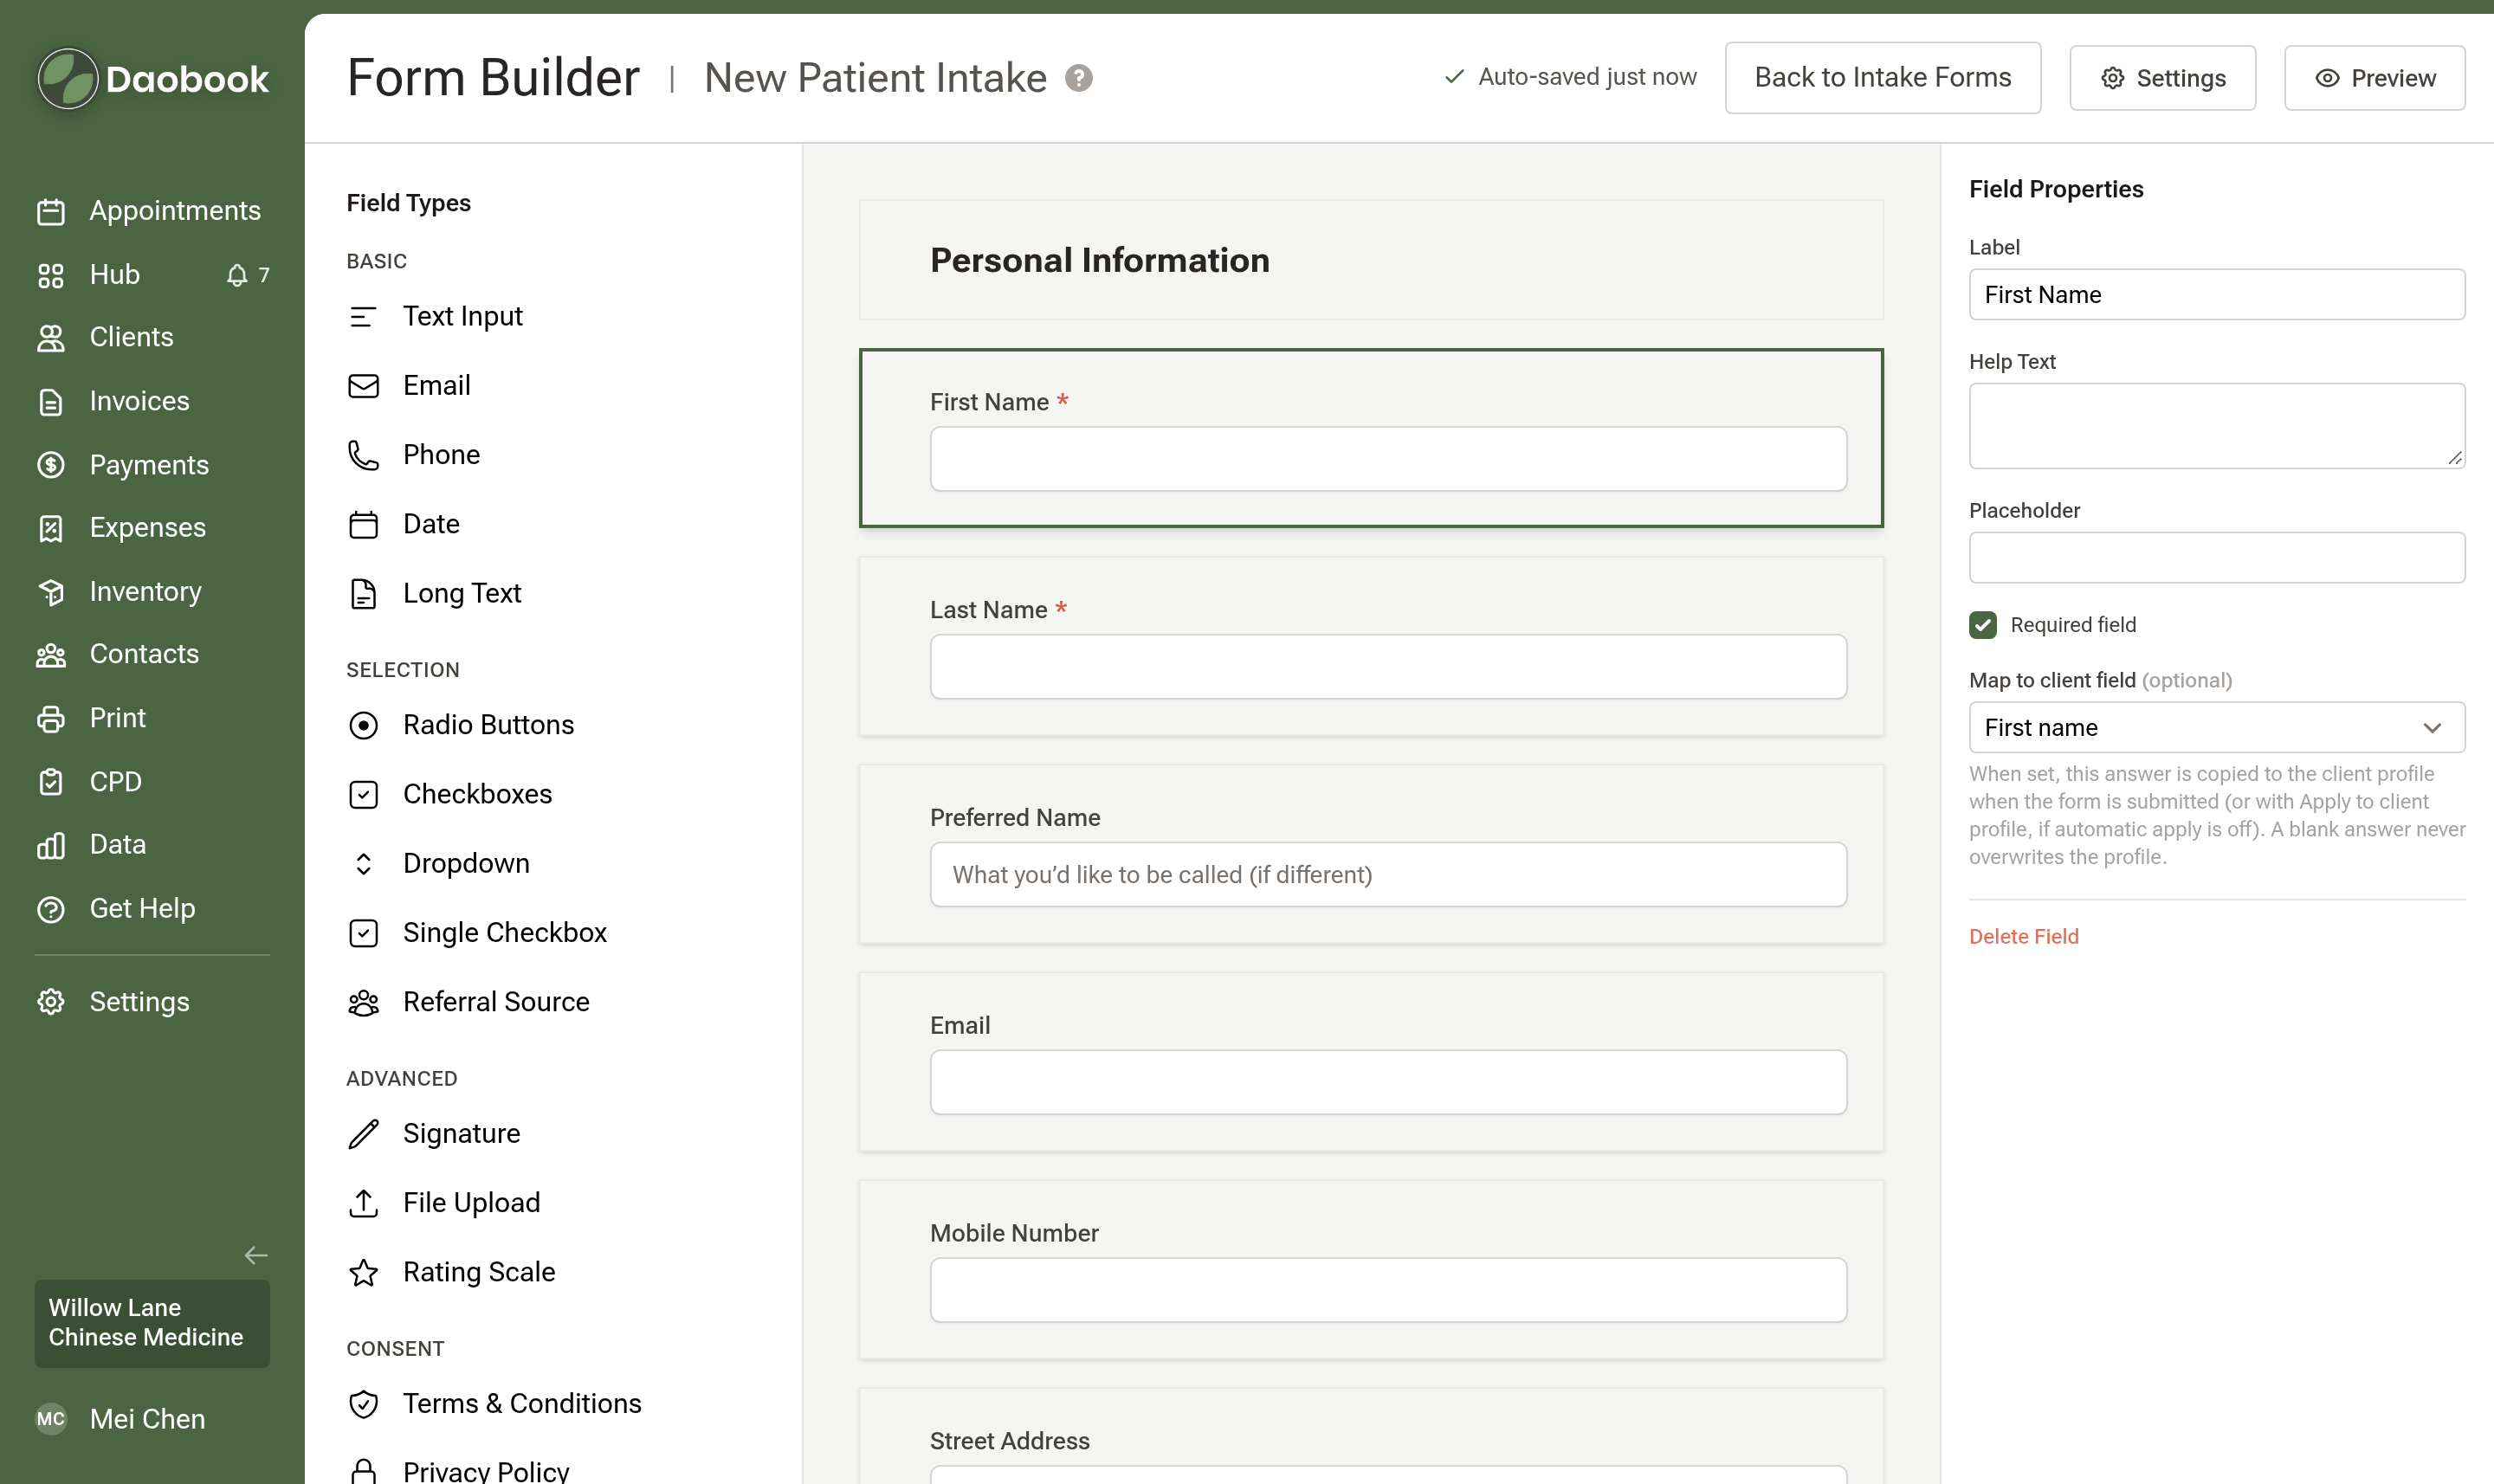
The form builder has three parts: Field Types on the left, your form in the middle, and Field Properties on the right.
- Click a field type to add it. It goes in after the field you've selected, or at the end.
- Click a field in your form to select it, then change its Label, Help Text, Placeholder and whether it's a Required field. For radio buttons, checkboxes and dropdowns, type the choices under Options.
- Drag the grip on the left of a field to move it.
- Delete Field removes the one you've selected.
Every change is saved as you go. Click "Preview" to see the form the way your client will.
Step 4: Use the purpose-built fields
Some field types do more than the ordinary field they look like, so reach for them first:
- Terms & Conditions and Privacy Policy show the text you've set in your Online Bookings settings, and record that the client agreed.
- Treatment Consent takes your own consent wording, typed in the properties panel.
- Marketing Opt-in updates the client's marketing preference.
- Signature lets the client sign with a finger or mouse.
- File Upload lets the client attach a file, such as a referral letter or test results.
- Referral Source answers "How did you hear about us?" from your own list of referral sources (Settings → Practice Info → Referral Sources), so the answer counts in your referral reporting.
Step 5: Send answers to the client profile
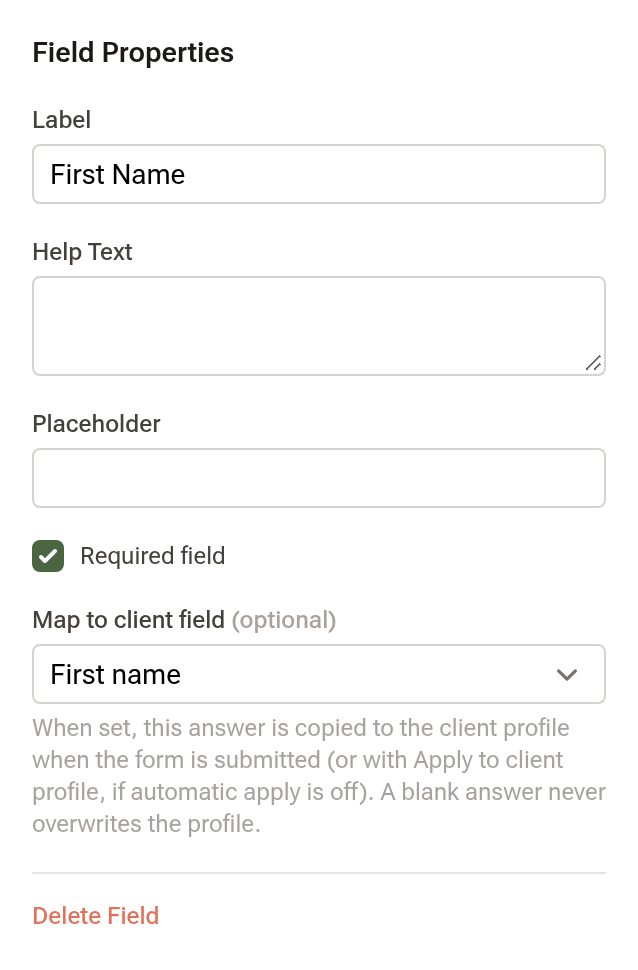
Select a question and choose a profile field under Map to client field — date of birth, mobile, address, emergency contact and so on. The TCM Comprehensive New Patient Intake template comes with its contact and personal questions already mapped.
When a client submits, their mapped answers are copied to their profile automatically, and a blank answer never overwrites anything already there. If you'd rather check each form first, turn off Automatically apply answers to the client profile under Settings → Communications → Client Communications.
Step 6: Choose when it's sent
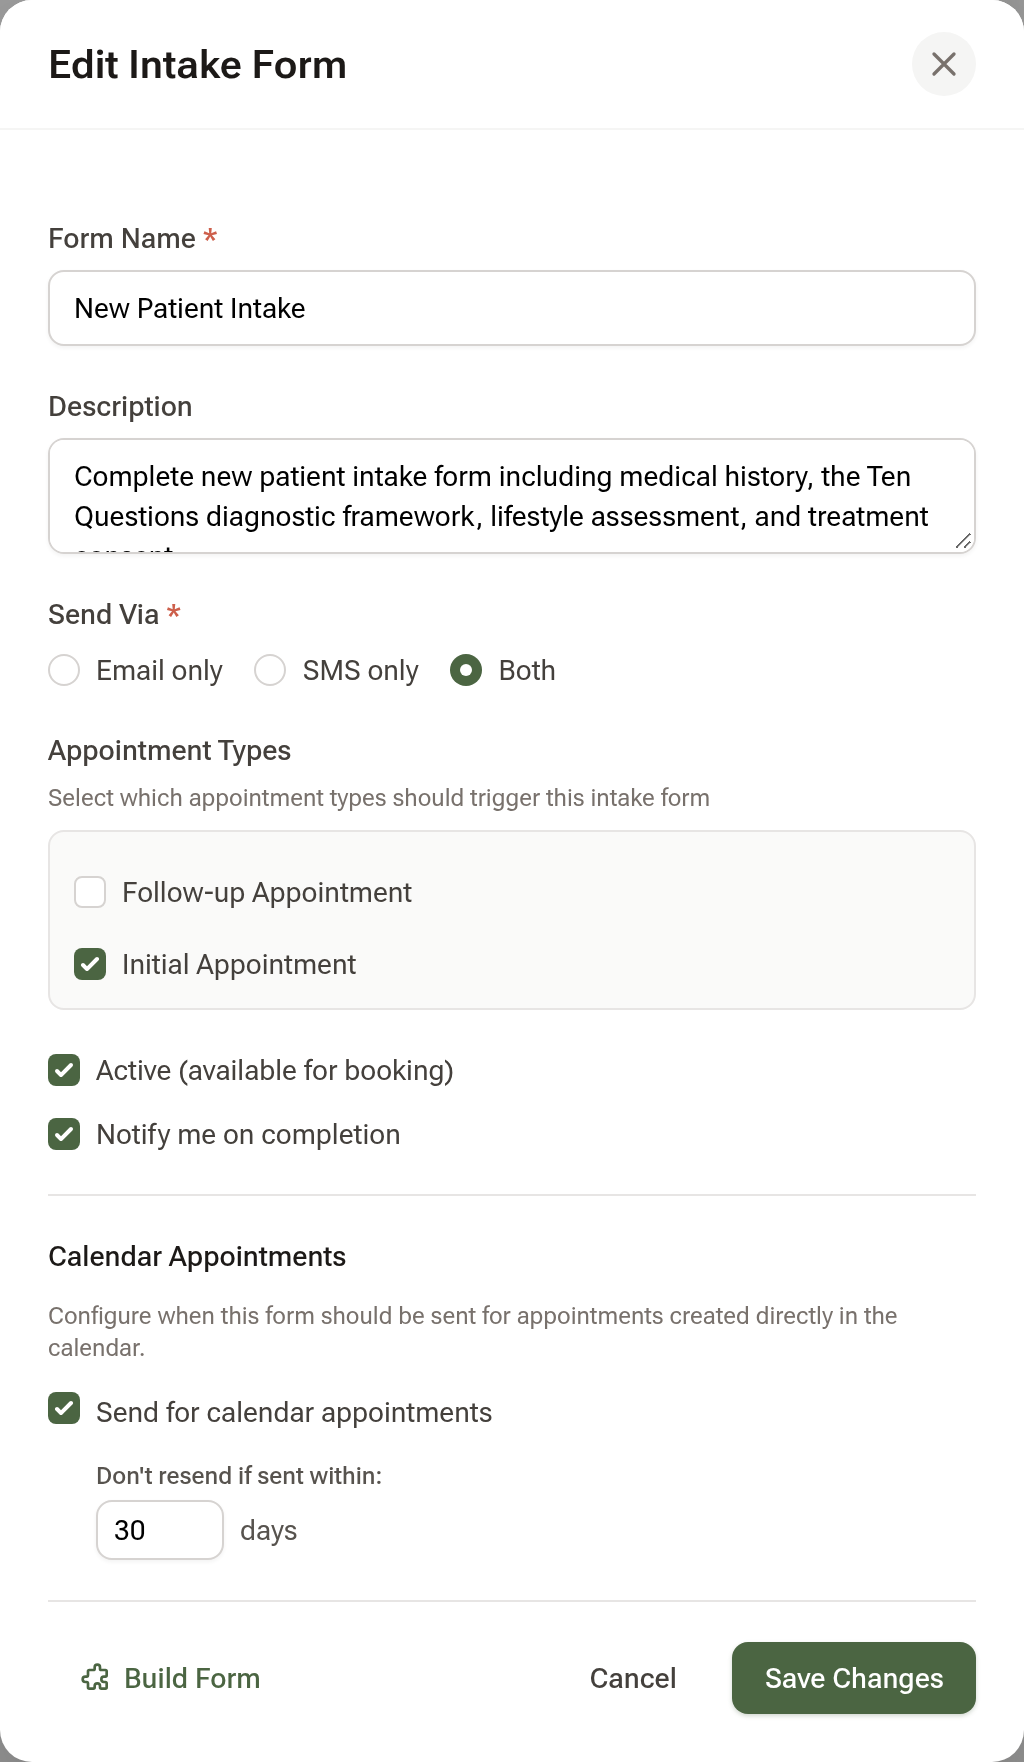
Click "Settings" at the top right of the builder (or the pencil icon on the form's row in the list):
- Send Via — Email only, SMS only or Both.
- Appointment Types — tick every appointment type this form should go out with, such as your initial consultation.
- Active (available for booking) and Notify me on completion, which emails you when a client submits.
Click "Save Changes".
A form made from a template starts out attached to no appointment type and set to email only. Until you tick at least one appointment type it shows "Not attached to any appointment type", and it is never sent with a booking.
Step 7: How forms reach your clients
- Online bookings — when a client books one of the form's appointment types, the form goes with their booking.
- Bookings you make in the calendar — sent when Send for calendar appointments is ticked, under Calendar Appointments in the same window. Owners and admins can override it for a single booking with Send intake forms to client in the booking window.
- No repeats from the calendar — a calendar booking doesn't send the form again while the client still has an unfinished copy sent within Don't resend if sent within (30 days to start with).
Automatic sending follows your client communications: while they're paused, or for an appointment type with Send Client Communications unticked, the form isn't sent with the booking.
Step 8: Send one yourself
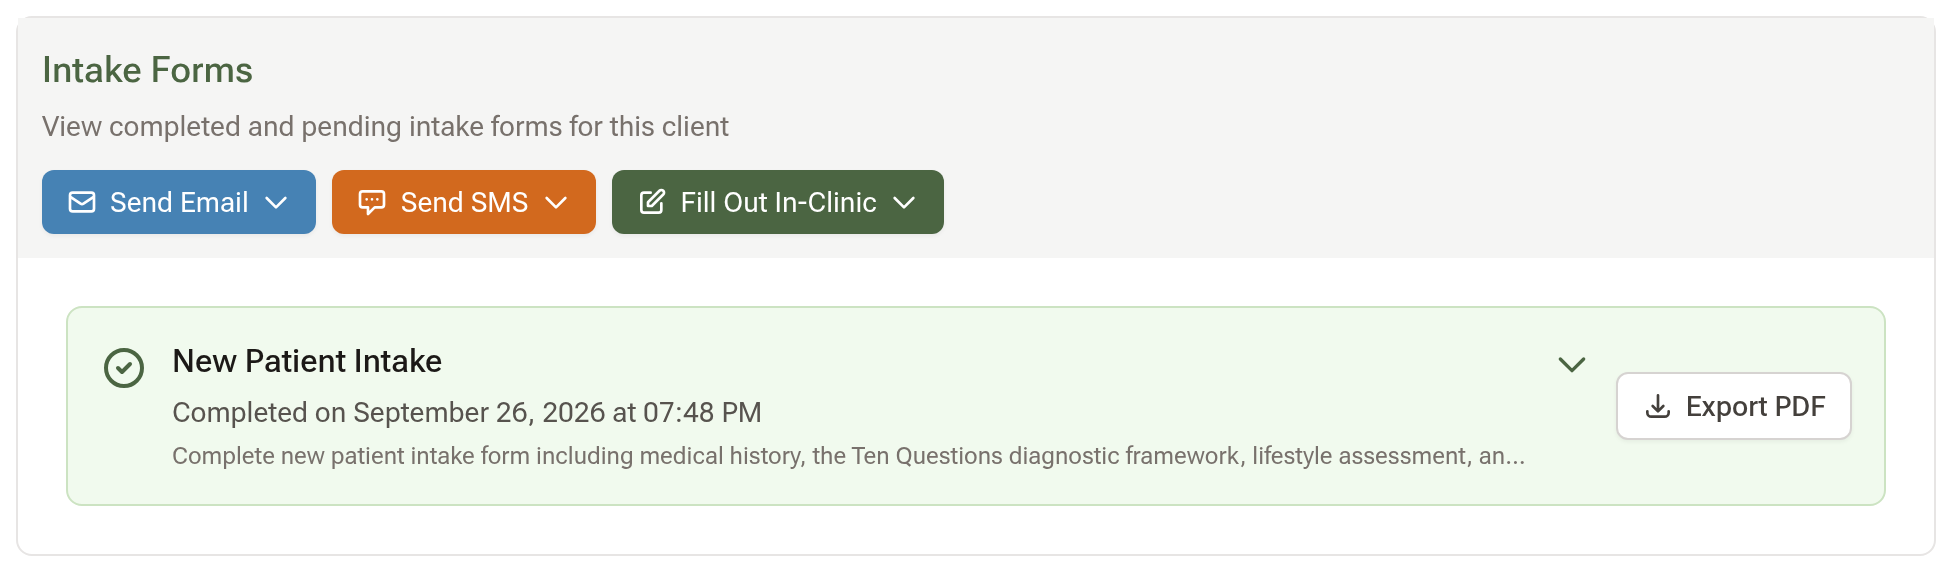
Open the client's profile and click Intake Forms. Send Email and Send SMS each list your forms; pick one to send it now. Fill Out In-Clinic opens the form on your device, so the client can fill it in at reception or you can complete it with them.
Step 9: What your client sees
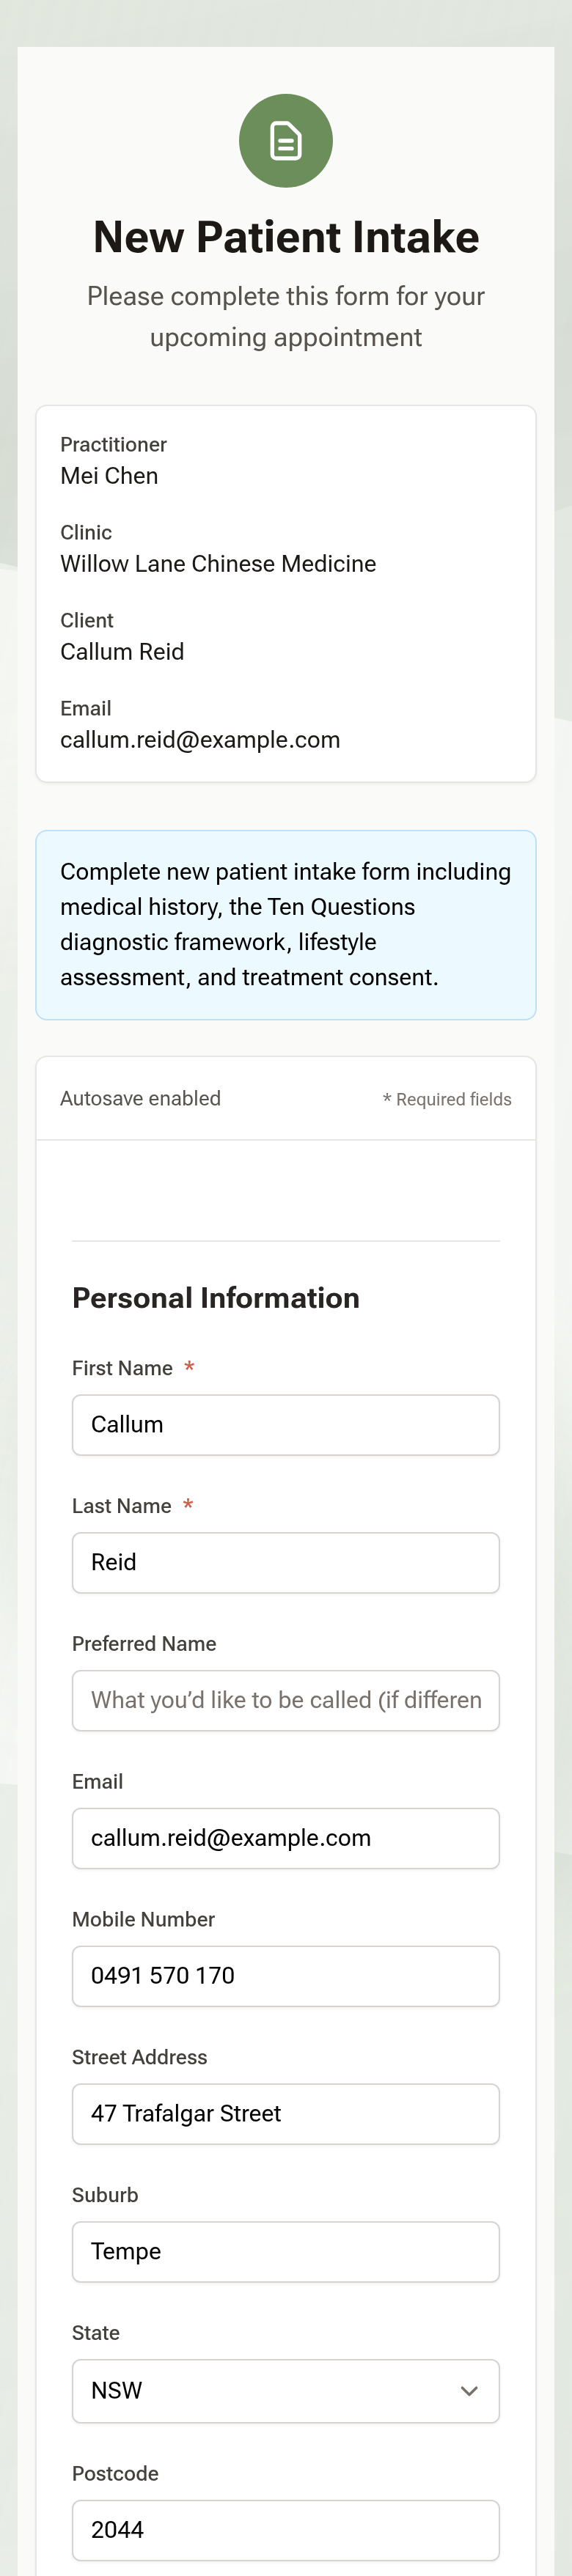
The client opens the link on their phone or computer. Anything already on their profile is filled in for them, their progress saves as they go, so they can come back to it, and they finish with "Submit Form".
Step 10: Read the answers
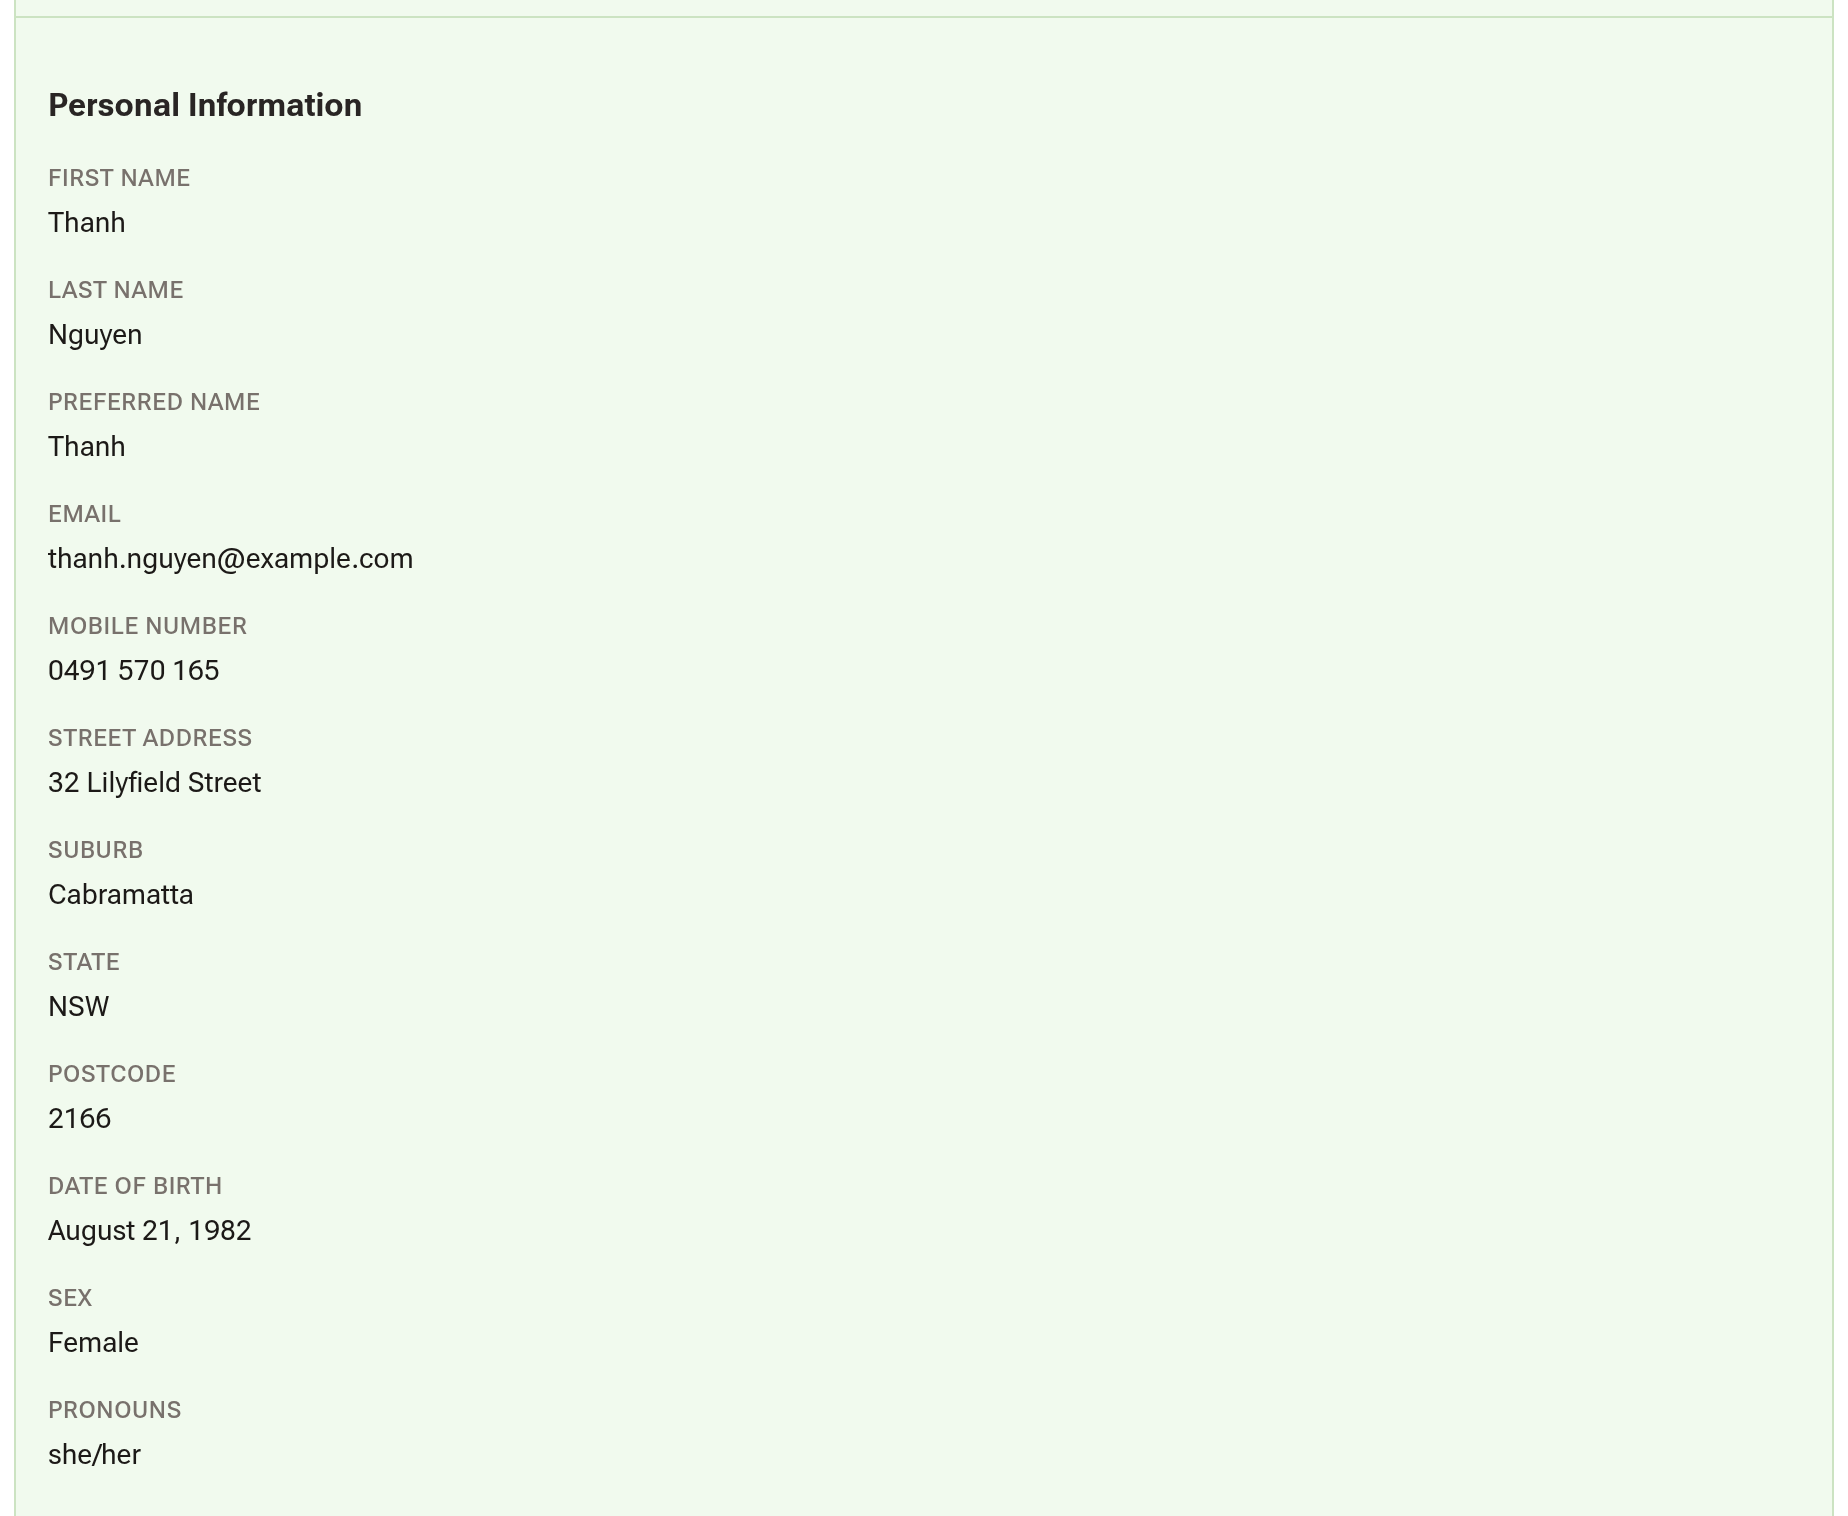
Completed forms sit under Intake Forms on the client's profile. Click one to open the answers, section by section, or click "Export PDF" for a copy. A form still waiting is listed under Pending Forms as Awaiting completion.
Retiring a form
Click the archive icon on a form you no longer use. It stops being sent and leaves the list, and completed copies stay on client profiles. To bring it back, open the ⋮ menu, tick Show archived forms and click "Unarchive".
Tips:
- A Word or PDF form can't be uploaded and turned into an intake form. Start from the closest template and change it to match.