
Setting Up Your Calendar
Working hours, a one-off extra day, appointment types and add-ons, rooms, how the calendar is drawn, and being told when a colleague books into your column.
Setting Up Your Calendar
Your calendar is shaped by a handful of settings: the hours you work, the appointment types you offer, and how the calendar itself is drawn. This tutorial walks through each of them, plus the two things practices ask about most — covering a colleague's day off, and being told when someone books into your column. Booking an appointment itself isn't covered here; you'll find that on the calendar the moment you click an empty slot.
The example clinic in the screenshots is a single practitioner working Monday to Friday. A team practice sees the same screens, with a practitioner picker on the calendar and a couple of extra settings noted below.
Step 1: Set Your Working Hours
Go to Settings → Practice Info → Working Hours. The Weekly Schedule card has a row for each day of the week.
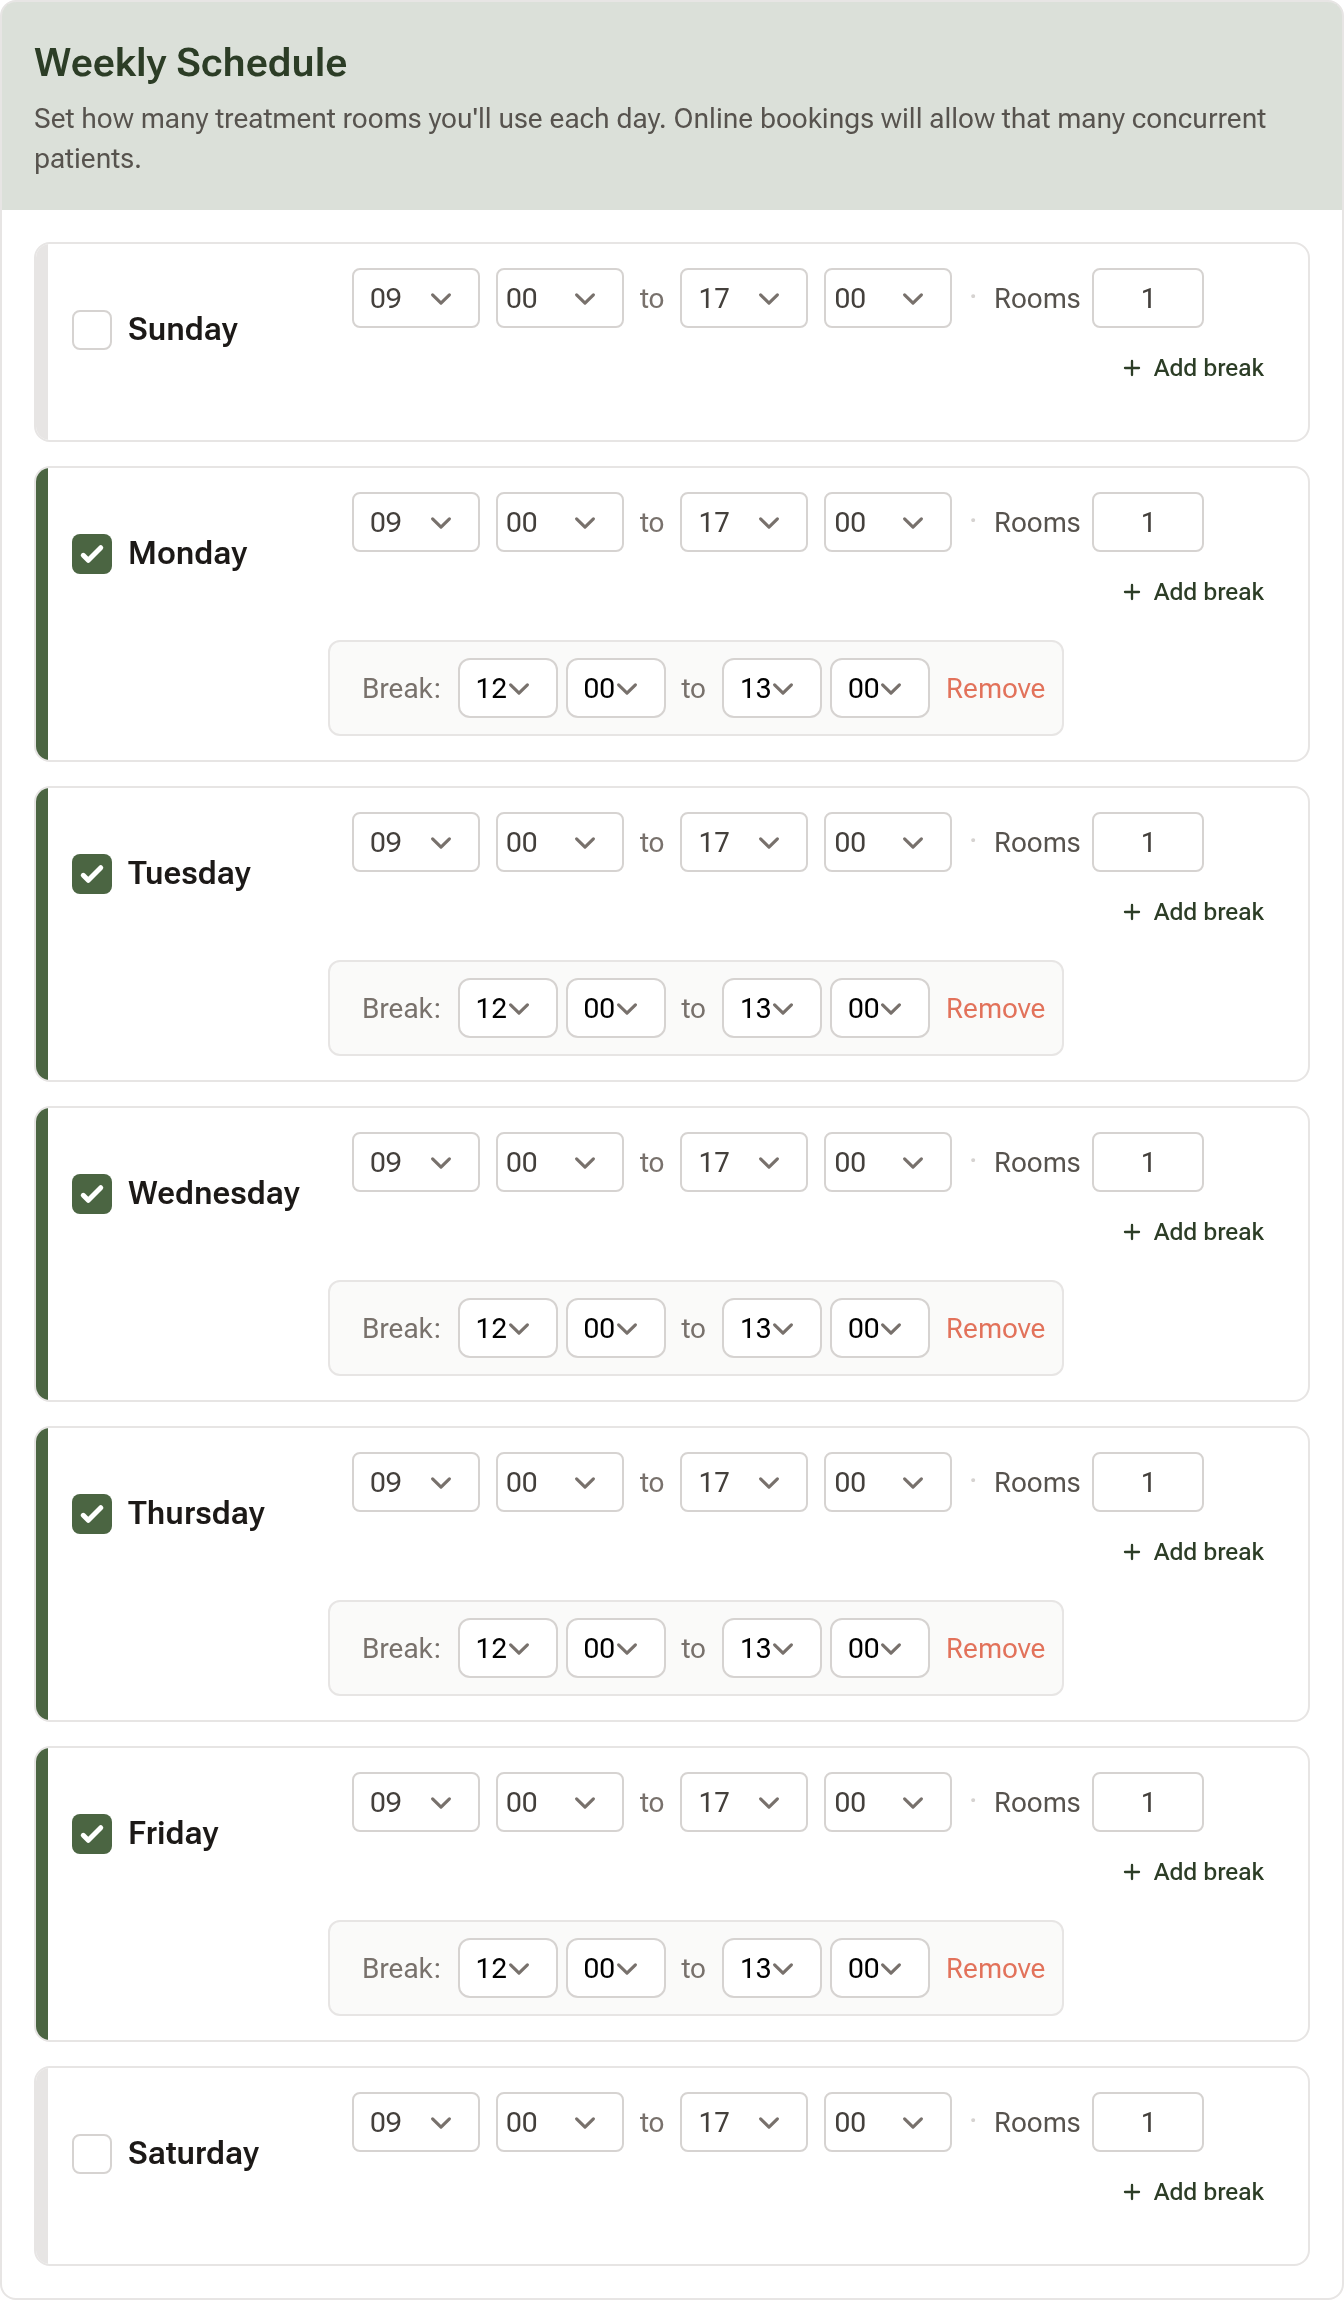
- Tick the days you work and set the hours for each. A day left unticked is a day off — nothing can be booked online, and the column is shaded on your calendar.
- Rooms stays at 1 unless you treat more than one client at once. Rooms are covered in Step 6.
- Add break puts a gap in a day — lunch, say. Online booking works around it.
Click Save Changes when you're done.
Working hours are per location. If you practise at two locations, switch location (the clinic name at the top of the sidebar) and set the hours for each. They're independent, so a Tuesday at one location doesn't have to match a Tuesday at the other.
In a team practice the owner can choose who sets each person's hours. If your Working Hours page shows "Your working hours for this clinic are managed by clinic administrators", your owner or admin sets them from Settings → Team & Clinics → Team Members & Invites: Manage next to your name, then the Working Hours section on your page. They can hand it back to you by changing Working Hours Management on the same page to Self Managed.
Step 2: Add a One-Off Day — Extra Availability
Working hours are the pattern. For a day that breaks the pattern — a Saturday clinic this month, covering a colleague's leave, staying late for a week — add Extra Availability. It adds bookable time on one date and leaves your weekly hours alone.
Open Appointments and click an empty slot on the day you want to add. The New Appointment window opens; in its footer, click Extra Availability.
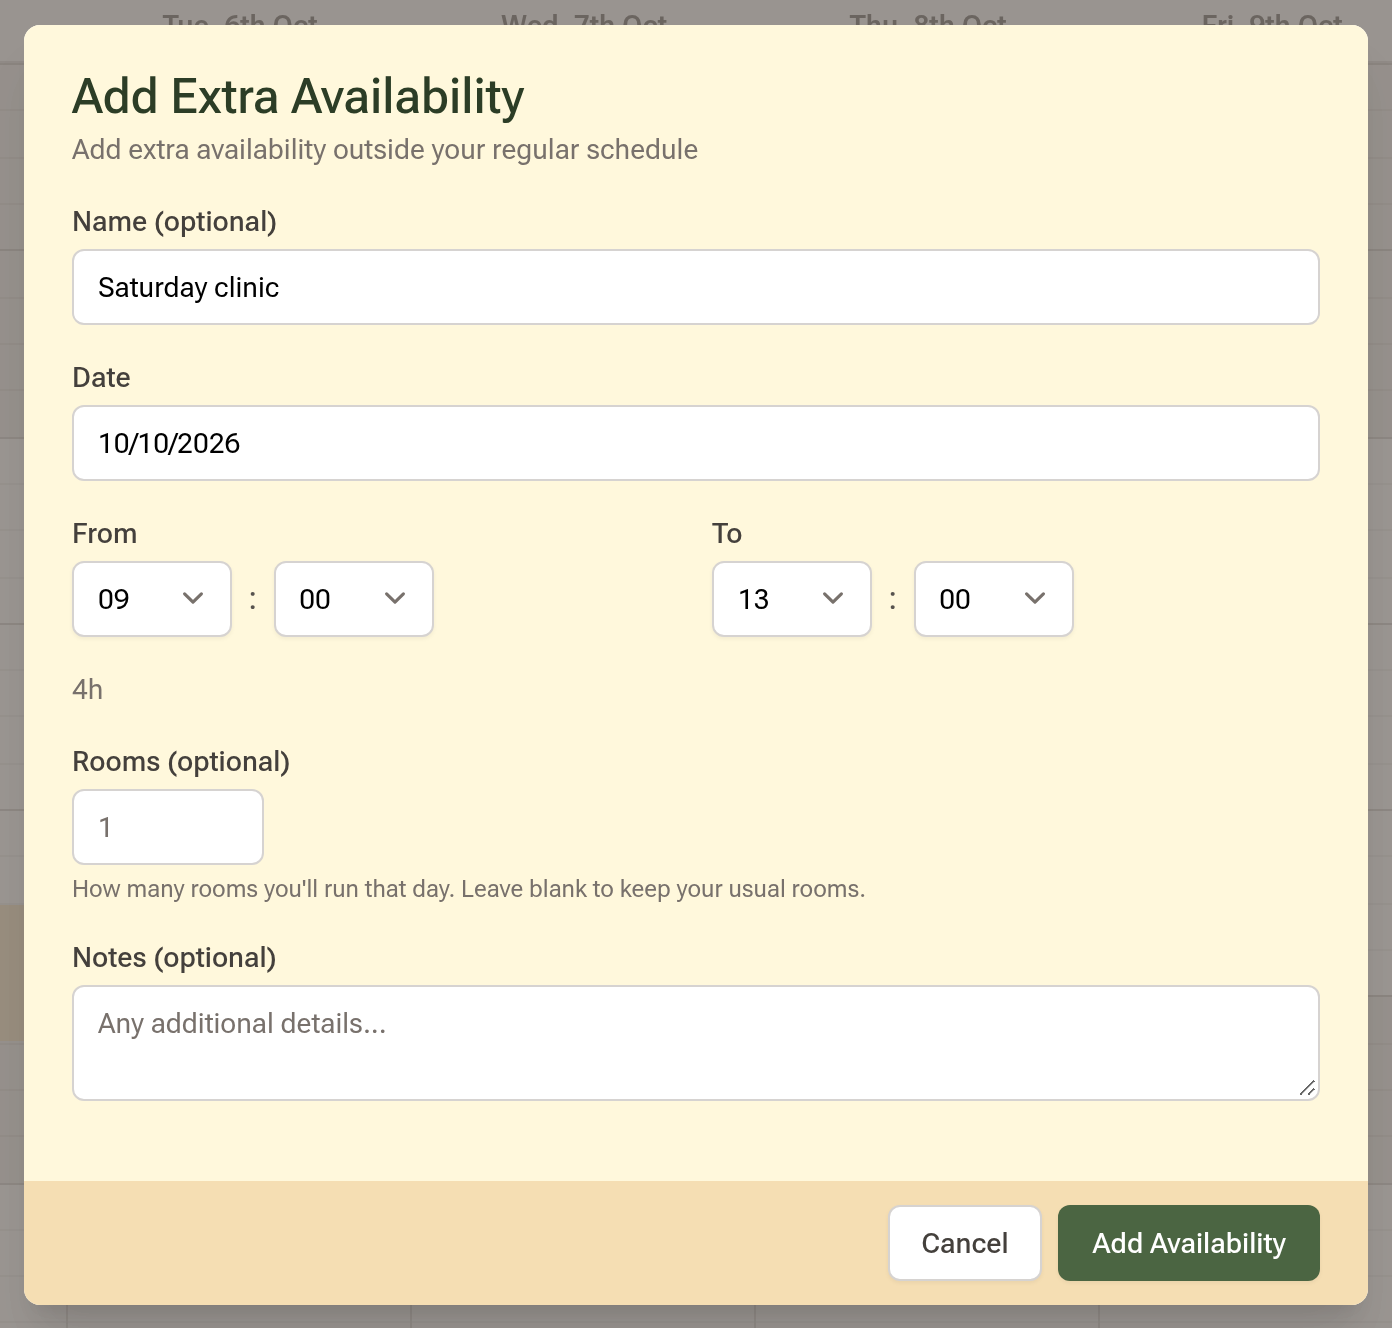
Fill in the window:
- Name (optional) — something you'll recognise on the calendar, like Saturday clinic or Covering Sarah.
- Date, From and To — the hours you'll be available. The date and start time are already set from the slot you clicked.
- Rooms (optional) — leave it blank to keep your usual rooms. Enter a number only if you'll run more rooms than usual on that day.
- Notes (optional) — anything for your own reference.
Click Add Availability. Online booking offers the new hours straight away, and the day shows as open on your calendar. It works on a day you normally don't work at all — that's the point.
Covering a colleague. An owner or admin can add extra availability to another practitioner's diary: with the calendar showing all practitioners, click an empty slot in their column and follow the same steps. The window's title reads Add Extra Availability for [their name] so you can see whose diary you're adding to.
Editing or removing it. Extra availability draws as a thin green line down the left edge of the hours it covers. Click it and the Extra Availability Details window opens with Edit and Delete — this is how a block entered with the wrong times gets fixed. You can edit your own blocks; owners and admins can edit anyone's at that location.
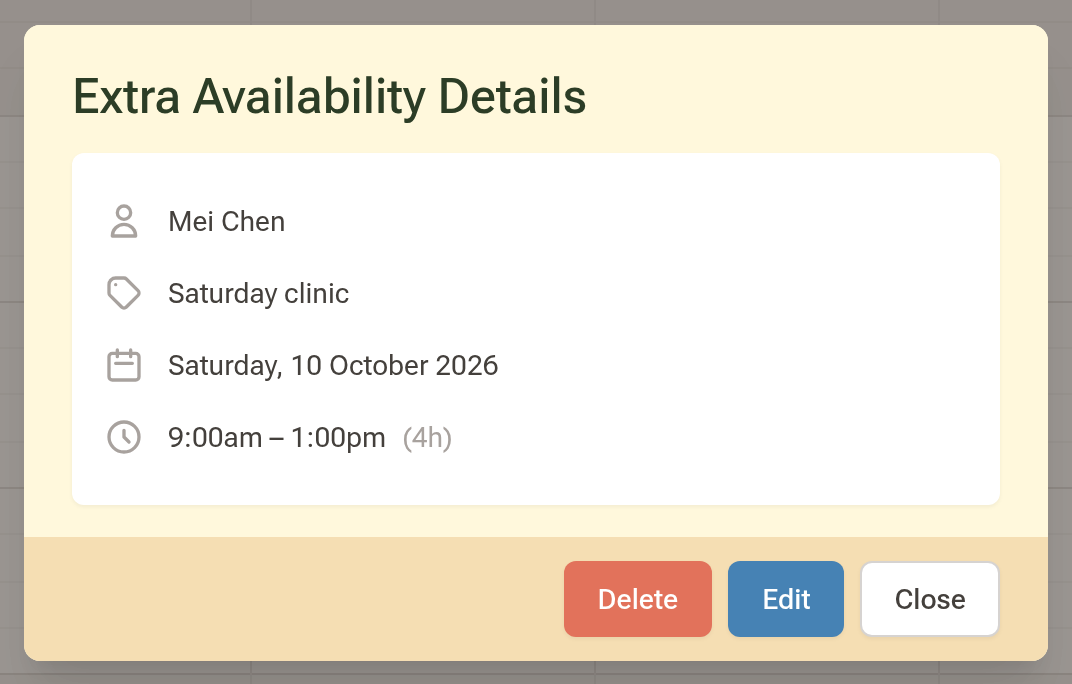
Extra availability adds time; it never takes time away. To close part of a day, use an unavailable block (next step).
Step 3: Block Time Off
Same starting point: click an empty slot on the calendar, and in the New Appointment window's footer click Unavailable block. Give it a name, set the date and times, and click Create Block. Tick Repeat this block for something regular — a weekly staff meeting, a monthly supervision session.
The difference from a break: a break in Working Hours happens every week at the same time; an unavailable block is for a particular date, or a series you choose. Clicking a block on the calendar opens its details with Edit and Delete, and a repeating block asks whether the change applies to only that occurrence, this and future occurrences, or the whole series.
Step 4: Set Up Your Appointment Types
Go to Settings → Practice Info → Appointment Types. Every service you book — initial consultation, follow-up, herbal consult — is an appointment type, and each one carries its own duration, price and colour. Click Add Type to create one, or Edit on a card to change it.
The form is in five sections; these are the fields that shape your calendar and your online booking page.
Basic Details
- Name — what you and your clients see.
- Category (optional) — groups types in dropdowns. Useful once you have more than a handful.
- Description — shown to clients on your online booking page.
Scheduling & Pricing
- Duration — how long the calendar blocks out.
- Default Consultation Template — which clinical fields appear when you start a consultation from this type.
- Price, an optional Concession Price, and an optional Item Code for health-fund claims.
- Set hands-on time matters only if you run more than one room — see the Multi-Room Availability tutorial.
Calendar & Options
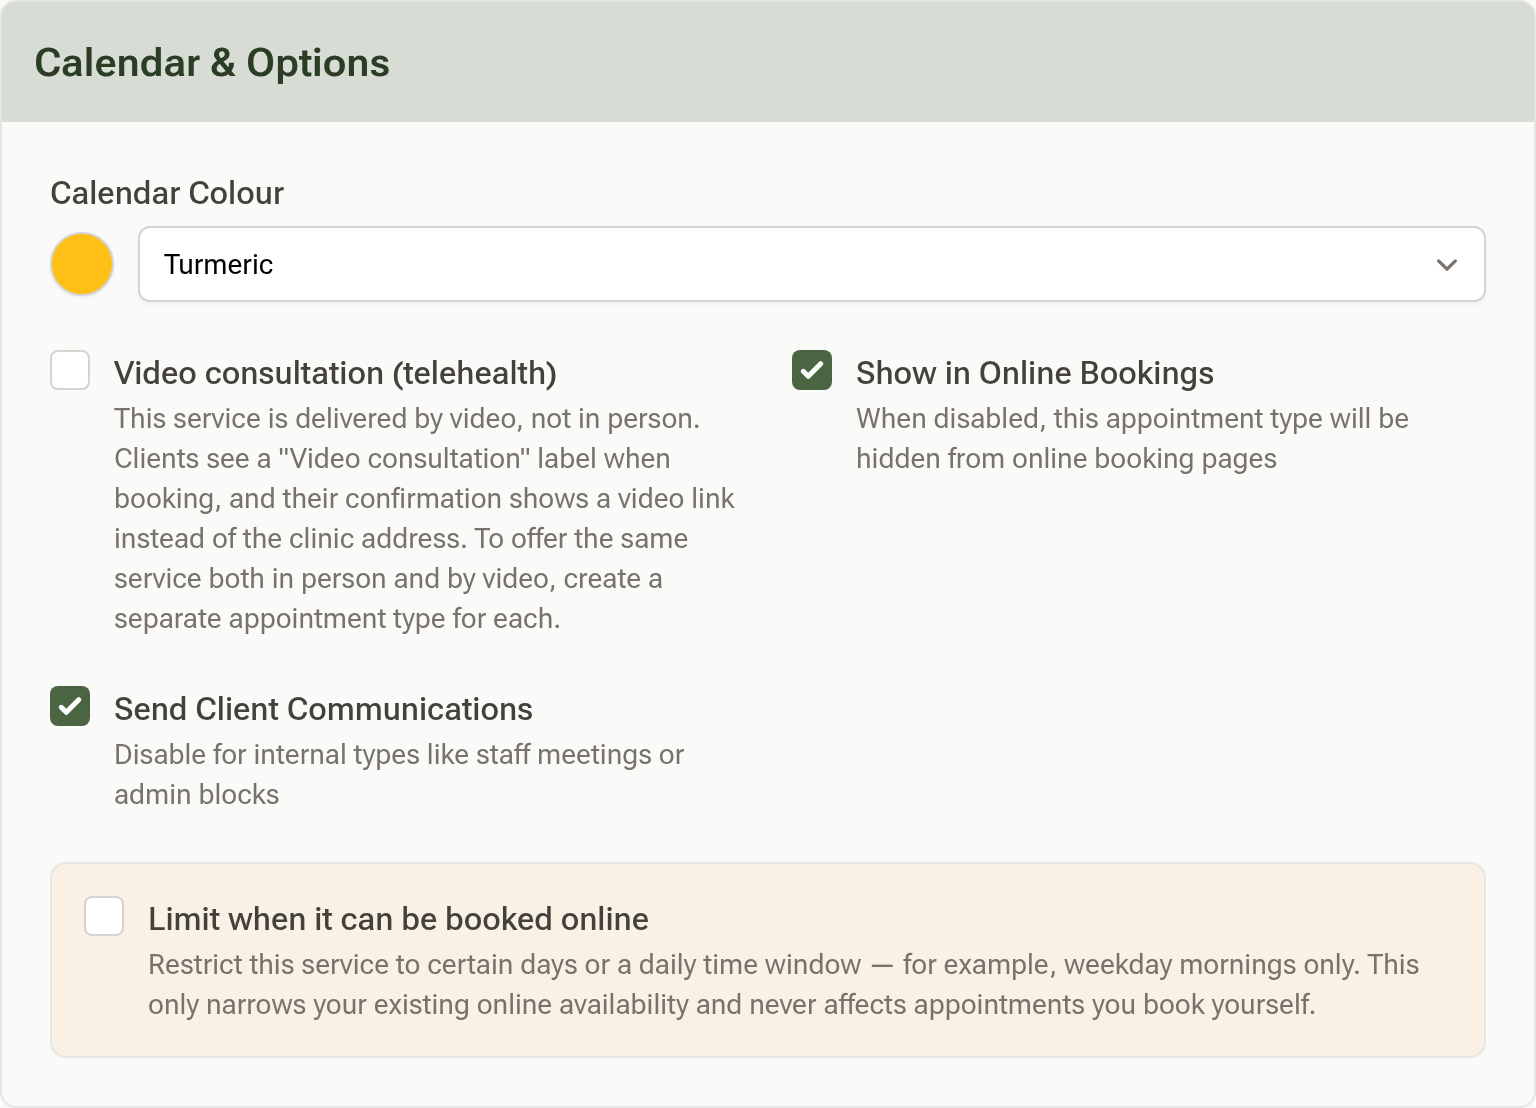
- Calendar Colour — pick from the palette. Every booking of this type takes the colour on your calendar, so give your main types colours you can tell apart at a glance. Change it later and existing bookings change with it.
- Show in Online Bookings — untick to keep a type off your booking page while still booking it yourself from the calendar. The usual case is a type you offer only in person, or one that needs a conversation first.
- Send Client Communications — untick for internal types like a staff meeting or an admin block, so nobody gets a reminder for it.
- Limit when it can be booked online — narrows this type's online booking to certain days or a time window (weekday mornings only, say). It never affects bookings you make yourself.
Practitioners — in a team practice, tick Provides for each practitioner who offers the type. Untick Online next to a practitioner to keep the type manual-only for them: you can still book it into their column, but it won't appear on their online booking page.
Click Create (or Update).
Retiring a type. There's no archive for appointment types, and deleting one can't be undone — although past bookings keep their name and colour. The gentler option is to untick Show in Online Bookings and leave it in place.
Step 5: Optional Extras — Add-ons
An add-on is something a client can have on top of an appointment — cupping, moxibustion, laser, ear seeds — with its own price and, if you want, its own extra minutes. Rather than making a separate appointment type for every combination, you set the add-on up once and it can be ticked onto any booking.
Go to Settings → Practice Info → Appointment Add-ons (there's also an Add-ons link at the top of the Appointment Types page) and click New Add-on.
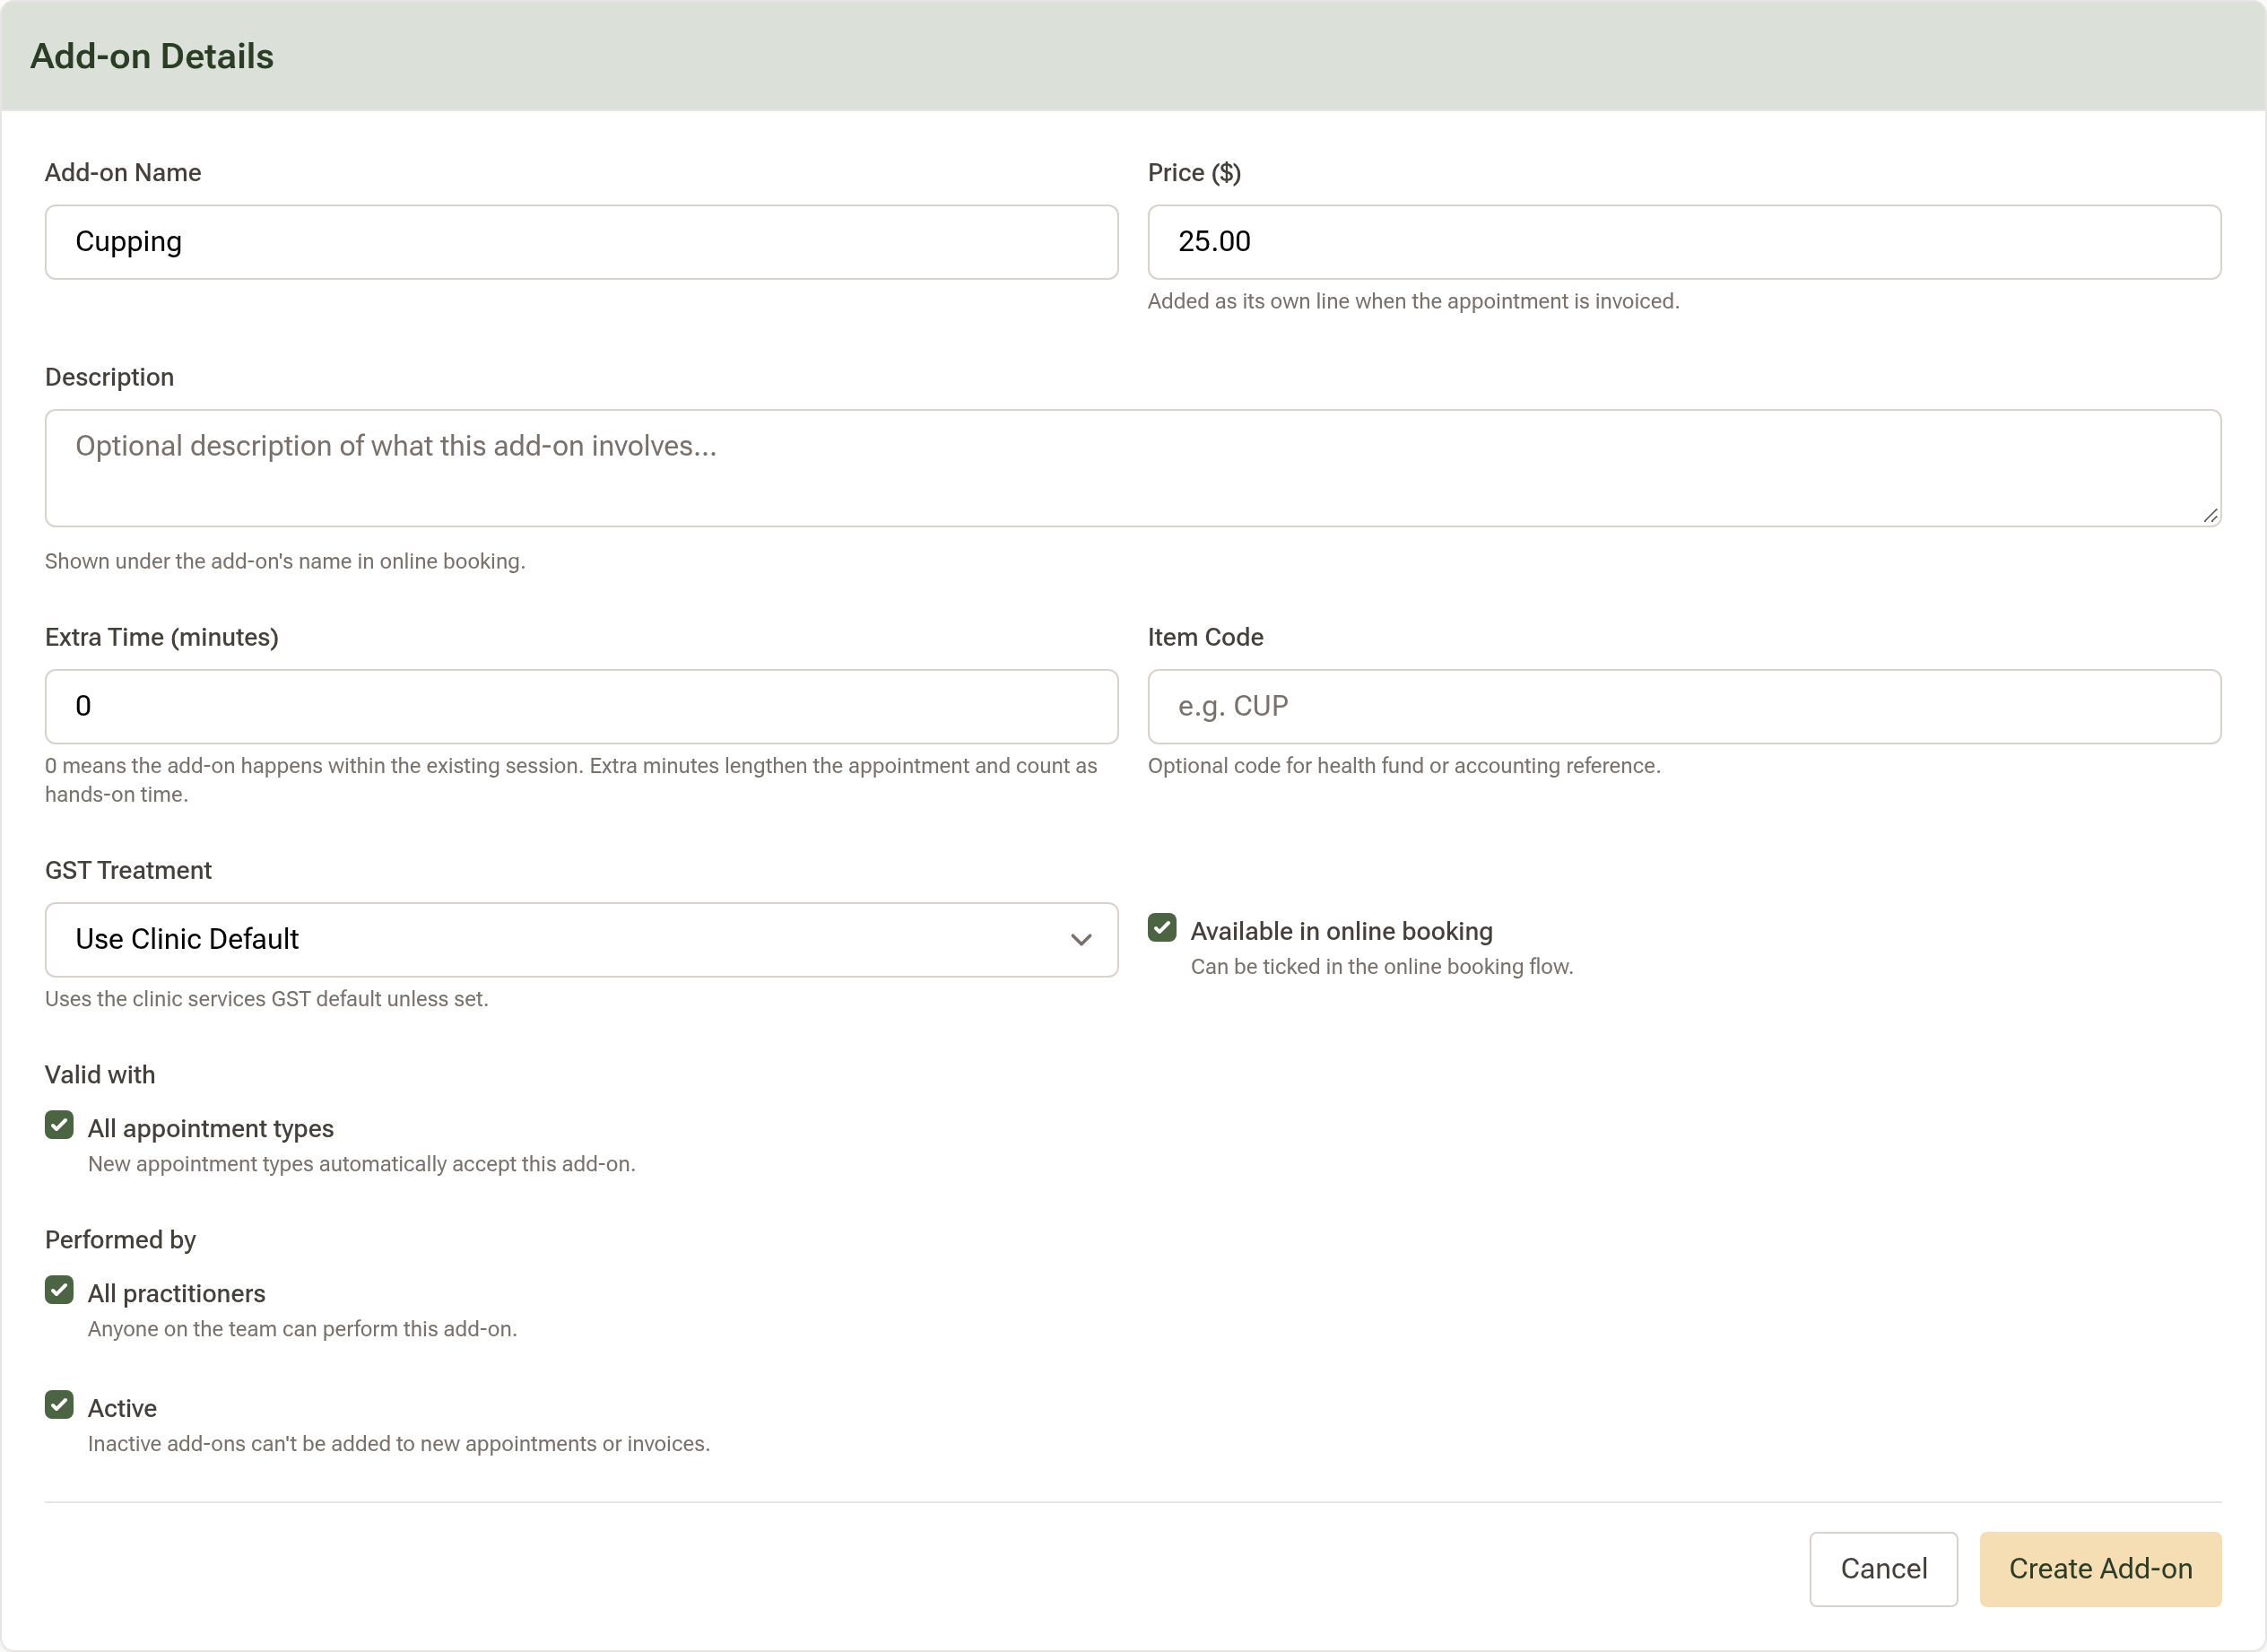
- Add-on Name and Price ($) — the price becomes its own line on the invoice.
- Extra Time (minutes) — 0 means it happens within the appointment. Enter minutes only if it makes the visit longer; those minutes lengthen the booking.
- GST Treatment — leave on Use Clinic Default unless this add-on is treated differently.
- Available in online booking — untick to keep it in-clinic only.
- Valid with — All appointment types, or untick to choose which types can carry it.
- Performed by — All practitioners, or untick to choose who offers it.
Click Create Add-on.
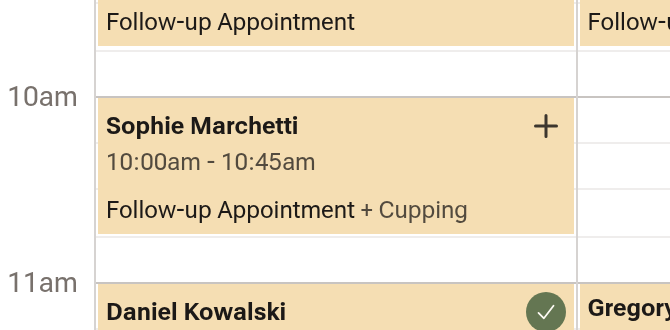
From then on the booking window shows an Add-ons list under the appointment type, and your online booking page offers the same list as Optional extras. A booking with an add-on reads Follow-up Appointment + Cupping on the calendar, and when it's invoiced the add-on appears as its own line at the price it had when booked.
Step 6: Rooms
If you're ever with one client while another rests in the next room, Daobook can book that way. The switch is the Rooms number on each day in Working Hours: set it to 2 and online booking can place two clients at once on that day, staggered by the hands-on time you set on the appointment type.
For a one-off day with more rooms — a Saturday where you have a second room borrowed — use Rooms (optional) on the Extra Availability block instead, and your weekly pattern stays as it is.
Two things to know:
- Online booking never offers more clients than you have rooms. Once every room is taken for a time, that time isn't offered.
- Booking by hand is never blocked. Your own calendar lets you put two clients at the same time even on a one-room day, on the assumption that you know what you're doing.
How to set hands-on time, what the room lanes look like on the calendar, and how to take one room out for a day are all in the Multi-Room Availability tutorial.
Step 7: Reading the Calendar
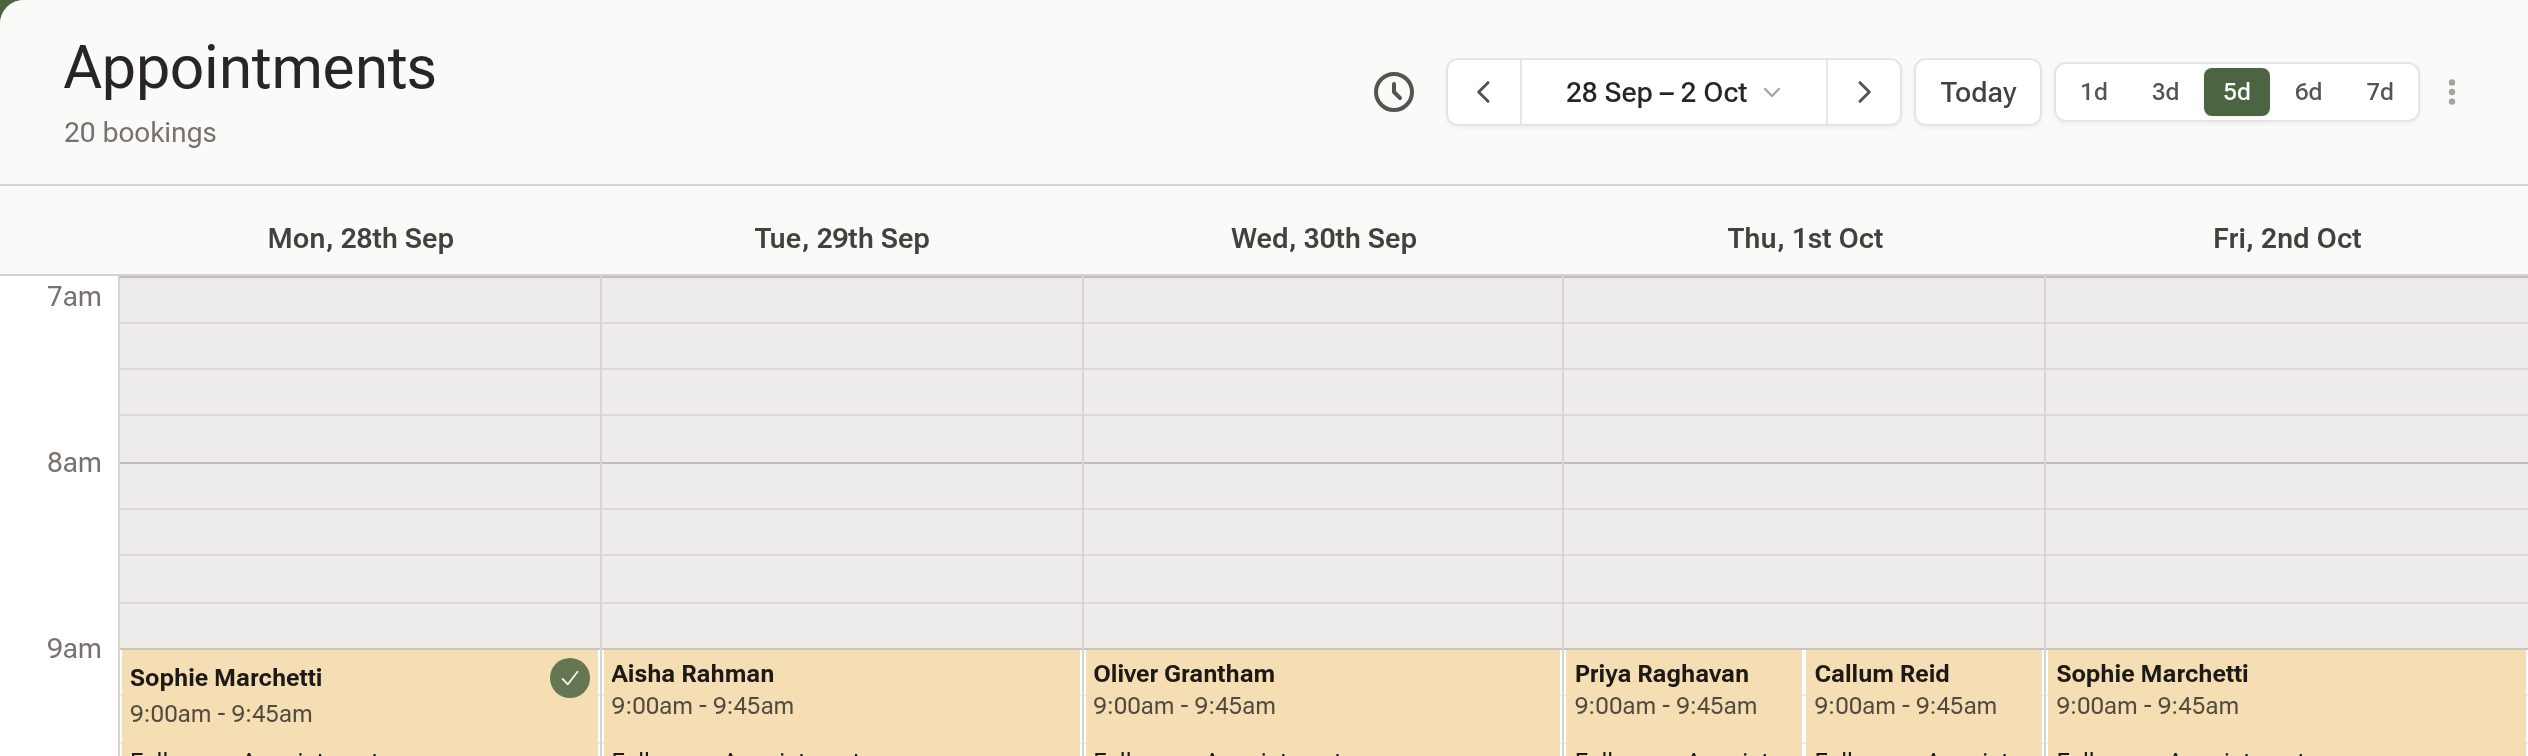
How many days you see. The 1d / 3d / 5d / 6d / 7d buttons above the calendar set the view. The 5, 6 and 7-day views always start on Monday and the arrows move a week at a time; 1d and 3d start on the day you pick and step by that many days. Today brings you back. The calendar remembers your last choice.
Which practitioners you see. In a team practice a practitioner picker sits under the title — chips for a small team, a dropdown with tick boxes for a larger one, with Select all, Just me and Clear. Tick the people you want side by side; each gets a column. Your selection is remembered until you change it.
Which location. With more than one location, the calendar's title becomes a dropdown — pick the location whose calendar you want.
Changing how it's drawn. Go to Settings → Practice Info → Calendar Display. These are your own preferences and don't change what anyone else sees.
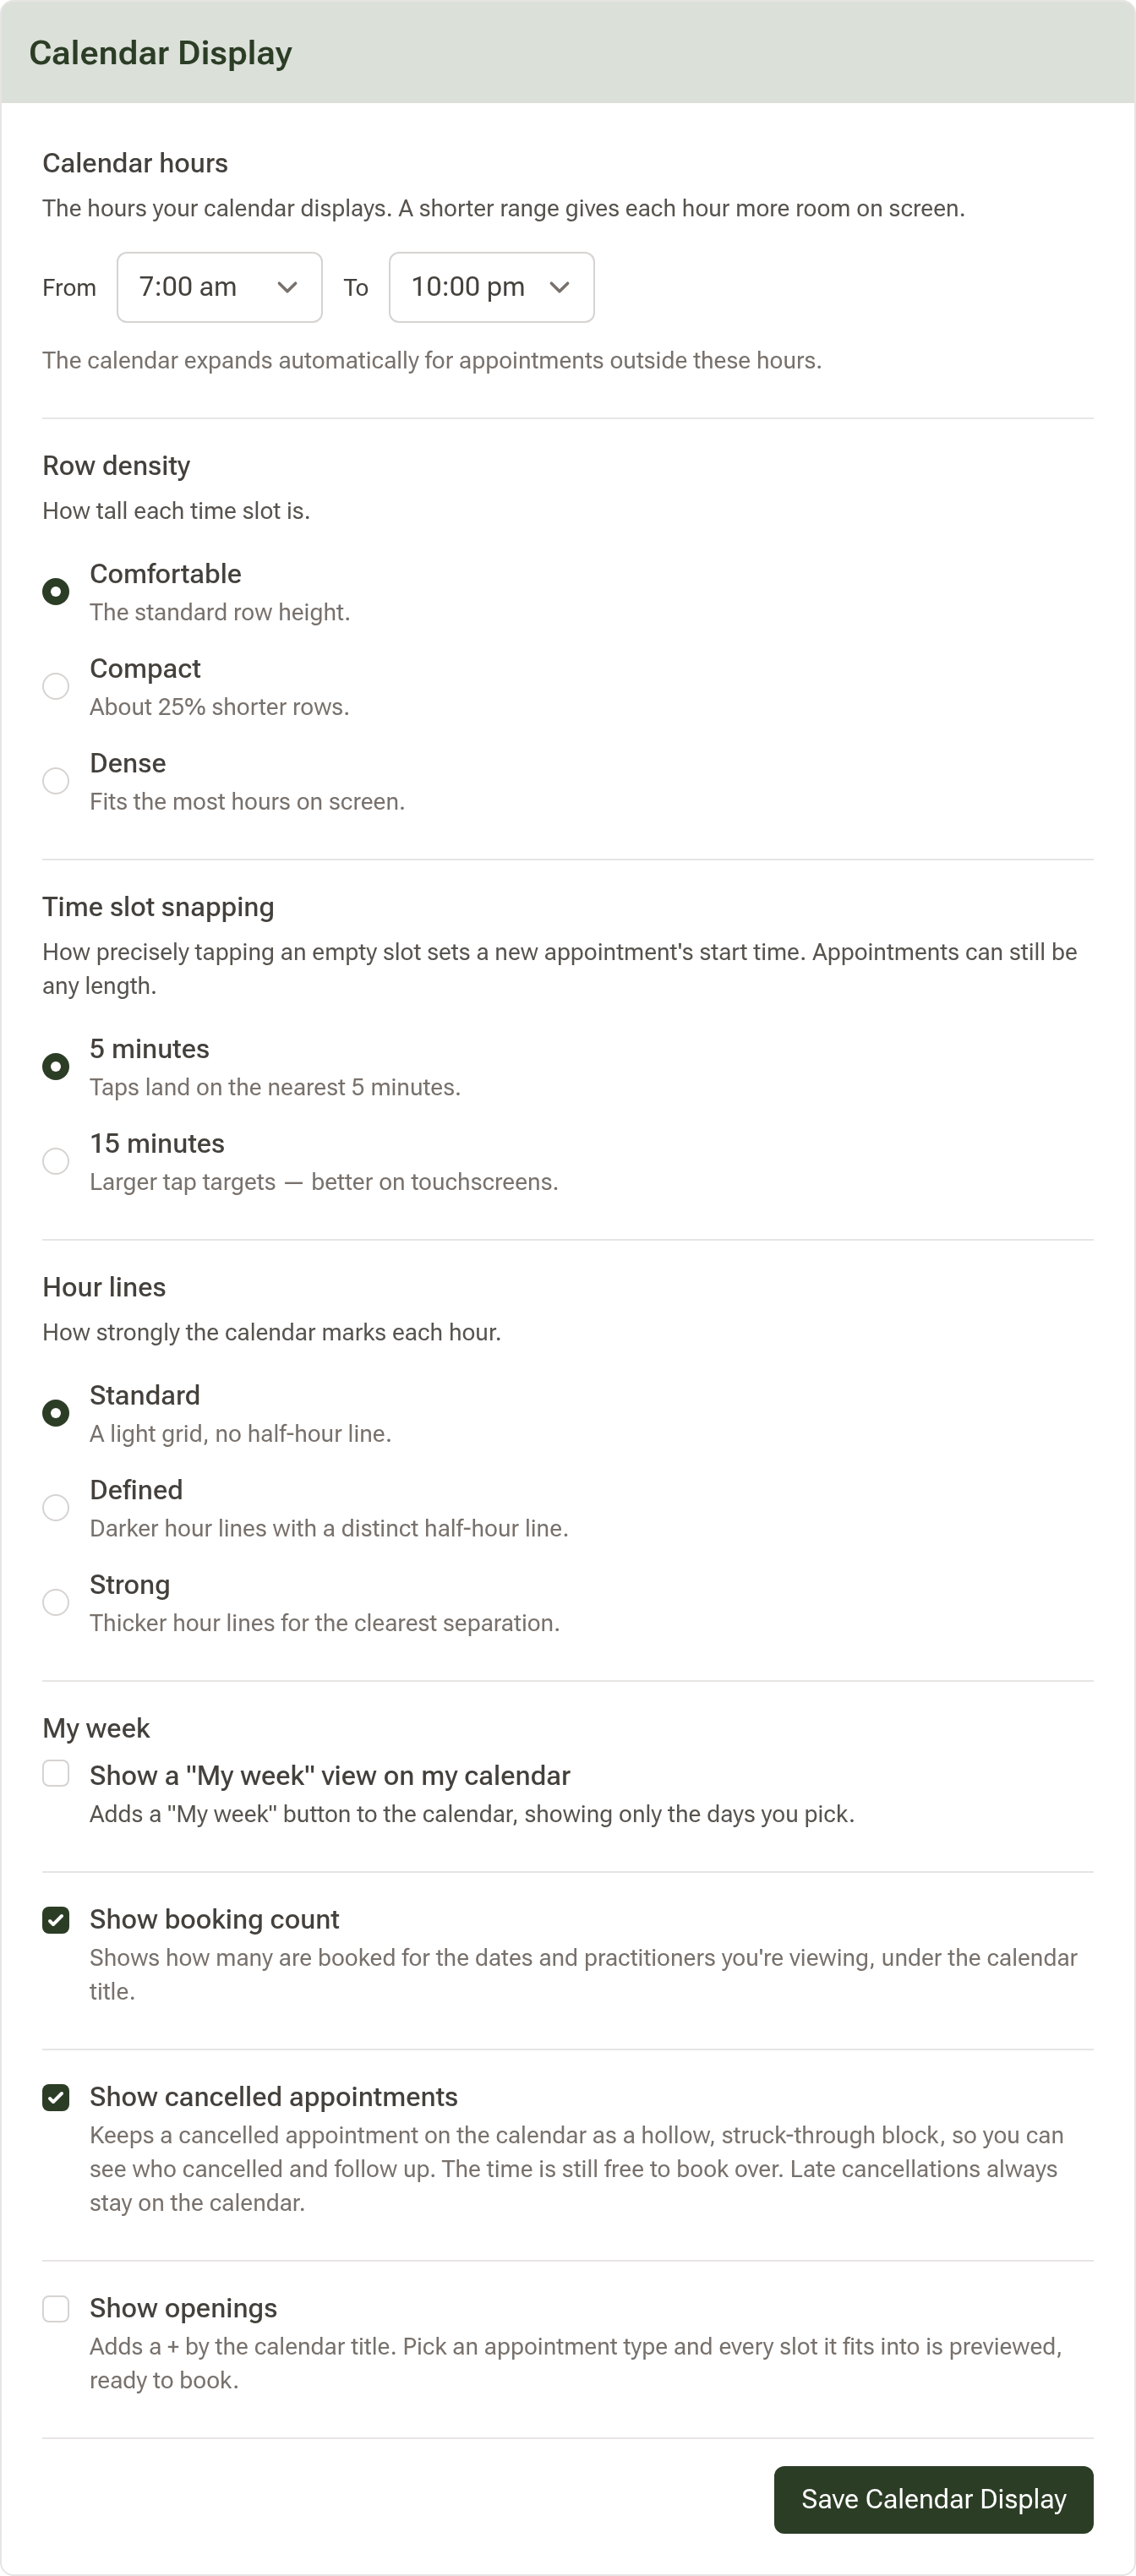
- Calendar hours — the range the calendar shows. A shorter range gives each hour more room; the calendar still expands for anything booked outside it.
- Row density — Comfortable, Compact or Dense. Dense with a tight hour range is how to get a whole day on one screen.
- Time slot snapping — whether a tap on an empty slot lands on the nearest 5 or 15 minutes. 15 is easier on a touchscreen.
- Hour lines — how strongly each hour is ruled.
- My week — adds a My week button showing only the days you tick. Handy if you work Tuesday to Saturday.
- Show booking count — a line under the calendar title with how many bookings are in view, for the dates and practitioners you're looking at. Cancellations and no-shows aren't counted. To count only certain types — clinical appointments and not admin blocks, say — set the type filter on the Hub's Bookings card; the calendar's count follows it and shows · filtered.
- Show cancelled appointments — keeps a cancelled booking on the calendar, struck through, so you can see who cancelled and follow them up. The time is free to book over.
- Show openings — adds a + by the title that previews every slot a chosen type fits.
On a phone the calendar shows fewer days than a desktop can. Turn the phone sideways, use My week, or work in the 1d view.
Step 8: Being Told When a Colleague Books Into Your Column
When a receptionist or a colleague books a client into your diary, you get a notification in the bell at the top of the page — but not an email, unless you turn it on. Go to Settings → Communications → My Notifications and tick Team booking email (and Team booking SMS if you'd like a text as well). Click Save.
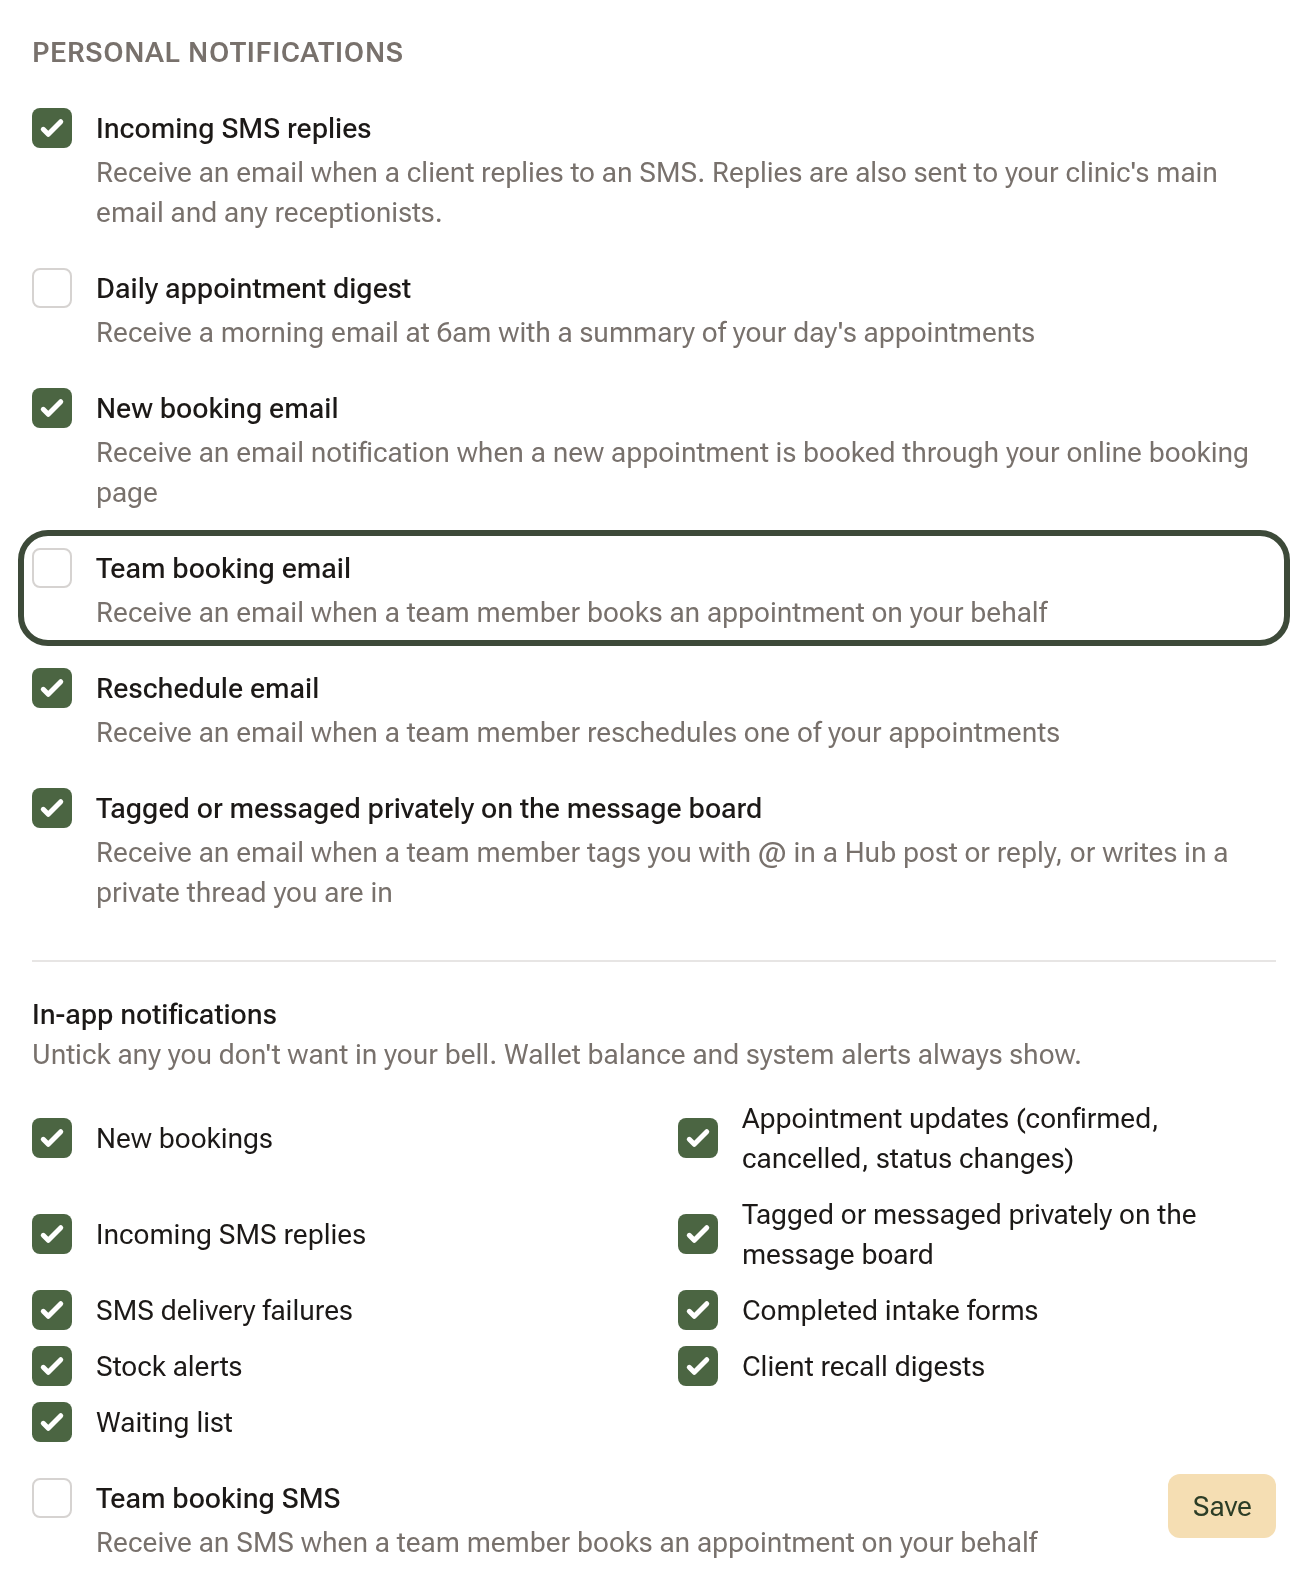
The email goes to your clinic's main email address and to you. Bookings clients make themselves through your online booking page are a separate setting on the same page, New booking email, which is on from the start; so is Reschedule email, for a colleague moving one of your appointments.
Tips
- Hours are per location, and types are per location too. Setting up a second location means setting both again there — there's an Import from another location button on Appointment Types to copy them across.
- Extra availability adds time and never removes it. To close time, use an unavailable block or a break.
- Wrong client on a booking? Open the booking, click Edit, and use Change next to the client's name to pick someone else. Once the booking has an invoice, the client is locked.
- Changing a type's name or colour updates every booking of that type on the calendar, past and future.