
Customising Notification Templates
Learn how to customise the SMS and email notifications your clinic sends for appointment reminders, booking confirmations, and cancellations — including per-appointment-type overrides.
Customising Notification Templates
Daobook sends automated notifications to your clients at key moments — when they book an appointment, as a reminder before their visit, and if an appointment is cancelled. You can customise the content of these messages to match your clinic's voice, and even set different templates for different appointment types.
What You Can Customise
There are five notification templates you can edit:
- Reminder SMS — a short text message sent before the appointment (24 hours, 48 hours, or 7 days, depending on your settings)
- Reminder Email — a formatted email sent at the same intervals
- Confirmation SMS — sent when an appointment is booked
- Confirmation Email — sent when an appointment is booked
- Cancellation Email — sent when an appointment is cancelled
Each template supports variables — placeholders that are automatically replaced with real appointment details when the message is sent.
Managing Clinic-Wide Templates
Clinic-wide templates are the defaults used for all appointment types unless a specific override is set.
Step 1: Navigate to Communications Settings
Click Settings in the main navigation, then select the Communications tab. In the left sidebar, click Client Communications (or Patient Communications, depending on your terminology setting).
Step 2: Configure Notification Channels
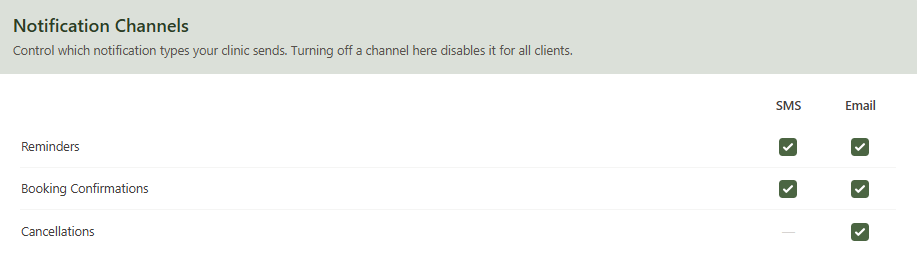
At the top of the page, you'll see the Notification Channels grid. This controls which notification types your clinic sends globally. Each row has checkboxes for SMS and Email:
- Reminders — SMS and Email
- Booking Confirmations — SMS and Email
- Cancellations — Email only
If you uncheck a channel here, that notification type is turned off for all clients, regardless of their individual preferences. For example, unchecking "Confirmation SMS" means no client will receive a booking confirmation text.
Step 3: Edit a Template
Scroll down to find the template you want to edit. Templates are organised into three sections: Reminder Templates, Confirmation Templates, and Cancellation Templates.
SMS templates use a plain text editor — type your message directly. Keep SMS messages under 160 characters to avoid extra charges.
Email templates use a rich text editor with a formatting toolbar. You can add bold text, italics, links, and bullet lists to create professional-looking emails.
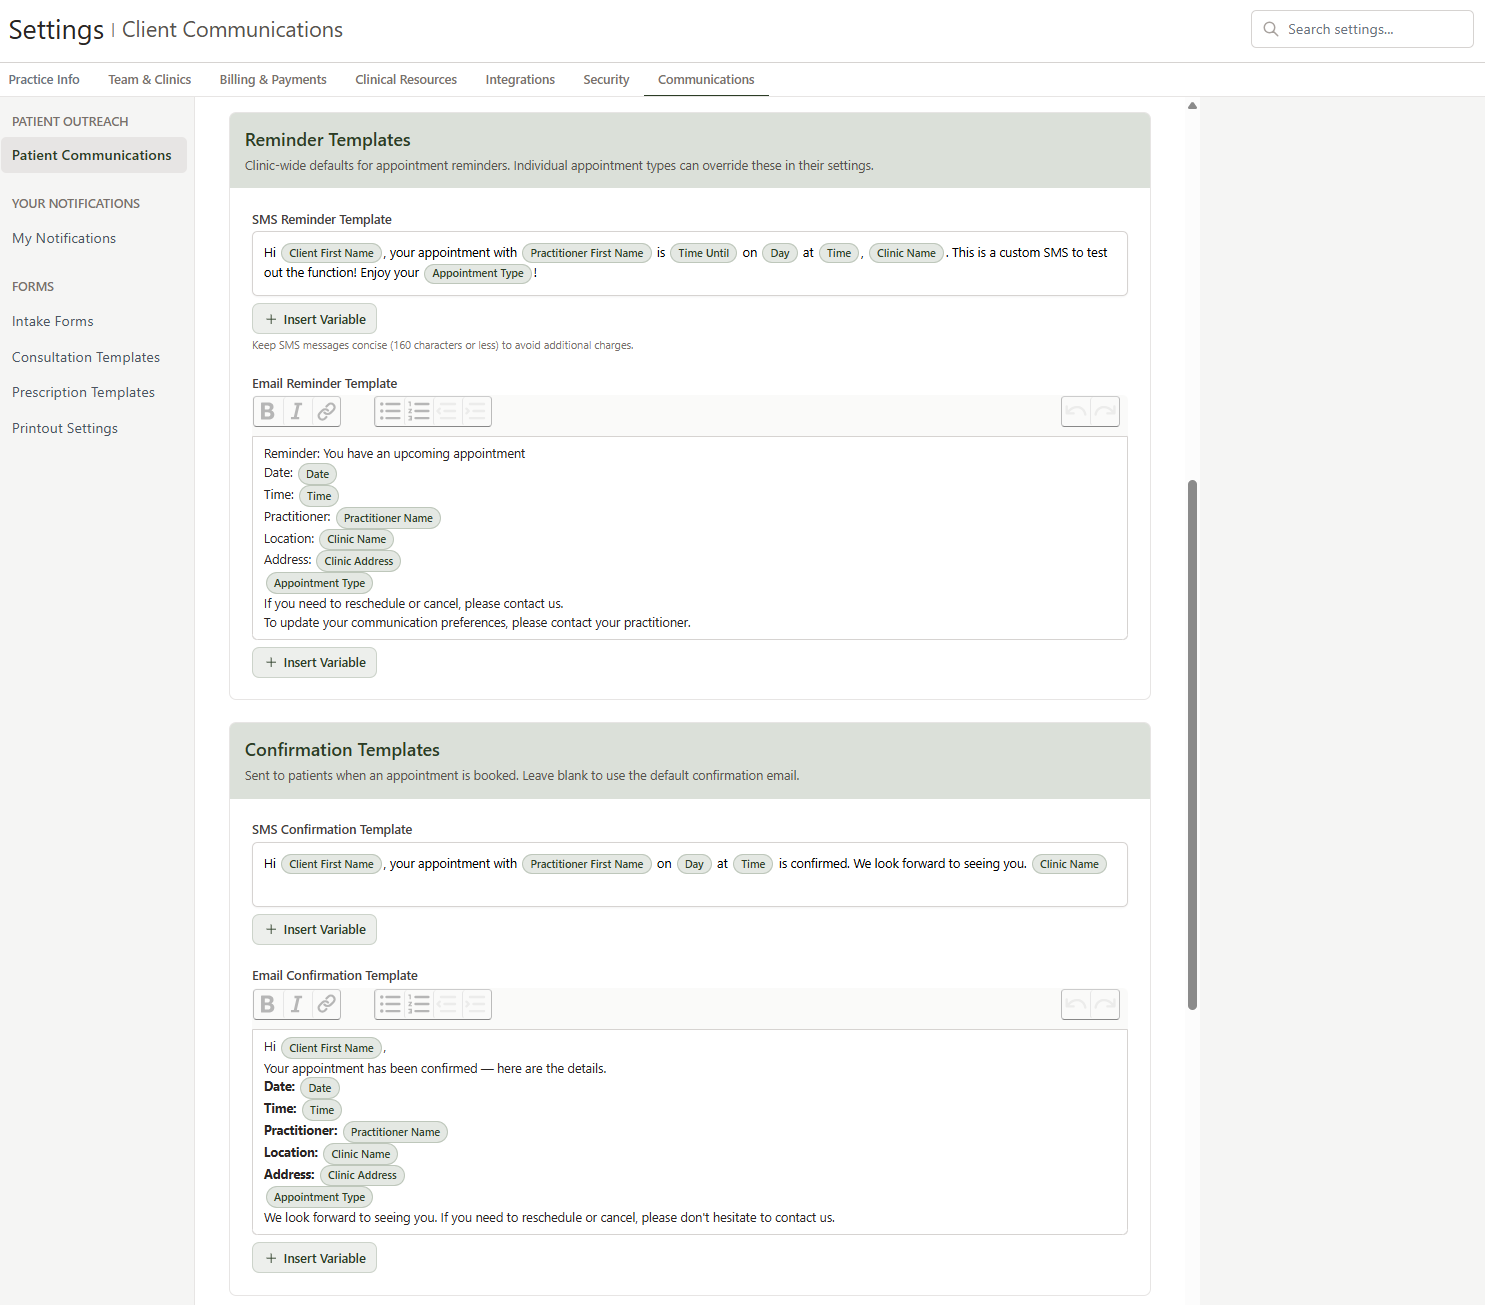
Step 4: Insert Variables
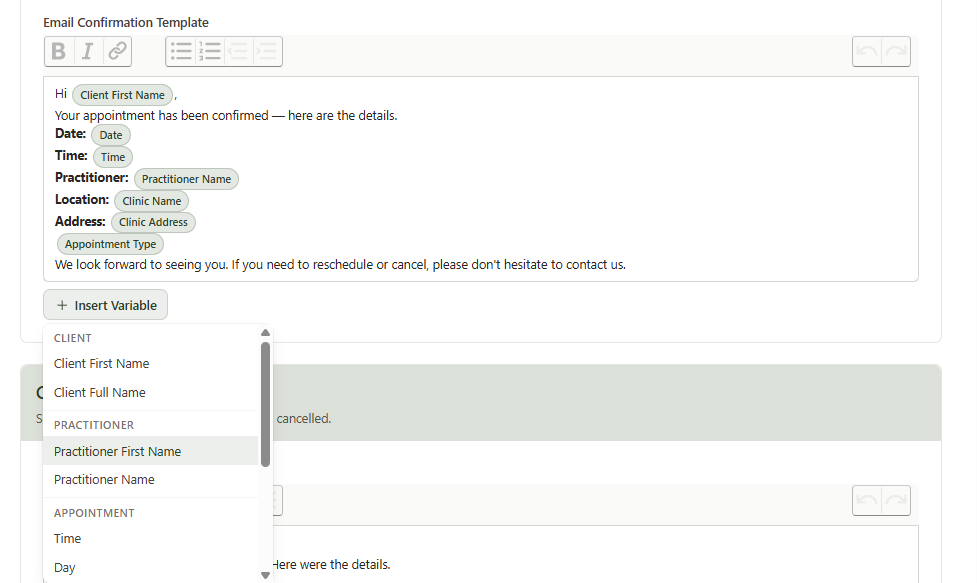
Variables are placeholders that get replaced with real data when the message is sent. Click the Insert Variable button below any template editor to see the available options, grouped by category:
| Category | Variables |
|---|---|
| Client | Client First Name, Client Full Name |
| Practitioner | Practitioner First Name, Practitioner Name |
| Appointment | Time, Day, Date, Time Until, Appointment Type |
| Clinic | Clinic Name, Clinic Address, Clinic Phone, Clinic Email |
Click any variable to insert it at your cursor position. In the email editor, variables appear as green chips. In the SMS editor, they appear as styled badges.
For example, Time Until inserts a natural phrase like "tomorrow" or "in 3 days", which works well in reminder messages.
Step 5: Save Your Changes
Click Save Changes at the bottom of the page. Your updated templates will be used for all future notifications.
Previewing and Testing Templates
Before going live with a new template, you can preview how it looks with sample data and send yourself a test message.
Step 1: Scroll to Preview & Test
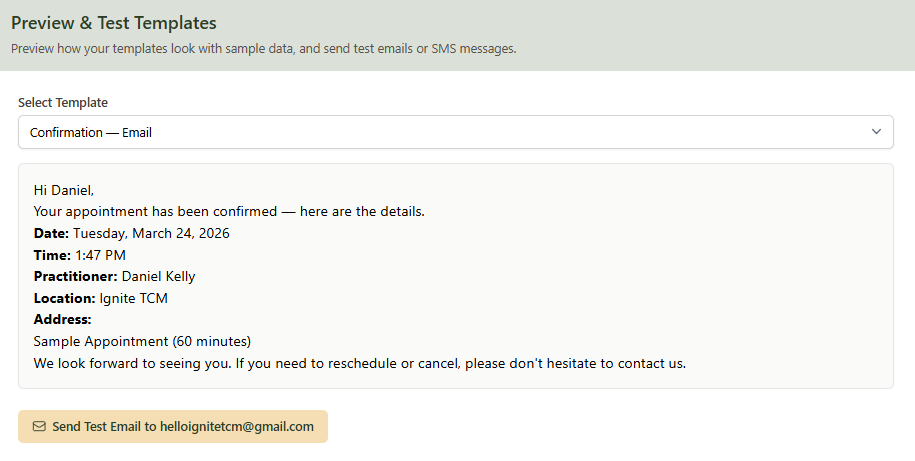
At the bottom of the Communications page, you'll find the Preview & Test Templates section.
Step 2: Select a Template
Use the Select Template dropdown to choose which template to preview. The dropdown is grouped into:
- Clinic Defaults — your clinic-wide templates
- Appointment Type Overrides — any custom templates set on specific appointment types (these only appear if you've created overrides)
Step 3: Preview
After selecting a template, a preview appears showing the message with sample data filled in. This gives you a clear picture of what your clients will receive.
Step 4: Send a Test
- For email templates: Click Send Test Email to send the template to your own email address. The test email includes a banner indicating it's a test.
- For SMS templates: Enter a mobile number and click Send Test SMS to send the message to that number.
Setting Up Appointment-Type Overrides
If you want a specific appointment type to use different notification wording, you can set an override. For example, you might want your "Initial Consultation" reminders to mention bringing health history forms, while "Follow-up" appointments use the standard clinic template.
Step 1: Navigate to Appointment Types
Go to Settings > Practice Info tab > Appointment Types. Click the edit icon next to the appointment type you want to customise.
Step 2: Scroll to Notification Templates
On the appointment type edit form, scroll down to the Notification Templates section. You'll see three subsections: Reminders, Confirmations, and Cancellations, each with email and SMS editors (where applicable).
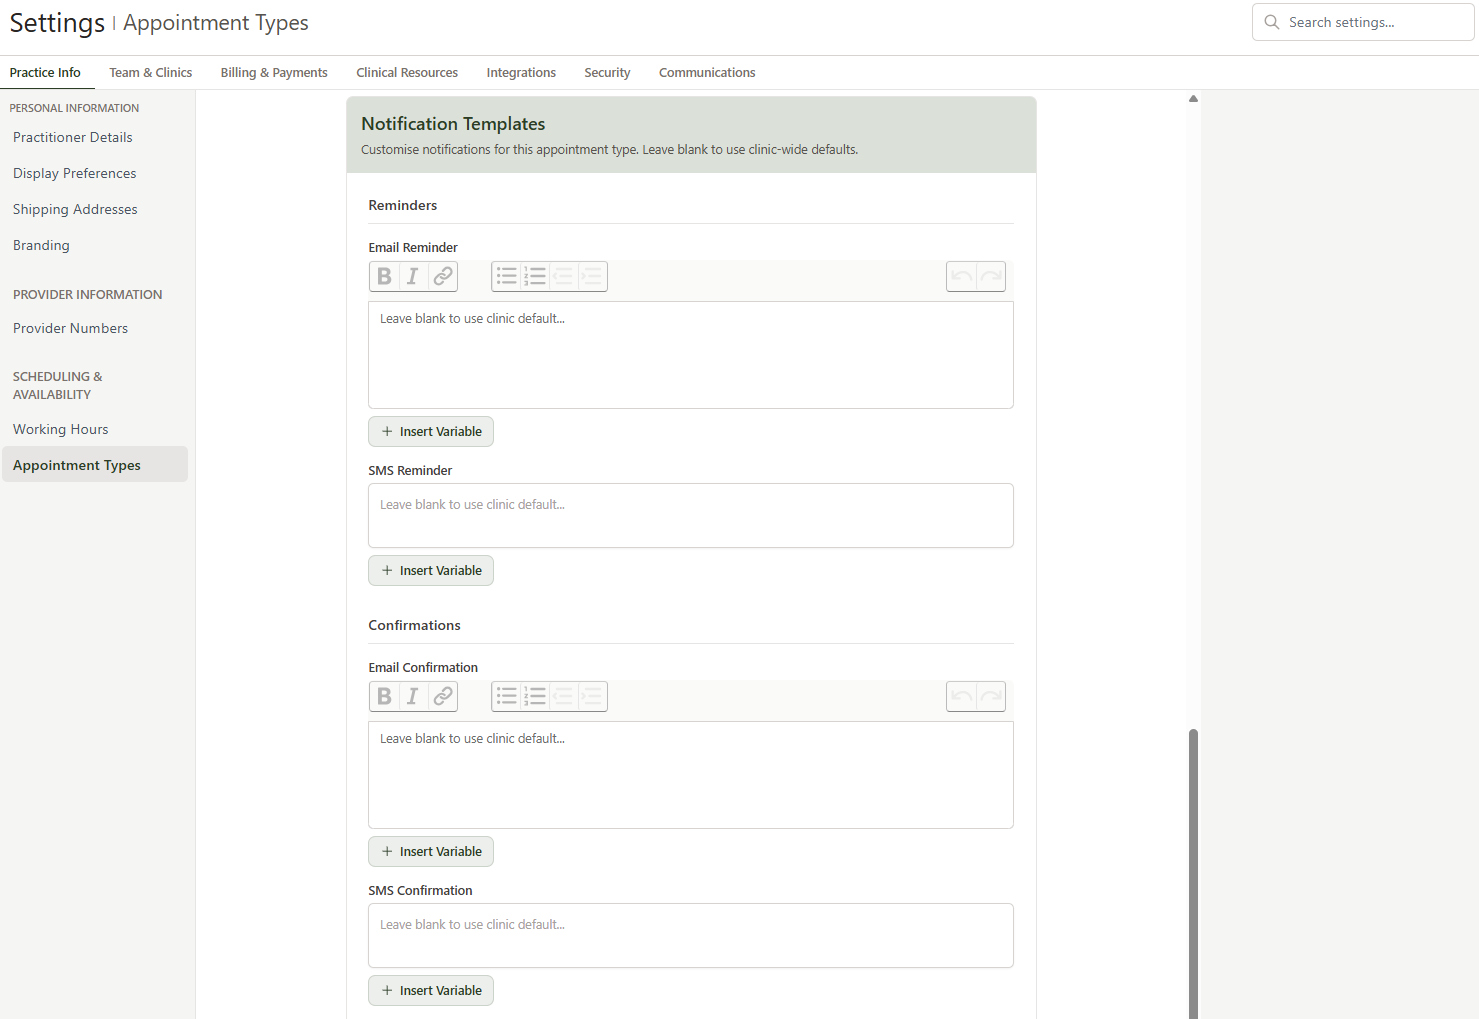
Step 3: Add Your Custom Template
Type your custom message in the relevant editor. The editors work the same way as the clinic-wide ones — use the Insert Variable button to add placeholders, and the rich text toolbar for email formatting.
Any editor left blank will fall back to the clinic-wide default. You only need to fill in the ones you want to override.
Step 4: Save
Click Update at the bottom of the form. The custom template will now be used whenever this appointment type triggers that notification.
How the Fallback Chain Works
When Daobook sends a notification, it checks for templates in this order:
- Appointment type override — if the specific appointment type has a custom template set, it uses that
- Clinic-wide default — if no override exists, it uses your clinic's default template
- Built-in default — if neither is set, Daobook uses a standard built-in template
This means you can set your clinic defaults once and only create overrides for appointment types that need something different.
Tips:
- Use the Preview & Test section to verify your templates before relying on them for real appointments
- Keep SMS messages concise — under 160 characters avoids extra charges
- The Time Until variable (e.g. "tomorrow", "in 3 days") is particularly useful in reminder messages as it gives clients a natural sense of urgency