
Recording Expenses
Record supplier bills, clinic costs, and inventory restocks in one place. Learn the difference between Costs, Stock items, and Overheads, how freight folds into your landed cost prices, and how to handle GST — with worked examples.
Recording Expenses
The Expenses area is where you record money going out of your practice — supplier bills, clinic rent, utilities, equipment, professional fees, and herb or product restocks. Each expense works like a bill: it can hold a single line or many, and getting each line's type right keeps your reports tidy and your inventory cost prices accurate.
The Three Line Types
This is the one idea worth understanding before you start. Every line on an expense is one of three types — Cost, Stock item, or Overhead — and each behaves differently.
Costs — the everyday case
Money you spent that doesn't add to your tracked inventory: clinic rent, electricity, insurance, acupuncture needles, cotton wool, equipment, software subscriptions, professional fees. Every Cost line has a Category (such as Rent & Utilities or Equipment & Software) so it lands in the right place on your reports. A new expense opens with a single Cost line ready to fill in, so a simple bill takes seconds.
Stock items — restocking inventory
Herbs, formula batches, or products you're buying back into stock. Adding a stock line increases your inventory on hand and can update the item's saved cost price, so your margins and cost of goods sold stay accurate. Use this for "200g of Bai Zhu granules" or "20 boxes of a finished product" — not for consumables you don't track.
Overheads — freight, duty, and the like
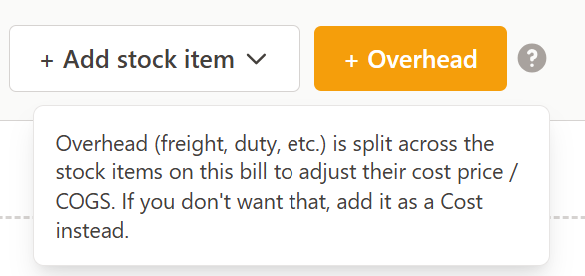
Charges that aren't a product themselves but add to the true cost of the stock you bought: freight, shipping, customs duty, import fees. An overhead is split across the stock items on the same bill, in proportion to their value, and folded into their landed cost price. If you'd rather a charge not be spread into stock cost — say it's a flat service fee — add it as a Cost instead.
In the form, the small ? next to the + Overhead button explains this in one line: "Overhead (freight, duty, etc.) is split across the stock items on this bill to adjust their cost price / COGS. If you don't want that, add it as a Cost instead."
Creating an Expense
Step 1: Open the New Expense form
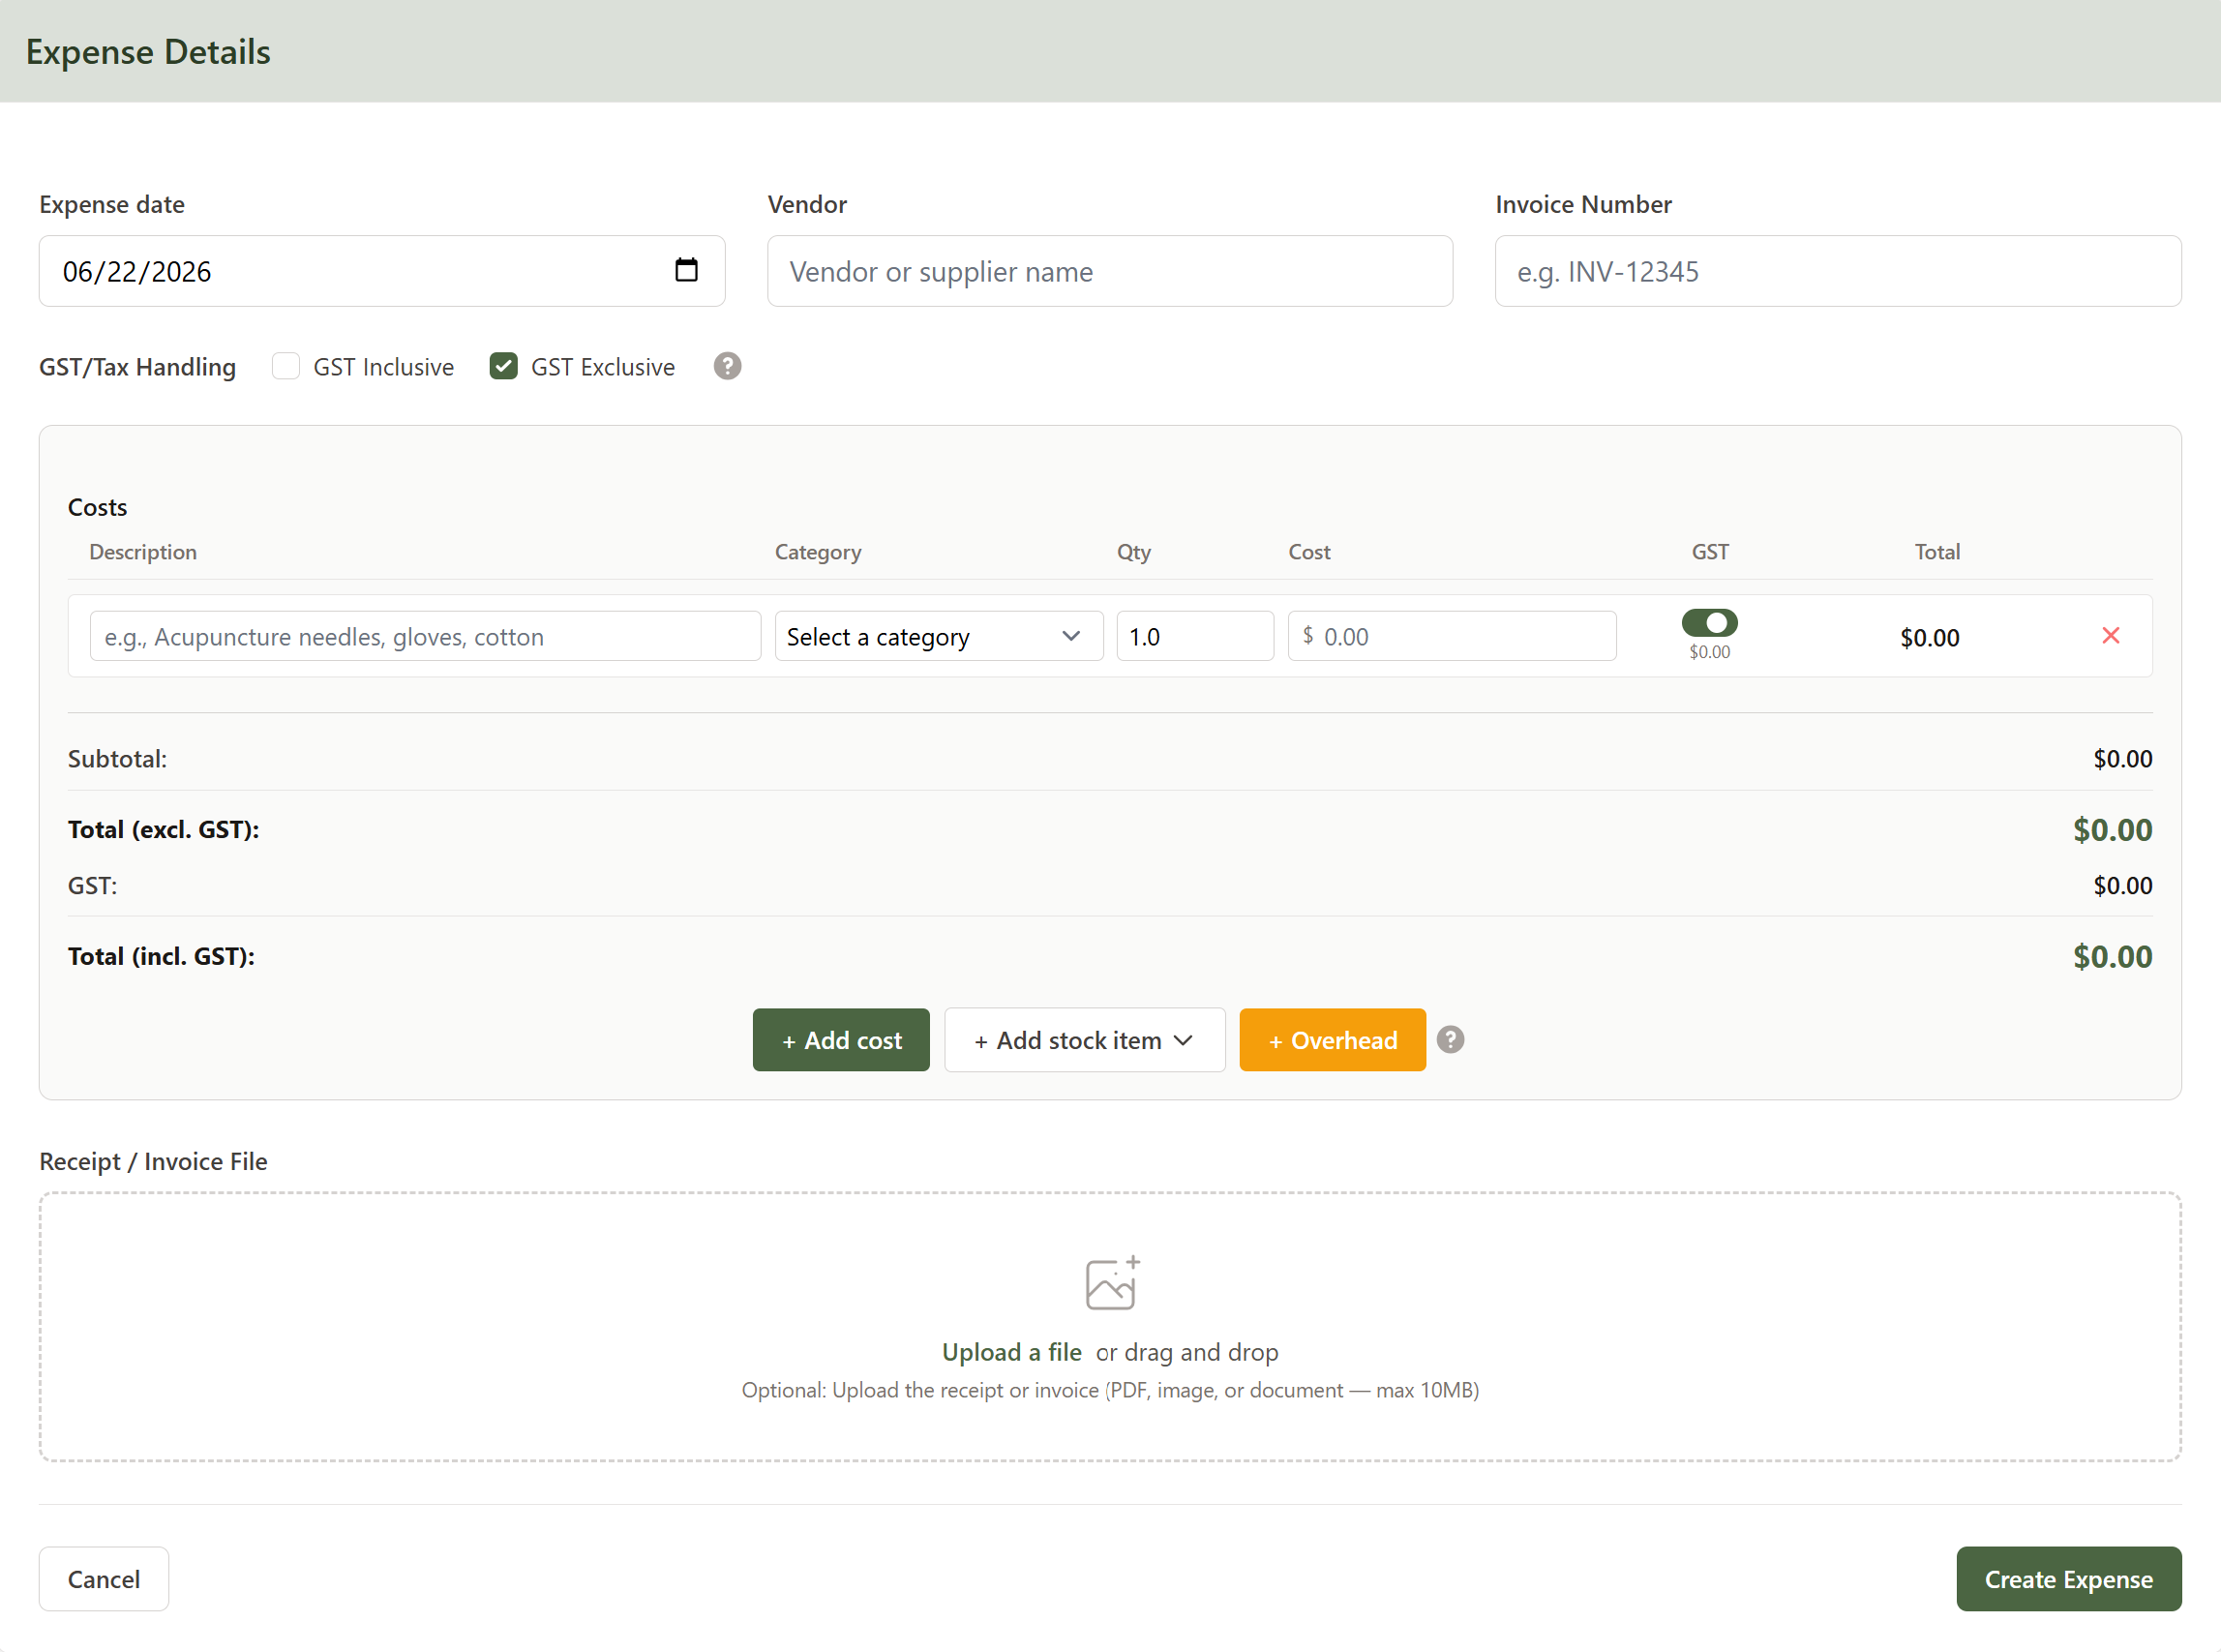
Click Expenses in the left sidebar, then New Expense at the top right.
Step 2: Fill in the bill details
- Expense Date — the date on the supplier's invoice
- Vendor — the supplier's name (e.g. "Sun Herbal", "AcuBest")
- Invoice Number — optional, the supplier's own reference (e.g. INV-12345)
Step 3: Choose how GST is handled
If your clinic is registered for GST, you'll see a GST/Tax Handling row with two options:
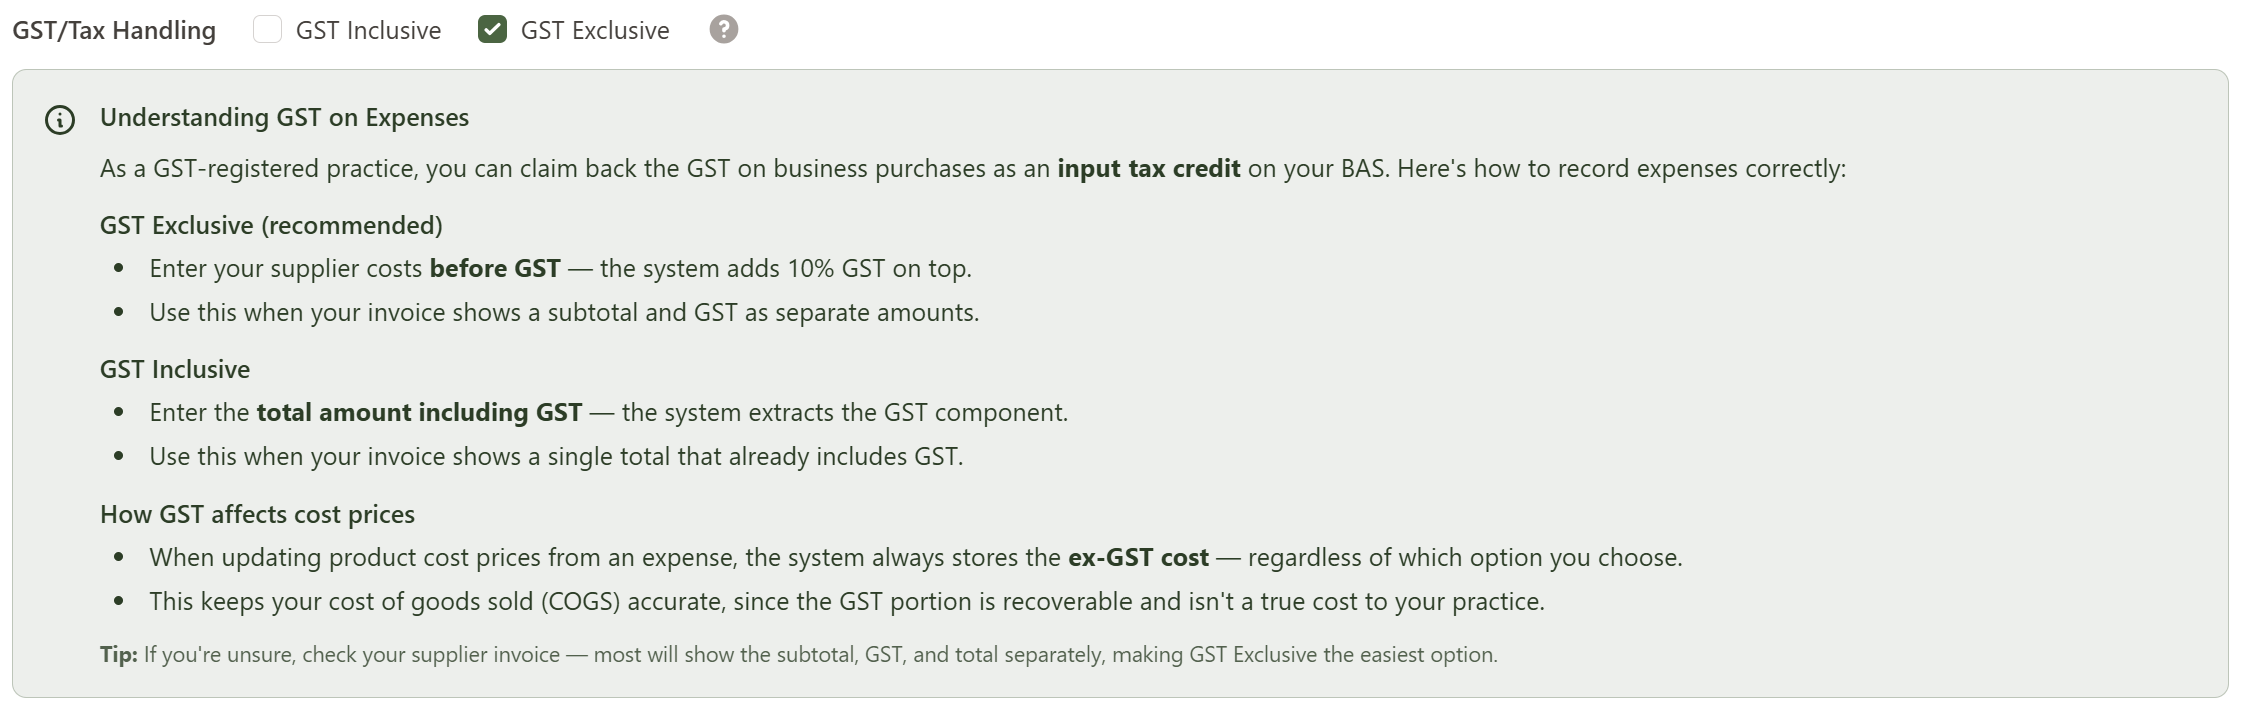
- GST Exclusive (recommended) — the amounts you enter are before GST, and Daobook adds 10% on top.
- GST Inclusive — the amounts already include GST, and Daobook works out the GST portion for you.
Match this to how your supplier's invoice is laid out. Click the ? beside the row for a fuller explanation, including how each choice affects the cost price written back to stock.
Step 4: Add your lines
Use the buttons beneath the lines:
- + Add cost — a consumable, service, rent, or other direct cost. Give it a description, pick a Category, and enter the Qty and Cost. To record a supplier discount, add a Cost line and enter a negative amount (see Scenario 4).
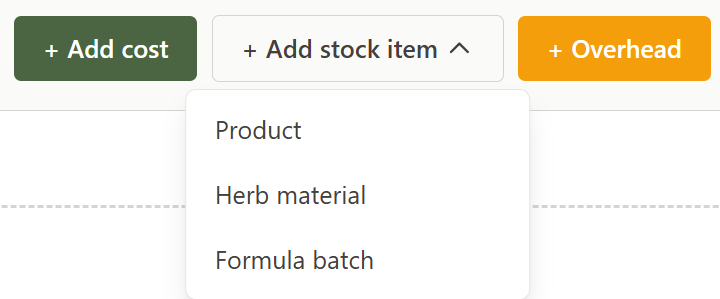
- + Add stock item — opens a small menu to add a Product, Herb material, or Formula batch. A separate Stock items section appears above your costs once you add one.
- + Overhead — freight or duty to spread across the stock items on this bill.
For stock items, herbs and formula batches ask for the Total paid rather than a per-unit price — enter the quantity in grams or millilitres and what the whole lot cost, and Daobook works out the unit cost for you. Products ask for a Qty and a per-unit Cost.
Leave Update cost price to match this purchase ticked (it's on by default) to push this purchase's cost into the item's saved cost price. If freight is spread across the bill, it's the landed cost — your purchase price plus its share of the freight — that's saved.

Step 5: Attach a receipt (optional)
Drag and drop the supplier's receipt or invoice onto the upload area, or click Upload a file. PDFs, images, and documents up to 10MB are accepted.
Step 6: Review the totals and save
The totals box keeps a running tally as you work — Subtotal, any Overhead, Total (excl. GST), GST, and Total (incl. GST). When it looks right, click Create Expense.

Scenario 1: A simple clinic cost
Your electricity bill arrives for $180.
- Click New Expense.
- Set the Date, enter the Vendor (your energy retailer), and the Invoice Number if you have one.
- The form already has one Cost line. Type "Electricity" as the description, choose the Rent & Utilities category, leave Qty at 1, and enter 180 as the Cost.
- Attach the bill if you'd like a copy on file, then click Create Expense.
That's the everyday pattern — rent, insurance, software subscriptions, and professional fees all follow the same single-Cost-line approach.
Scenario 2: Restocking granules with freight
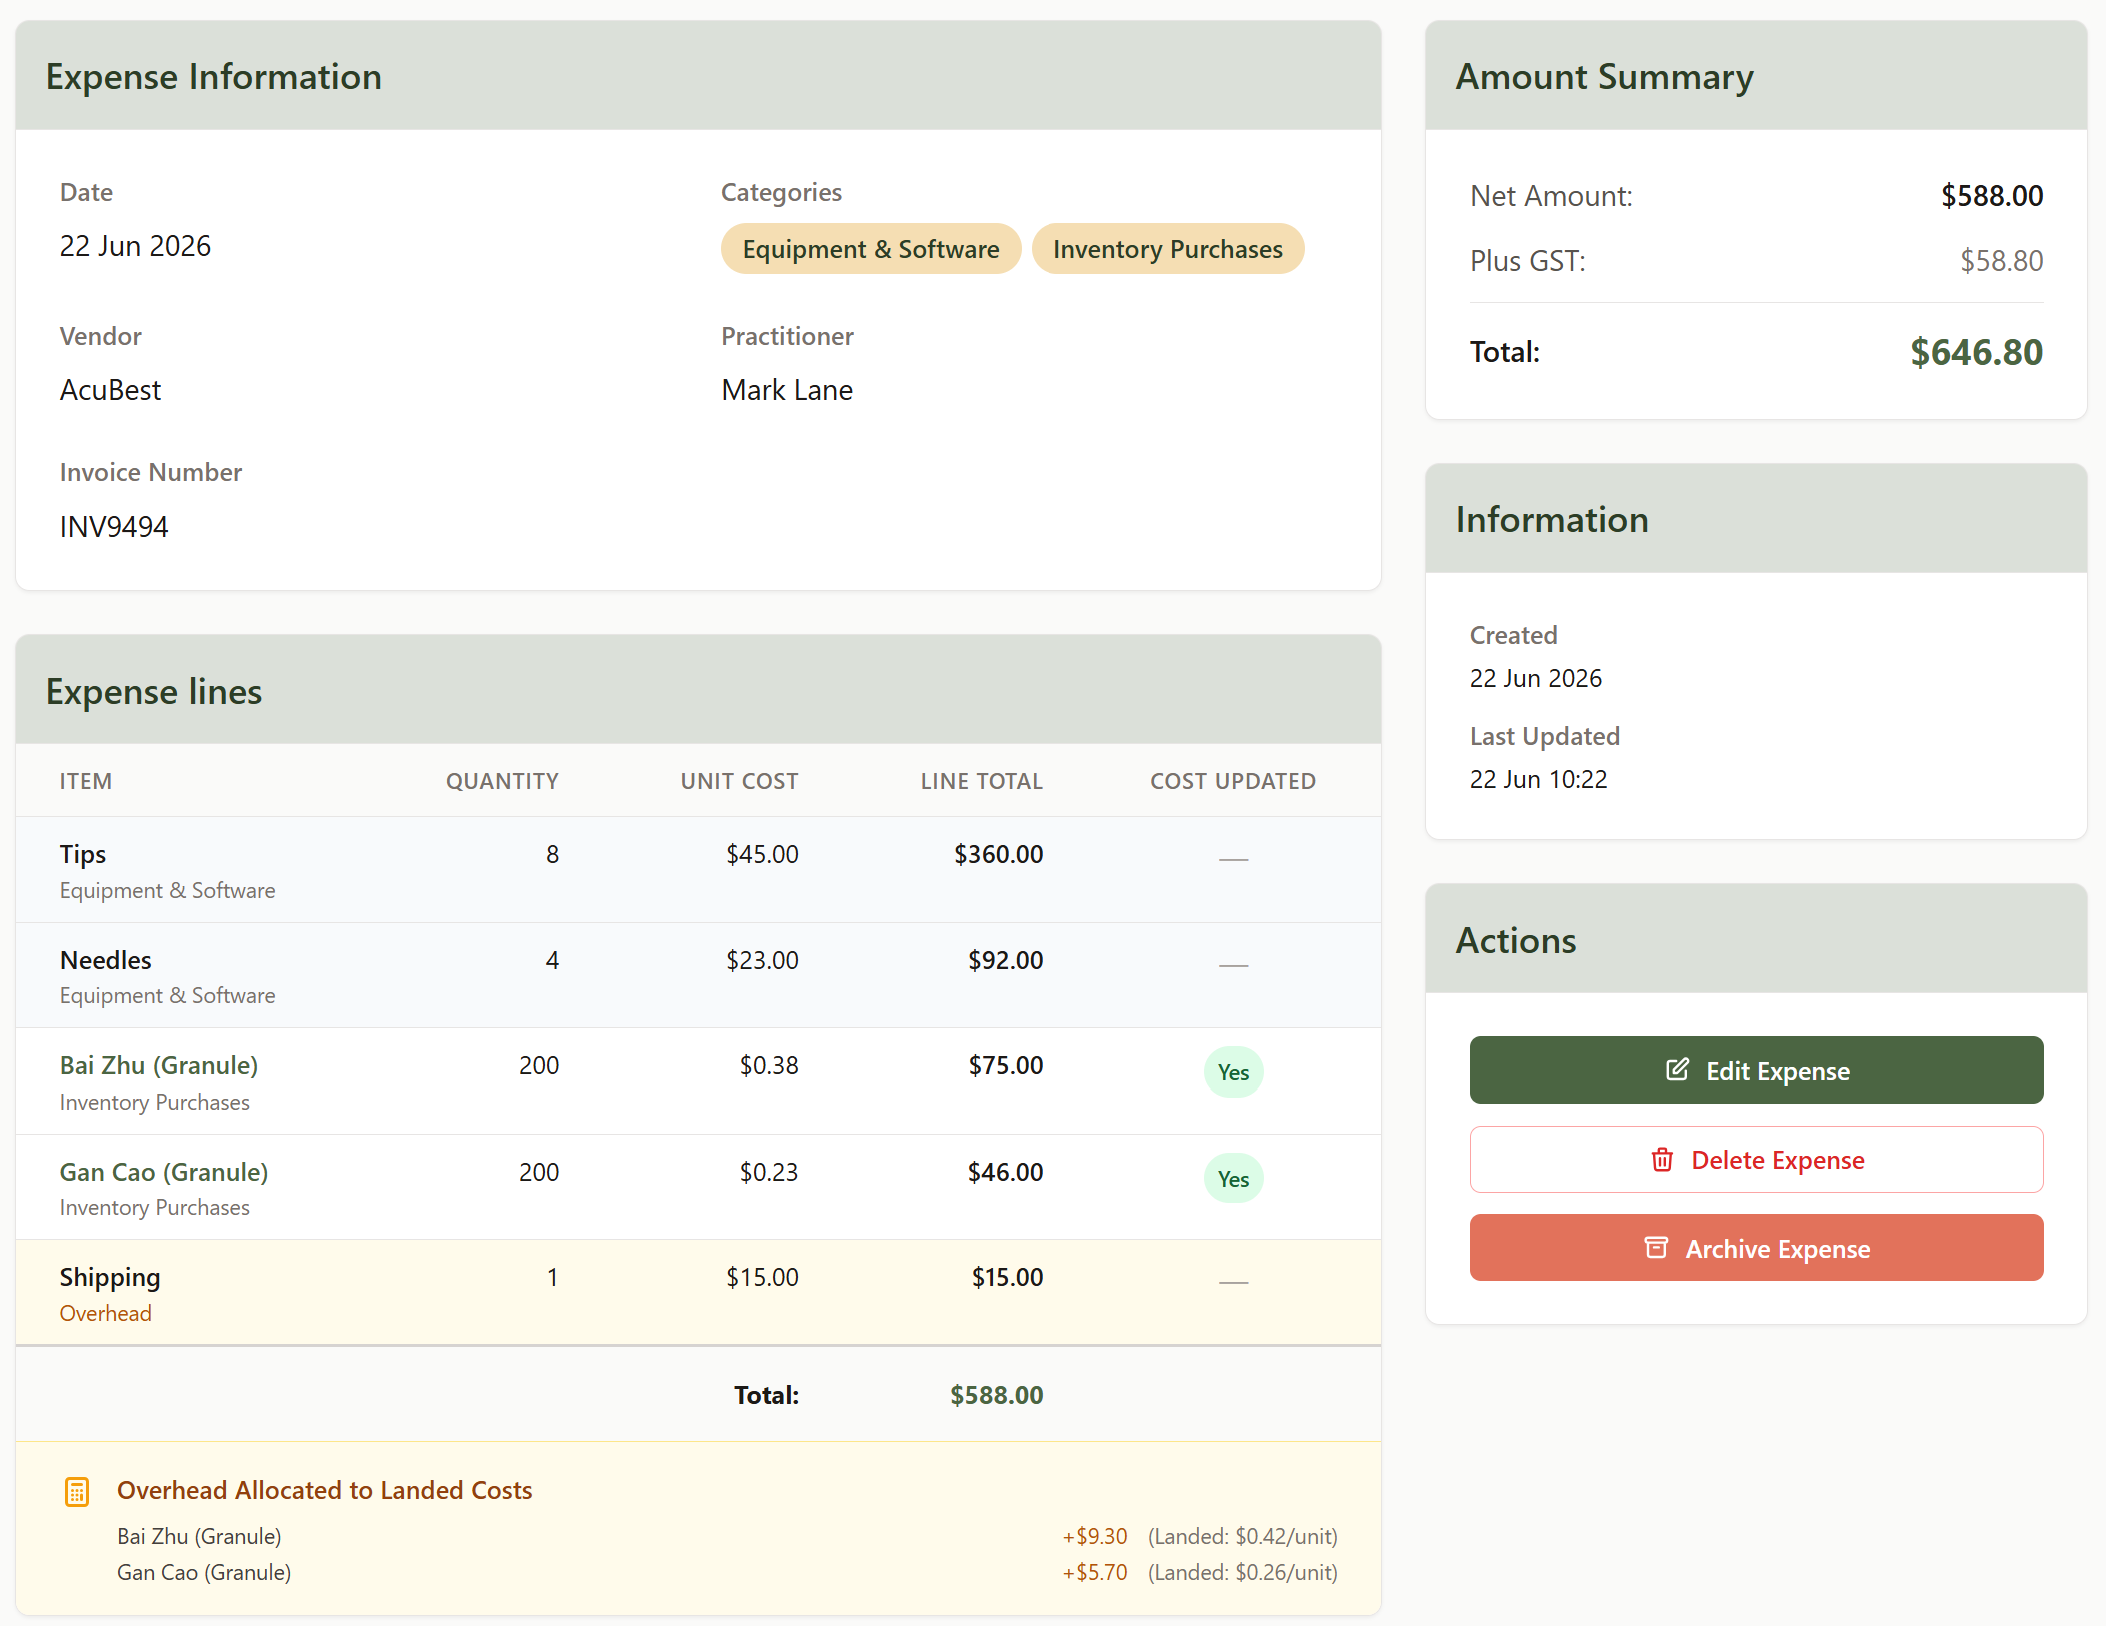
You order 200g of Bai Zhu granules for $75 and 200g of Gan Cao granules for $46 from a herbal supplier, who charges $15 shipping.
- Click New Expense and fill in the date, vendor, and invoice number.
- Click + Add stock item > Herb material. Search for and select Bai Zhu (Granule), enter 200 grams and a Total paid of 75.
- Add a second herb material line for Gan Cao (Granule) — 200 grams, Total paid of 46.
- Click + Overhead, describe it as "Shipping", and enter 15.
- Leave Update cost price to match this purchase ticked on both herbs.
Daobook splits the $15 freight across the two herbs by value: Bai Zhu carries $9.30 and Gan Cao $5.70. Their landed unit costs become roughly $0.42/g and $0.26/g — your raw cost plus freight — and those are the cost prices saved against each herb. You'll see this spelled out in the Overhead Cost Allocation Preview before you save.

This is why freight belongs as an Overhead rather than a Cost: it makes the cost price you sell against reflect what the stock genuinely cost to land on your shelf.
Scenario 3: One supplier invoice, mixed items
A single bill from a supplier often mixes things you stock with things you don't — for example, acupuncture needles and guide tubes (consumables) alongside herbs you're restocking.
You don't need separate expenses. On one bill:
- Add the herbs as stock items (they restock inventory).
- Add the needles and tubes as Costs with an Equipment & Software or consumables category (they don't).
Each line keeps its own category, so the expense is filed correctly across both categories at once. On the saved expense and in the list, you'll see a category pill for each distinct category the bill touches.
Scenario 4: A discount on the whole bill
Your herb supplier takes $20 off a $200 order as a loyalty discount, and it should lower the GST too.
- Add your herbs or costs to the bill as usual.
- Click + Add cost and name the line "Discount" (any Category is fine — it nets against that category).
- In the Cost field, enter the discount as a negative amount — type -20.
- Leave the GST toggle on if the discount applies to GST-charged items, so the GST is worked out on the reduced total.
The Total and the GST both drop to match the net you actually paid — no separate discount field to manage, and your reports record the lower cost automatically.
Viewing and Editing Expenses
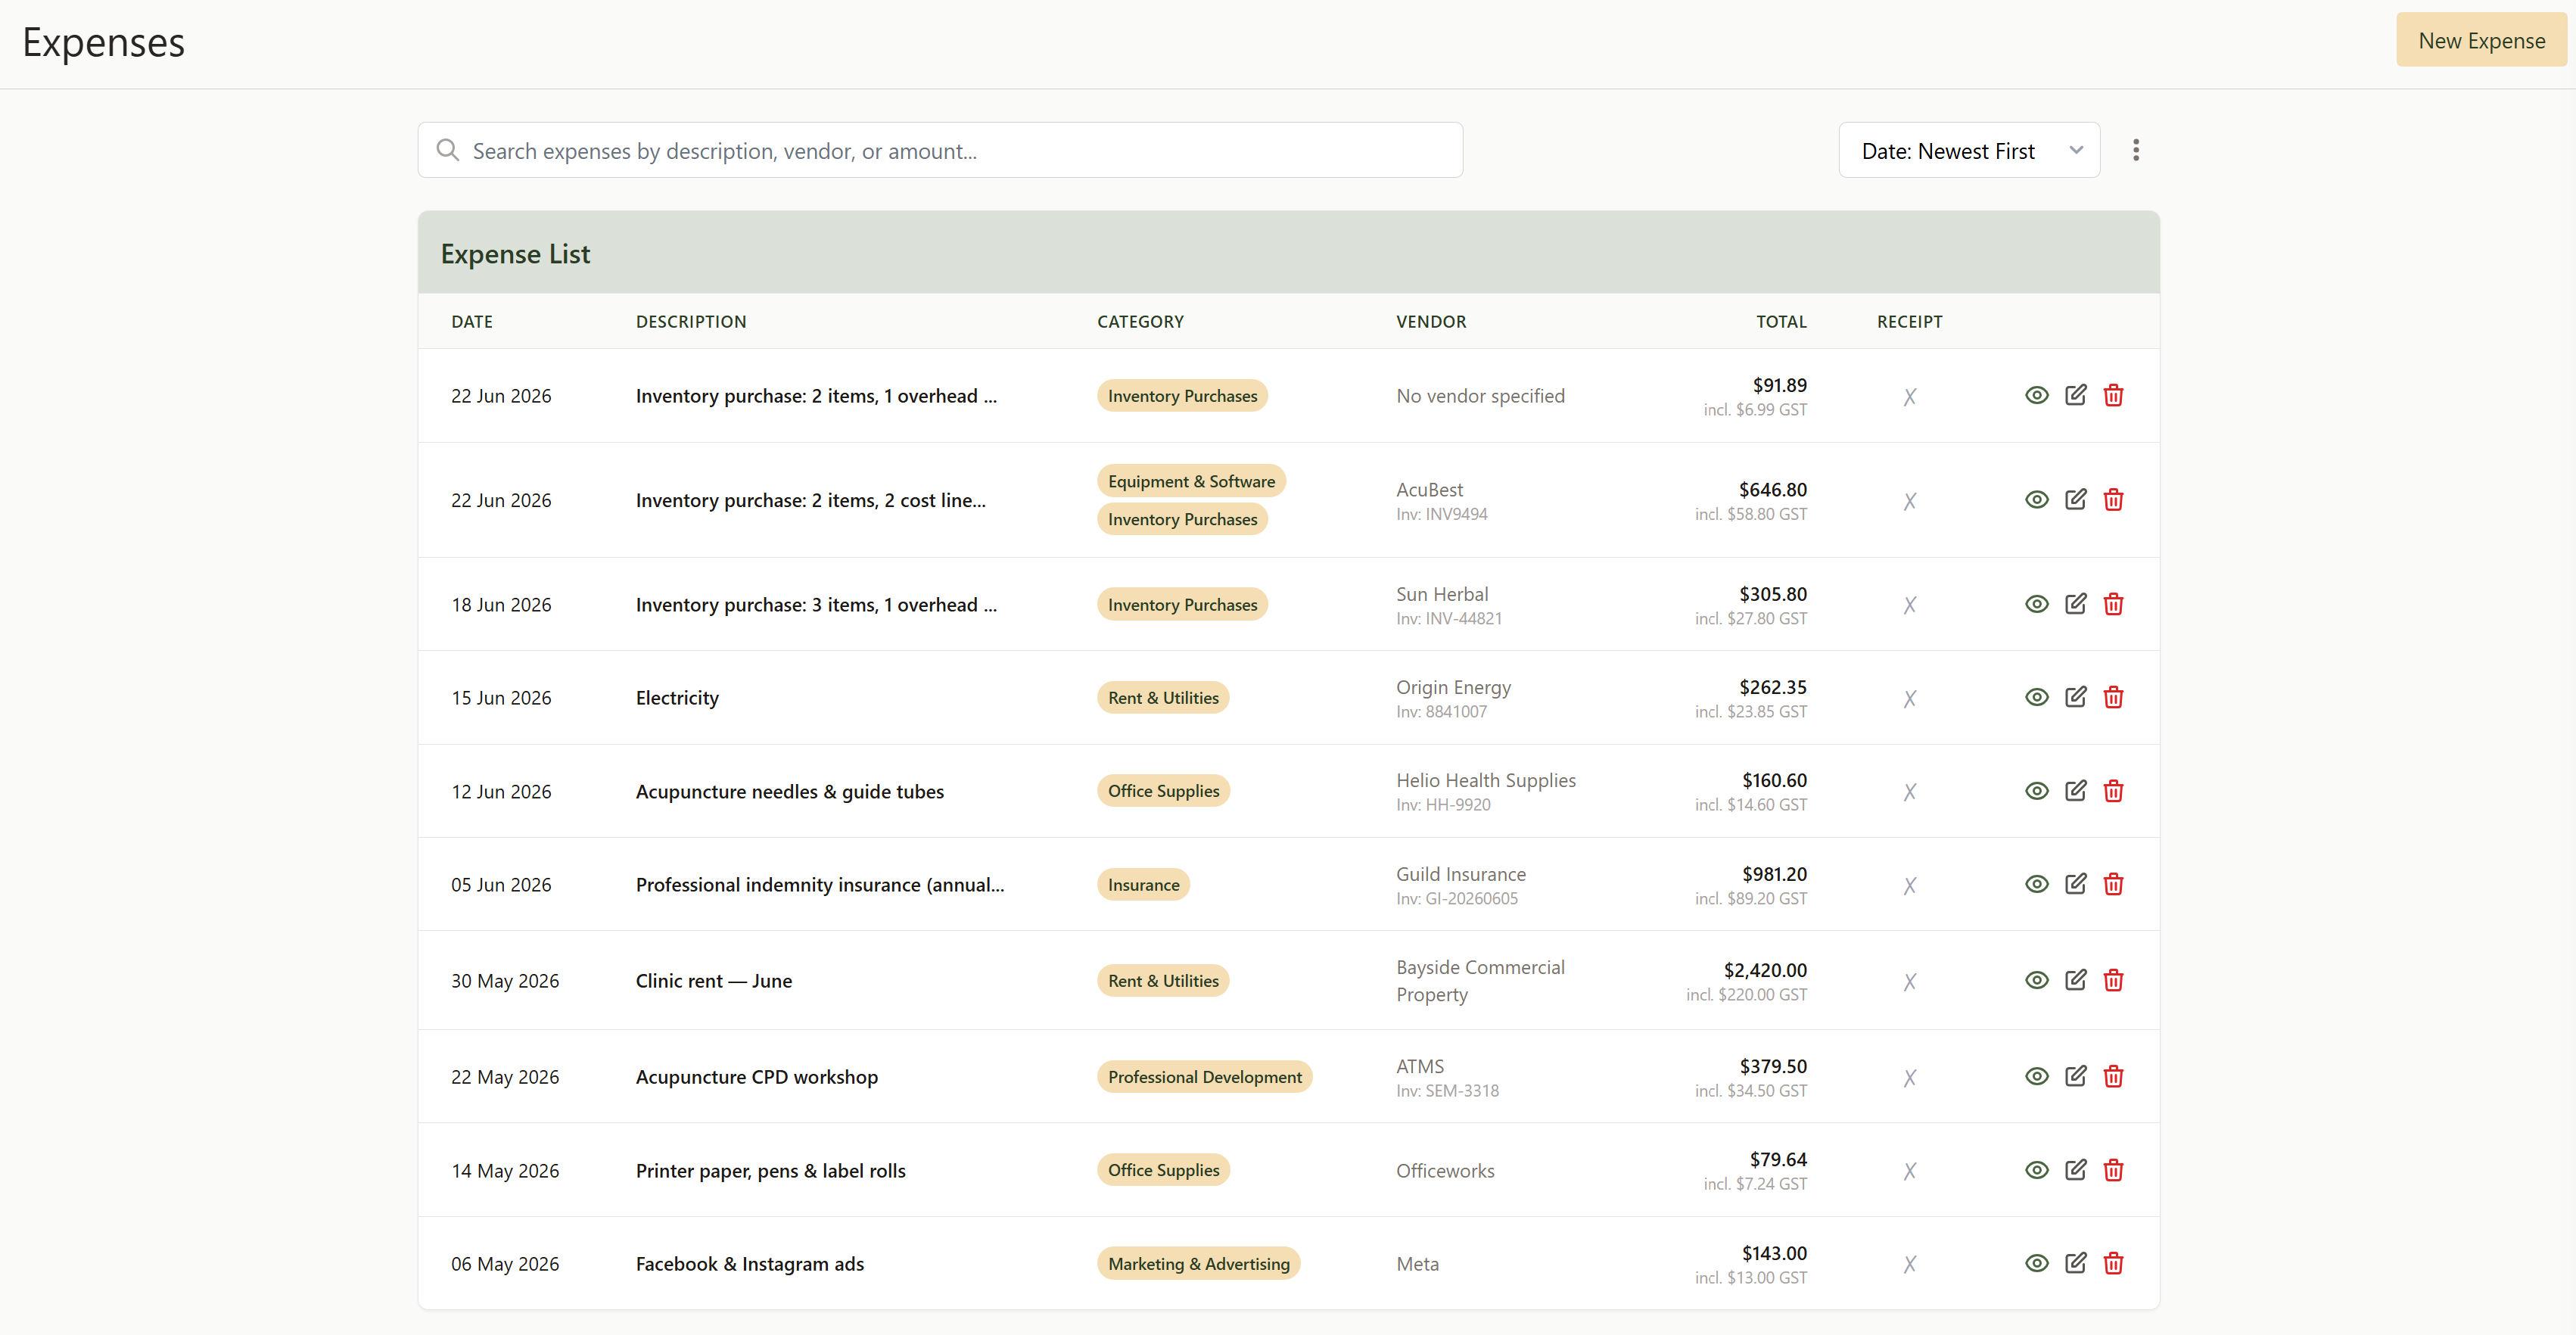
Every expense appears in the Expenses list, newest first. Each row shows the date, a short description, its category pills, the vendor, and the amounts. Use the search box to find a bill by description, vendor, or amount, and the sort menu to reorder by date or amount.
Click the eye icon to open an expense, the pencil to edit it, or the bin to delete it. Opening an expense shows its full line-item breakdown, any overhead allocation, and a GST-aware amount summary.
Tips:
- Freight is an Overhead, not a Cost — that's what folds it into your landed cost price. A flat fee you don't want spread into stock cost should be a Cost line instead.
- Stock items restock inventory; Costs don't. If you don't track an item, record it as a Cost — there's no need to create a product for every consumable.
- Herbs and batches use Total paid, not a per-unit price. Enter the grams and the lot price, and the unit cost is worked out for you.
- Keep "Update cost price" ticked when prices have moved, so your margins and cost of goods sold stay current. Untick it for a one-off purchase at an unusual price you don't want to become the norm.
- One bill can hold many categories — mix stock and costs on a single supplier invoice rather than splitting it up.
- A discount is a negative Cost line. Add a Cost line named "Discount" and enter the amount as a negative (e.g. -20) — the total and the GST net down for you.