
Adding Team Members and Setting Their Permissions
Give receptionists, bookkeepers, admins and other practitioners their own login, choose what each can see and do, and know which of them count toward your subscription.
Adding Team Members and Setting Their Permissions
Everyone who works in your clinic should have their own login. Membership is per clinic: a person is added to each location they work at, with a role and permissions set separately for each. Only members marked as a Clinical Practitioner count toward your subscription; receptionists, bookkeepers and admins who don't treat patients are free.
Step 1: Open Team Management
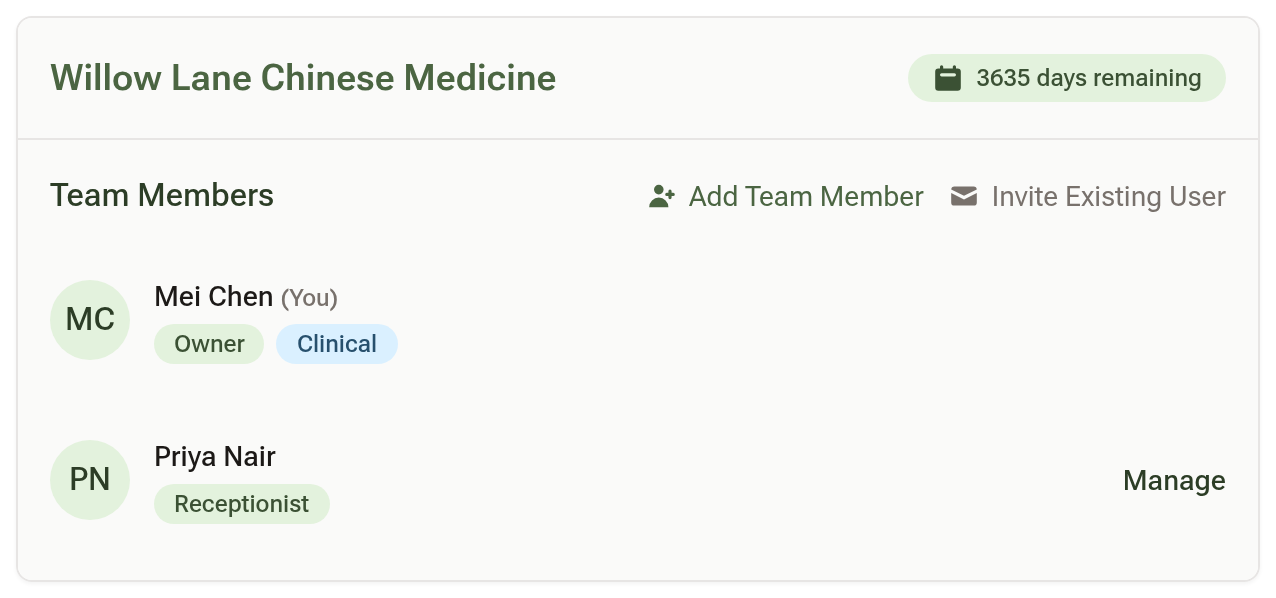
Go to Settings, open the Team & Clinics tab and click "Team Members & Invites". Your clinic's card lists the current team with a role on each row, and shows how many clinical slots your plan has filled.
Step 2: Add the person
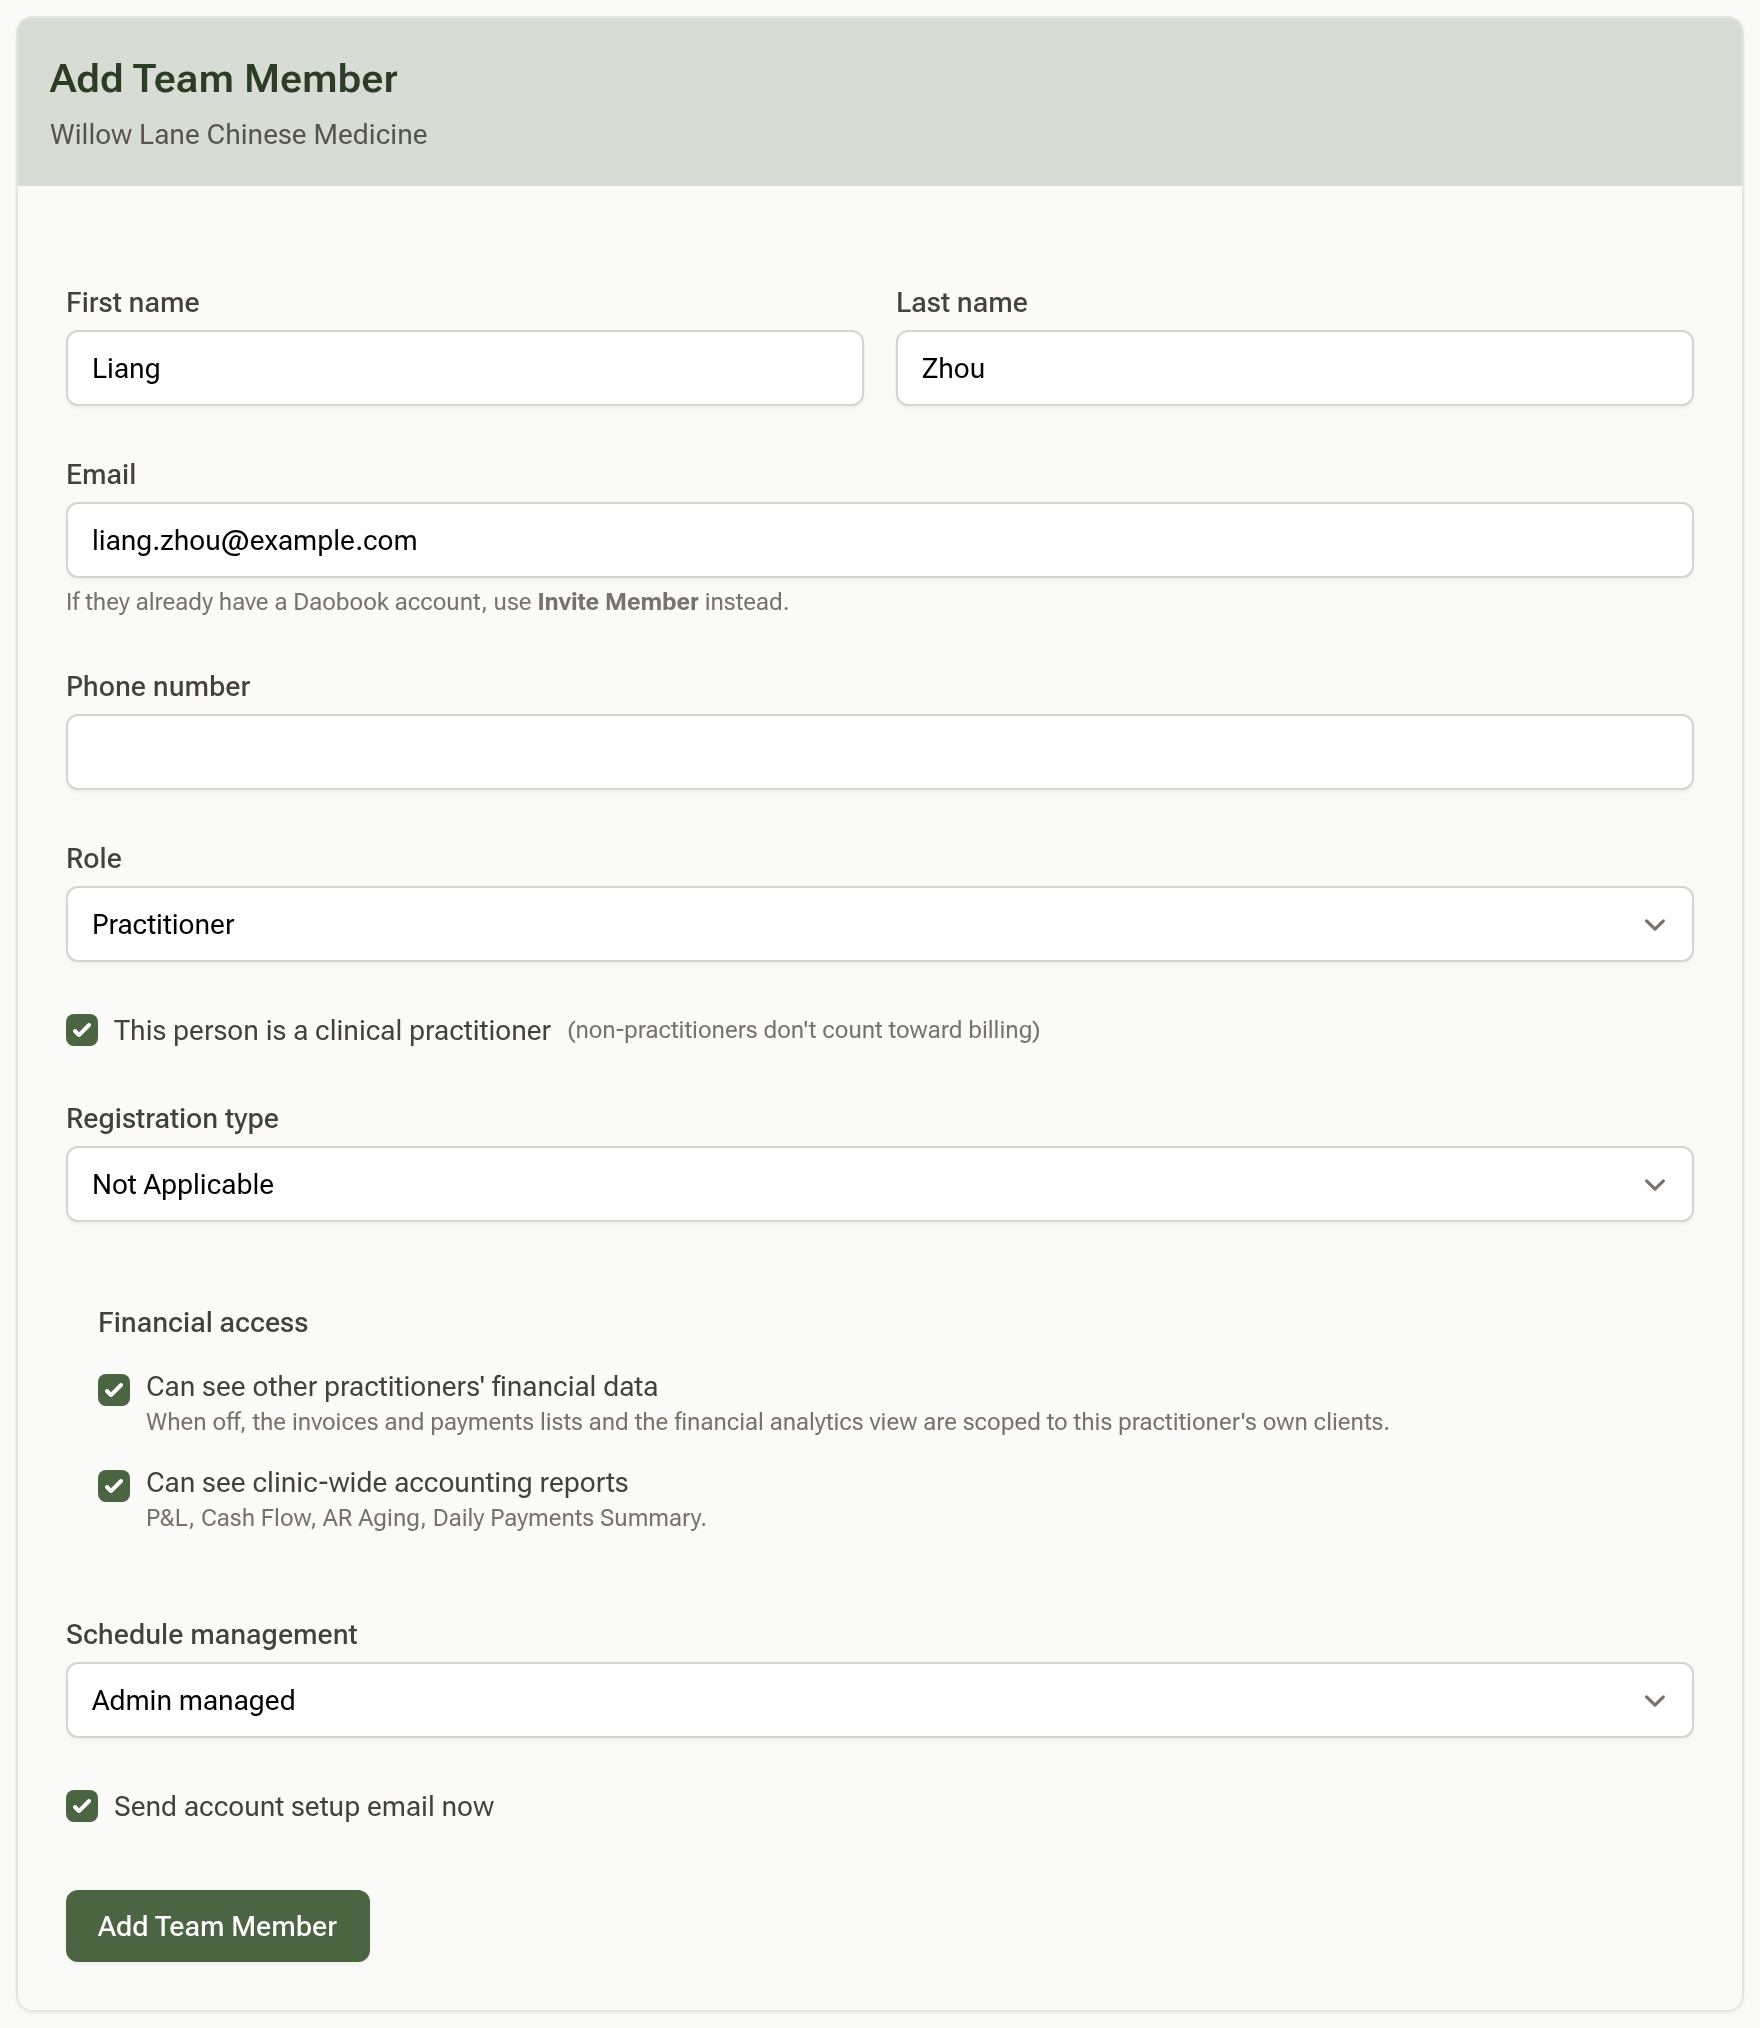
Click "Add Team Member". Enter their first name, last name and email, and choose a Role: Practitioner, Administrator, Bookkeeper or Receptionist.
The "This person is a clinical practitioner" checkbox is what your subscription bills for, not the role. Choosing Receptionist or Bookkeeper unticks it for you. Choosing Practitioner or Administrator ticks it, so for a practice manager who will help with setup but never treat patients, choose Administrator and then untick the box before saving. When every clinical slot on your plan is taken, the box is greyed out and the person is added as non-clinical; upgrade your plan first if they need to treat patients.
For a practitioner, fill in their registration type and AHPRA number. For a practitioner or receptionist, set their financial access — you can change it later. Leave "Send account setup email now" ticked and click "Add Team Member".
They receive an email with a "Set Up Your Password" button, valid for 7 days. Until they use it their page shows Pending Setup; if the link expires, open their page and click "Send Setup Email".
If the person already has a Daobook login — a locum who works at another practice, say — use "Invite Existing User" instead: enter their email and role and click "Send Invitation". They accept from the email and your clinic is added to their existing account.
Step 3: Set what they can see and do
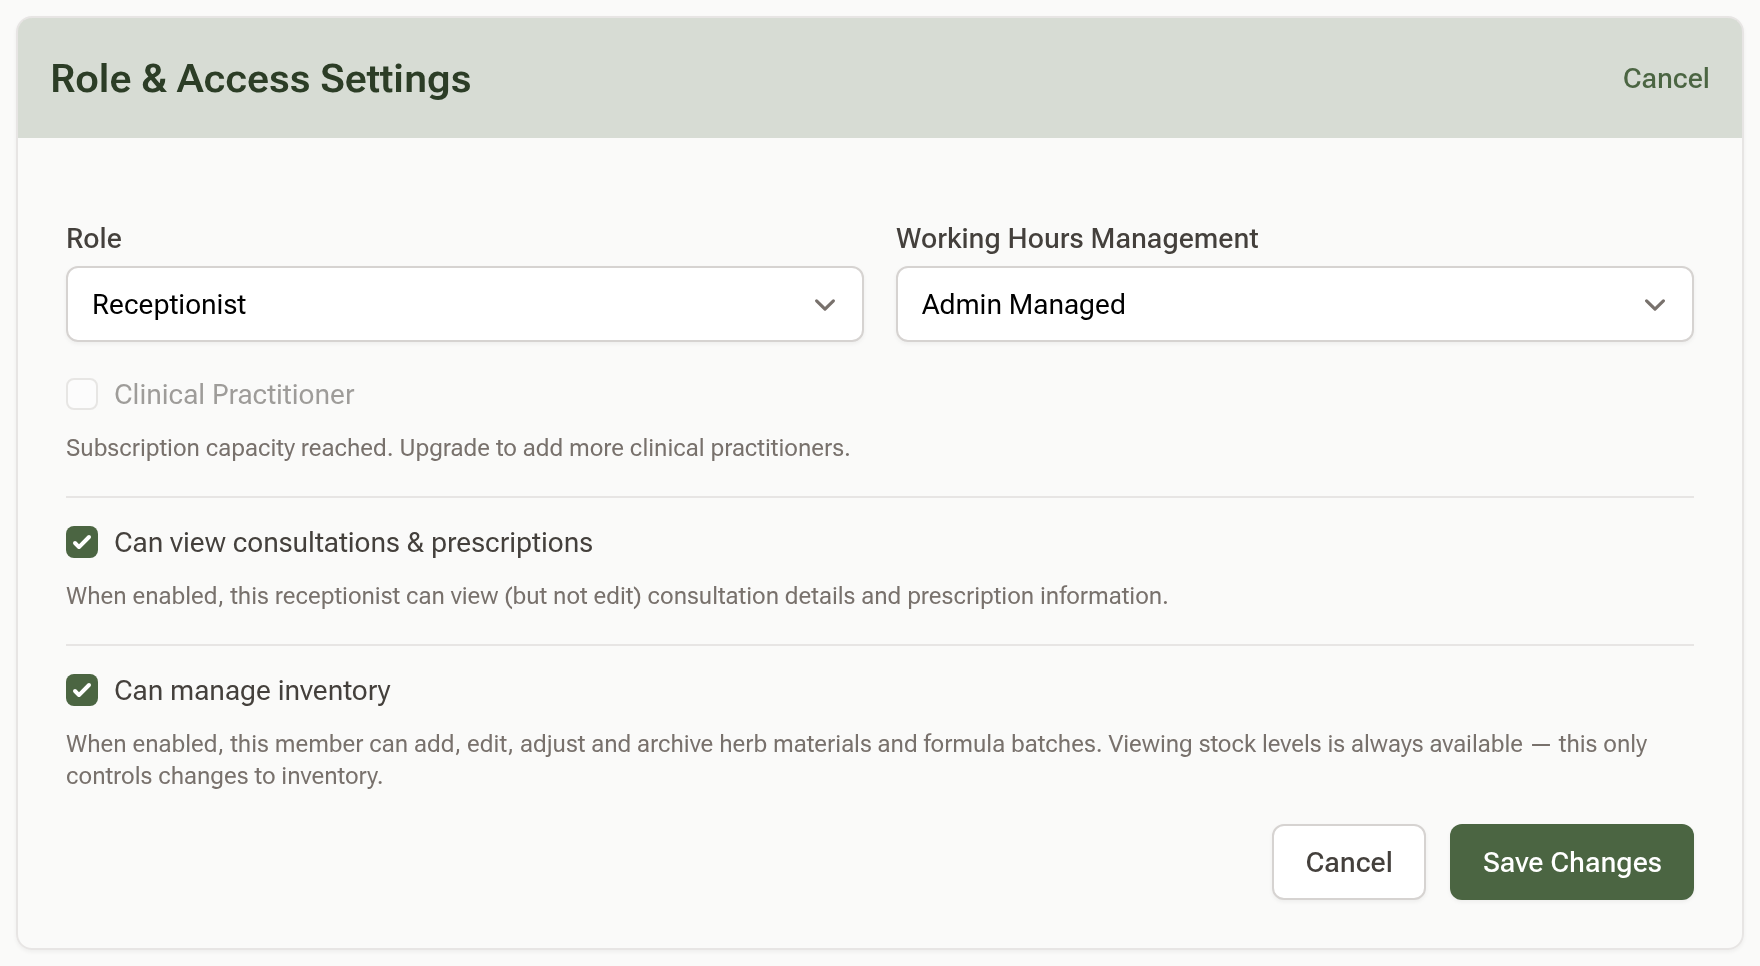
Click "Manage" on the person's row. Under Role & Access Settings click "Edit" to change their role or the toggles that go with it:
- Receptionist: "Can view consultations & prescriptions" — untick it to keep front-desk staff out of clinical notes.
- Practitioner: "Can edit other practitioners' appointments" and "Can use the AI Scribe", both off by default.
- Either: "Can manage inventory".
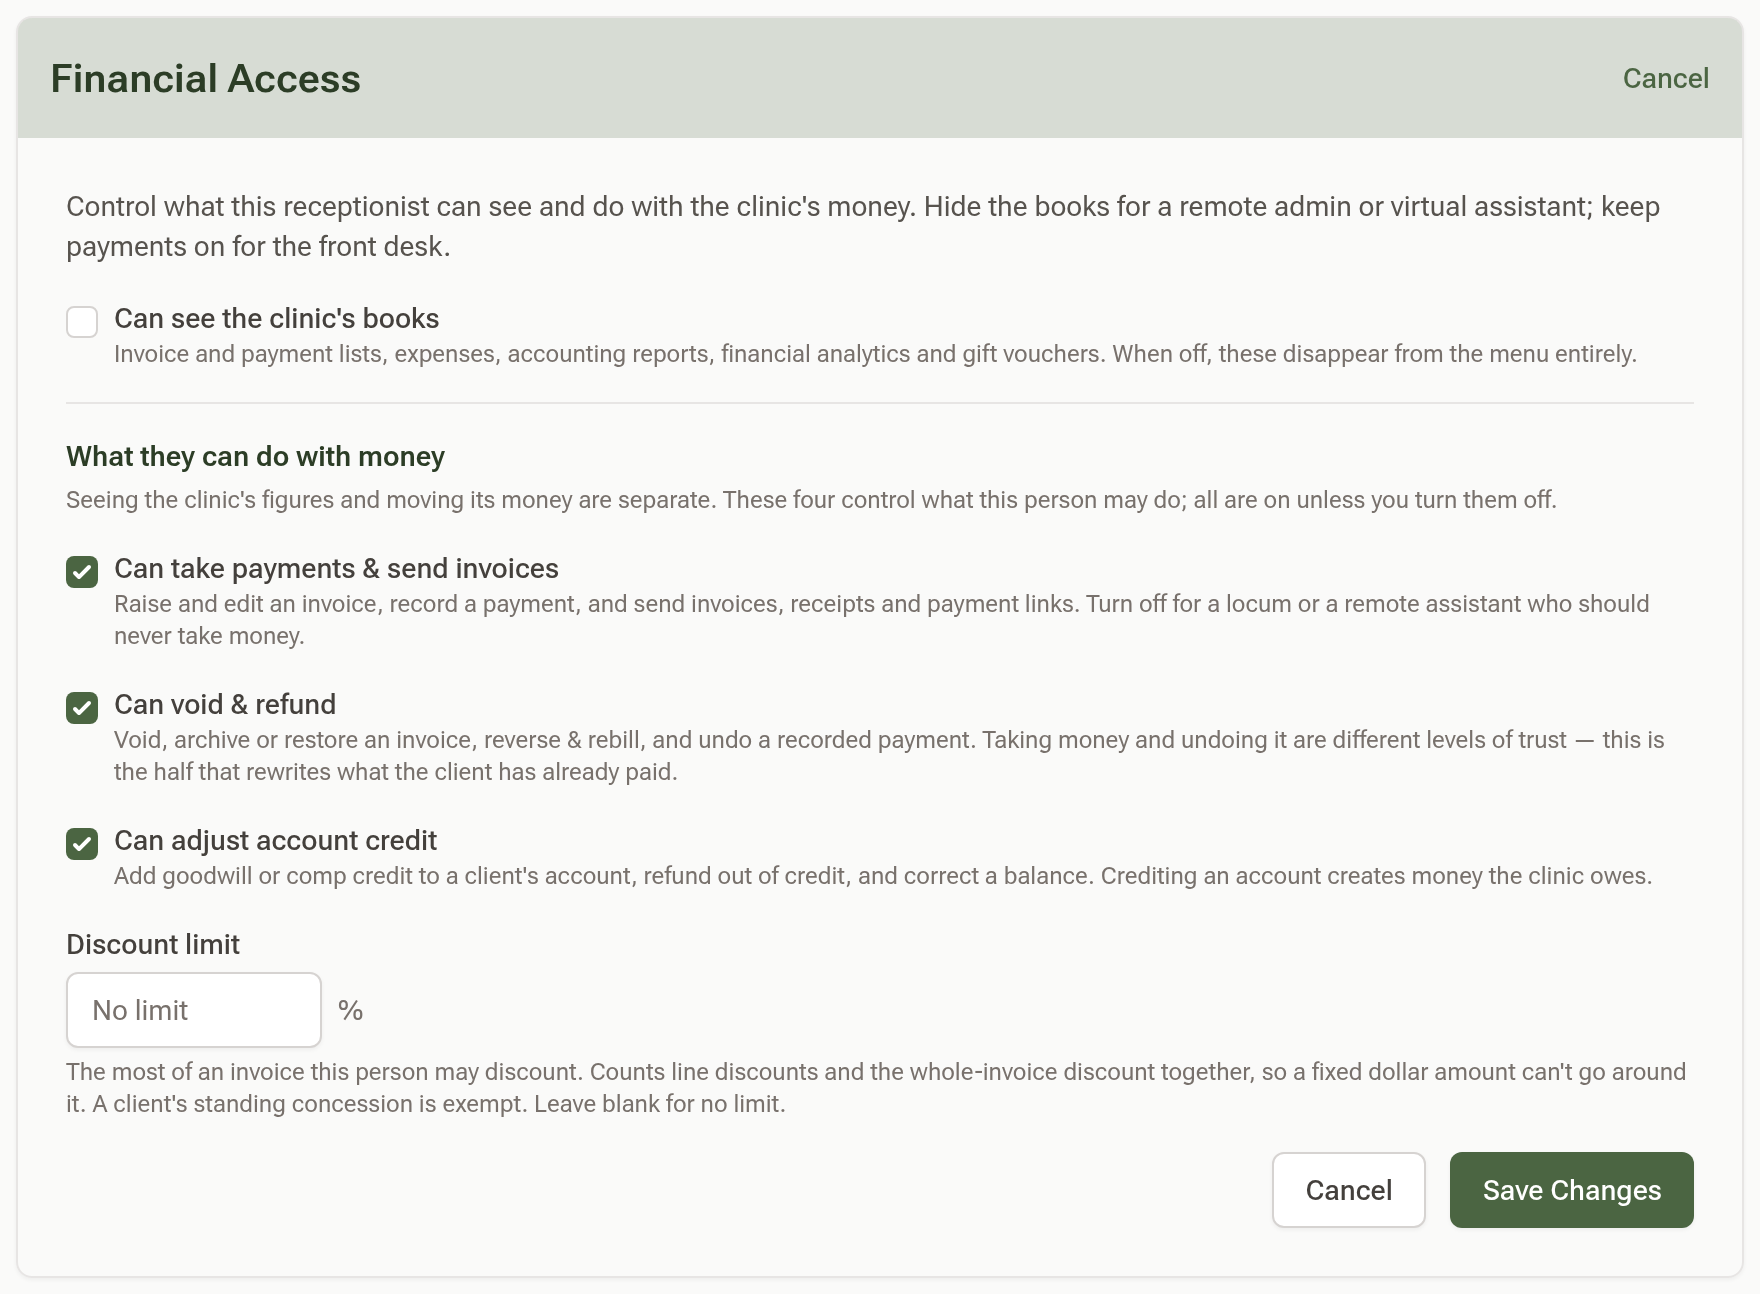
Under Financial Access click "Edit". For a practitioner, "Can see other practitioners' financial data" and "Can see clinic-wide accounting reports" control what they see. For a receptionist, "Can see the clinic's books" hides invoices, payments, expenses and reports from their menu entirely — the setting for a remote assistant. Below those, four settings control what they may do with money: "Can take payments & send invoices", "Can void & refund", "Can adjust account credit" and a Discount limit. All are on unless you turn them off. Click "Save Changes".
Step 4: Remove someone who has left
At the bottom of their page, click "Remove from Clinic" and type their email to confirm. They lose access to this clinic's data; their own account, and the records they created, remain.
Tips:
- A setup link must be opened in a browser that isn't signed in as someone else. Setting a new starter up at your own computer? Sign out first, or use a private window.
- Second location? Add them to that clinic as well. Roles and permissions don't carry across.
- Owners and admins see everything and have no toggles. An admin cannot remove or demote the owner.