
Recording Acupuncture Points
Chart the points you needled in seconds using your own quick-pick palette, protocols, and custom points — and see each client's point history build over time.
Recording Acupuncture Points
Daobook records the points you needled as real data rather than a line of free text — so it can count needles, build each patient's point history, and report across your whole clinic. It's built around your own working library, which is what makes charting a treatment take seconds.
What it is and isn't: Daobook doesn't suggest which points to use — it's not a clinical reference. The feature is for recording the points you've chosen, quickly. What you needle is always your call.
What comes with it: 423 points ship with Daobook — every numbered point on all fourteen channels, the WHO extra points, and the scalp lines. Anything beyond that (your own system, a lineage's extra points, an ashi point you keep coming back to) you add yourself, and there's a section below on how.
Turning It On or Off
Two switches govern the section, and both are on by default — for the templates you already had as well as any new ones. The section appears when both are on.
For you, across every template. Settings > Clinical Resources tab > Acupuncture Points, under Point recording: untick "Use the structured point section in consultations", click Save at the foot of the page, and your consultations show the free-text Acupuncture Treatment box instead. Your templates aren't touched, and points you've already recorded stay exactly as they are.
For one template. Settings > Notifications & Templates tab > Consultation Templates — edit a template and, with no field picked, tick or untick "Show Acupuncture Points" under In the note, then click "Save Template".
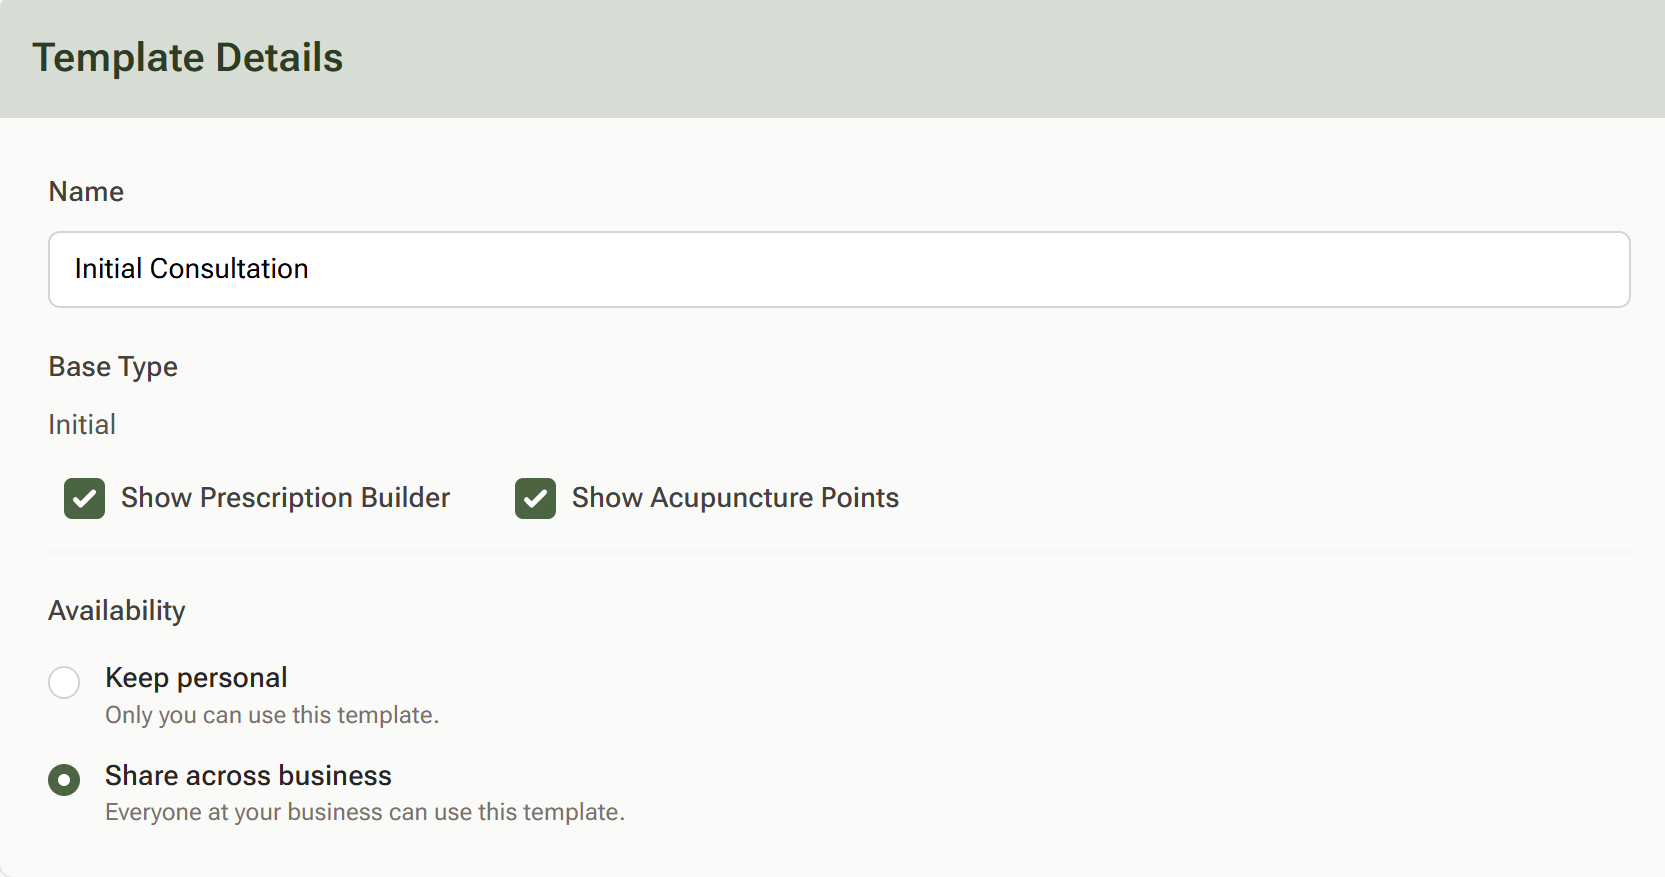
Untick it and the section disappears from that template entirely — if you don't needle, nothing changes for you.
If you've been typing points into the free-text Acupuncture Treatment box, that box now steps aside wherever the section is switched on and the box is empty. A consultation that already has a note in that box keeps it, with a line explaining it's been superseded — clear the note and the box stops appearing.
Step 1: Chart the Points
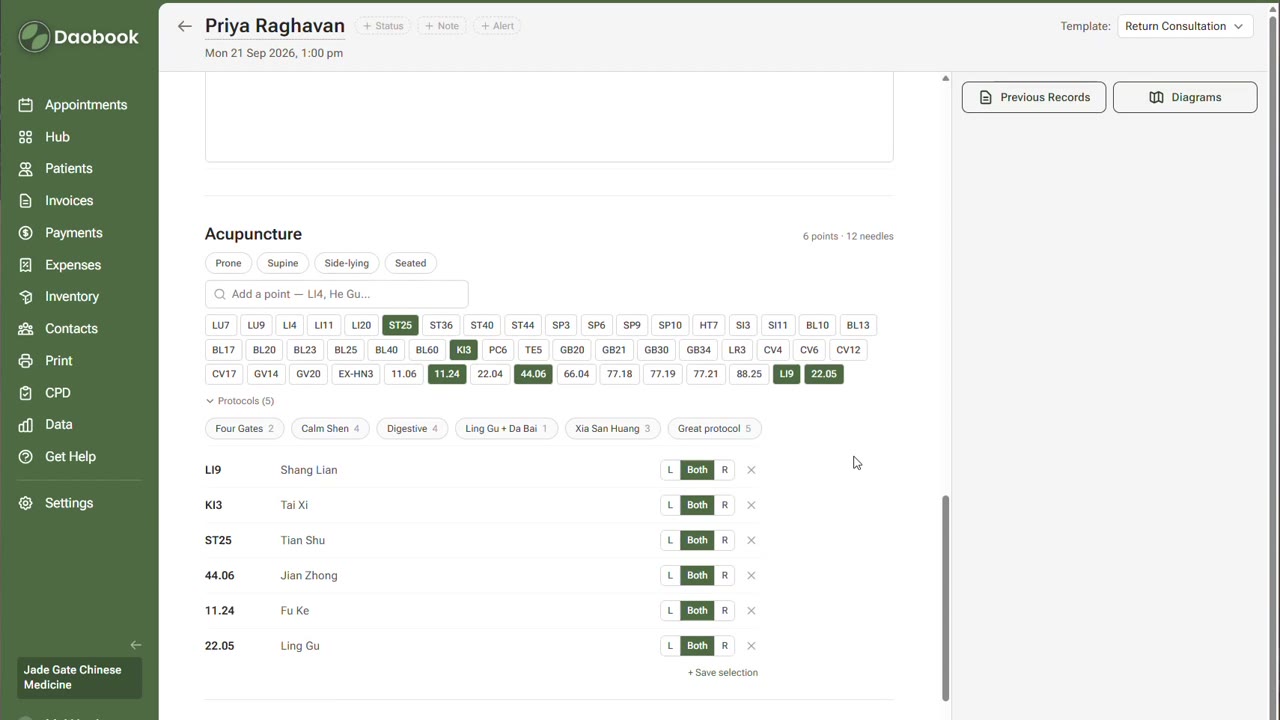
Open a consultation and find the Acupuncture section, between your treatment notes and the prescription builder. There's one search field — "Add a point — LI4, He Gu…" — with your quick-pick chips beneath it.
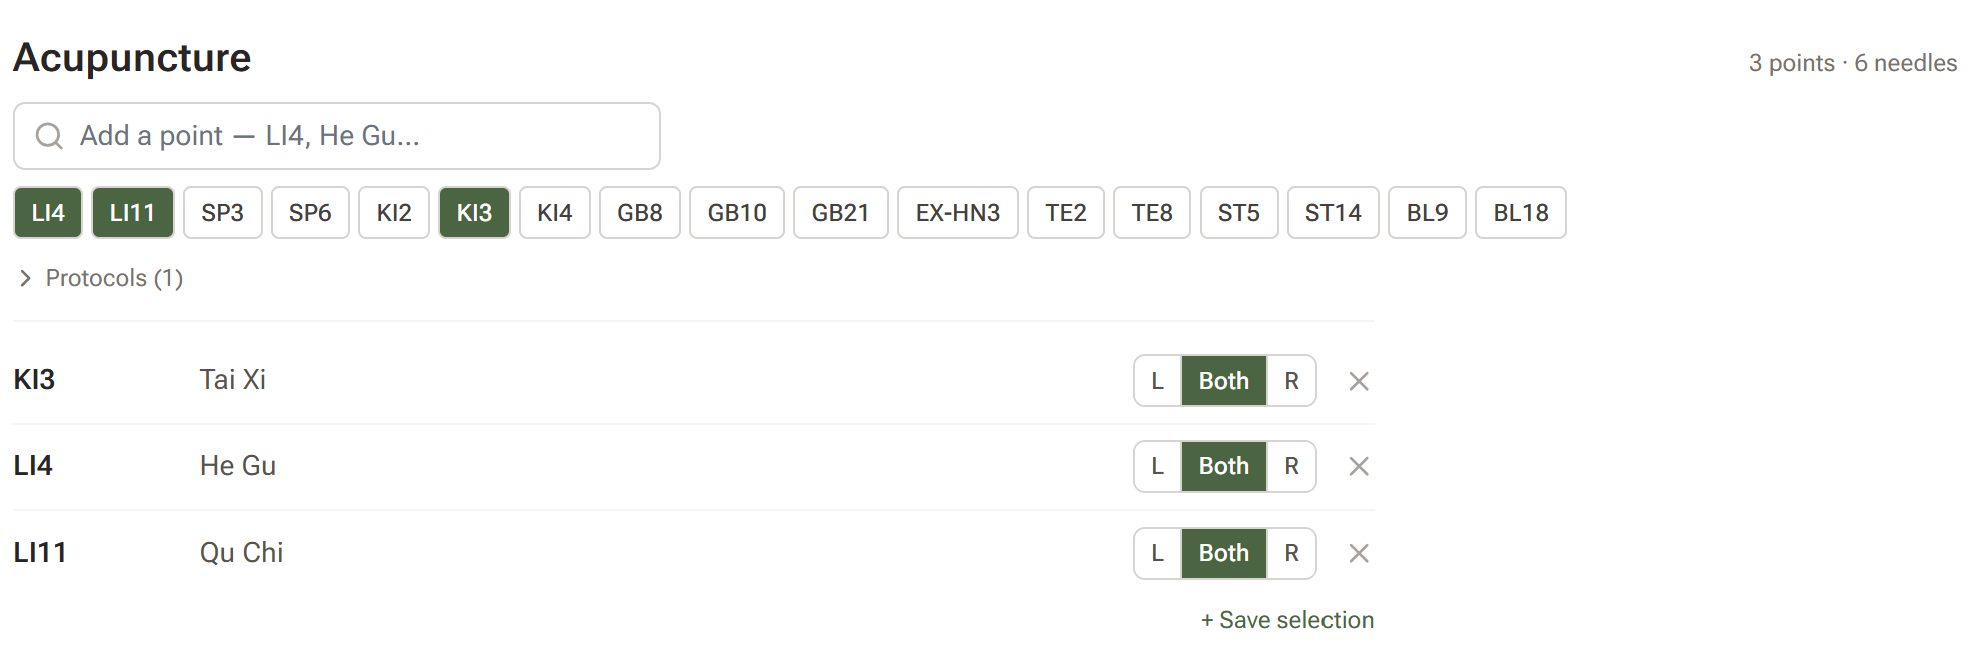
- Tap a chip to add that point. Tap it again to take it back off.
- Or type. Typing filters your chips first. Codes match however you write them —
li4,LI 4andli-4all land on the same point — and so do pinyin written solid ("hegu" finds He Gu), Chinese characters, and English names. Anything outside your palette is searched from the full library and listed under "Not in your points". Pressing Enter adds the first match. - Each selected point gets a row with an L / Both / R control. Midline points — Ren, Du, and midline extras like Yintang — simply read "Midline".
- The counter at the top right totals points and needles as you go, counting a bilateral point as two needles.
- The bookmark icon on a row pins that point to your quick-pick chips. This is the main way a palette gets built — out of the points you actually use, one consultation at a time.
- The × takes a point off this treatment only. The chip stays in your quick pick — points are removed from your palette in Settings, never from inside a consultation. See Managing Your Library below.
Recording more on each point
A row carries the point and its side, and nothing else unless you ask for it. Three more details are there if you want them, each off until you turn it on in Settings > Clinical Resources tab > Acupuncture Points, under Point details. Tick what you record and click Save at the foot of the page.
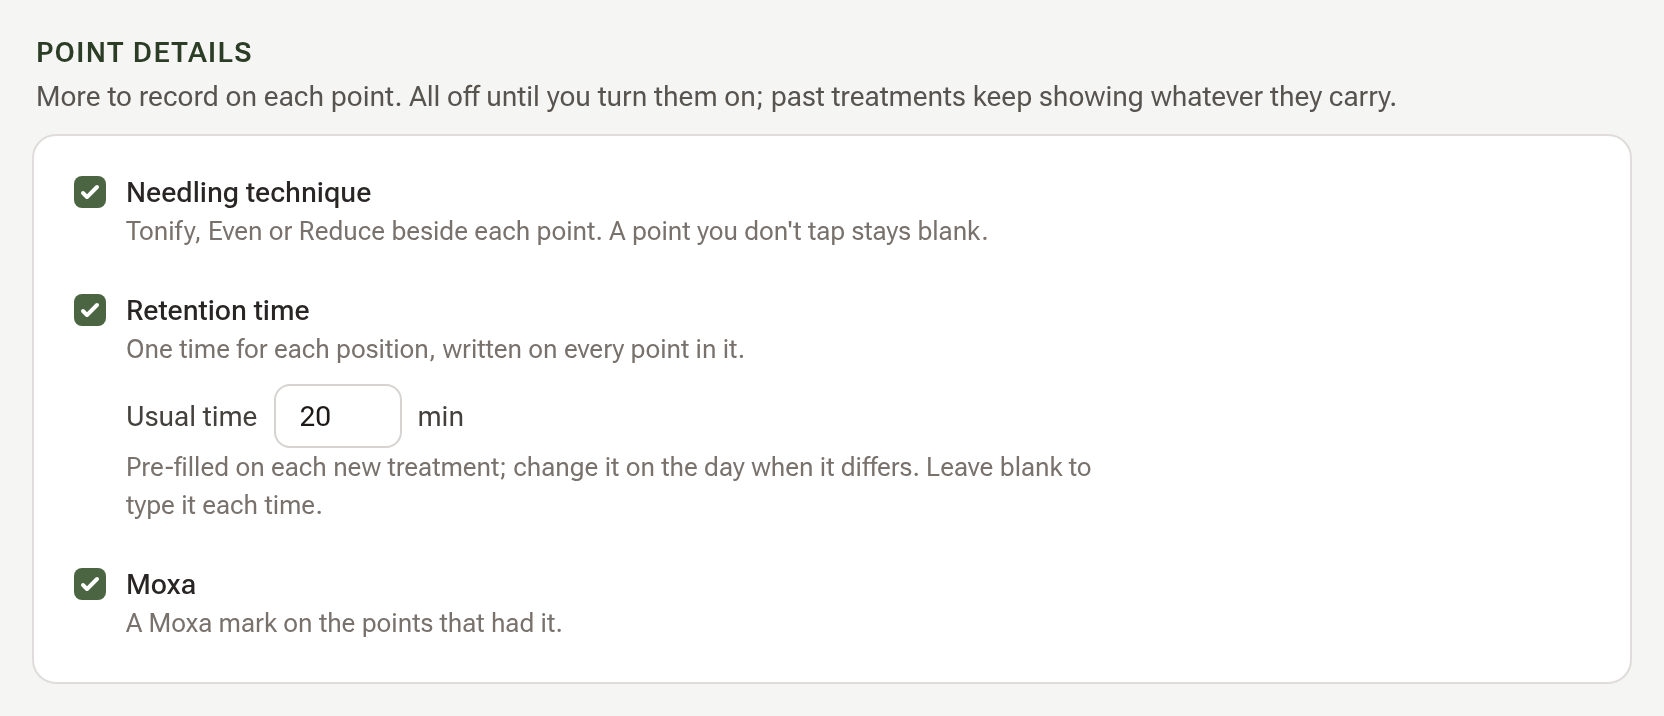
- Needling technique adds a Tonify / Even / Reduce control beside each point's side. Nothing is pressed until you tap it, and tapping the pressed one clears it again, so a point you don't tap records no technique.
- Retention time adds one min field for the treatment, beside the points-and-needles counter. Type it once and it applies to every point. If you chart in positions, each position gets its own field on its heading instead. Set a Usual time under the tick and it is filled in for you on each new treatment, so you only change it on the day it differs.
- Moxa adds a Moxa button on each row, for the points that had it.
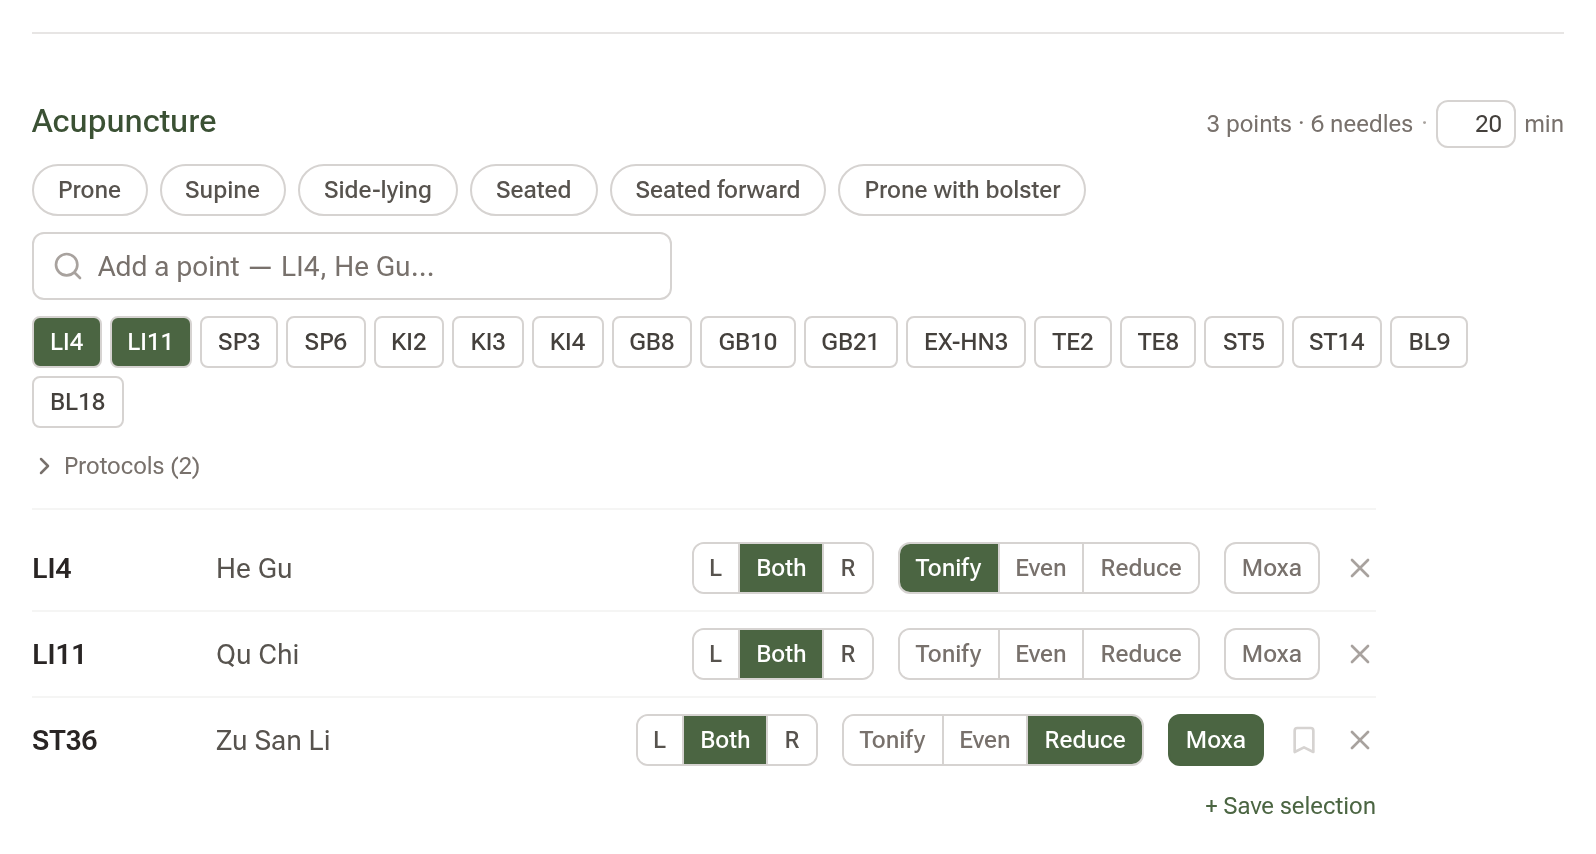
Turning a detail off later hides its control but never removes what you recorded: a finished note shows everything the treatment carries.
Step 2: Chart in Positions
Most treatments happen in one position. Some don't — you needle the back with the patient prone, turn them over, and needle the front. The position pills above the search field keep those apart, so the note says which points went in when.
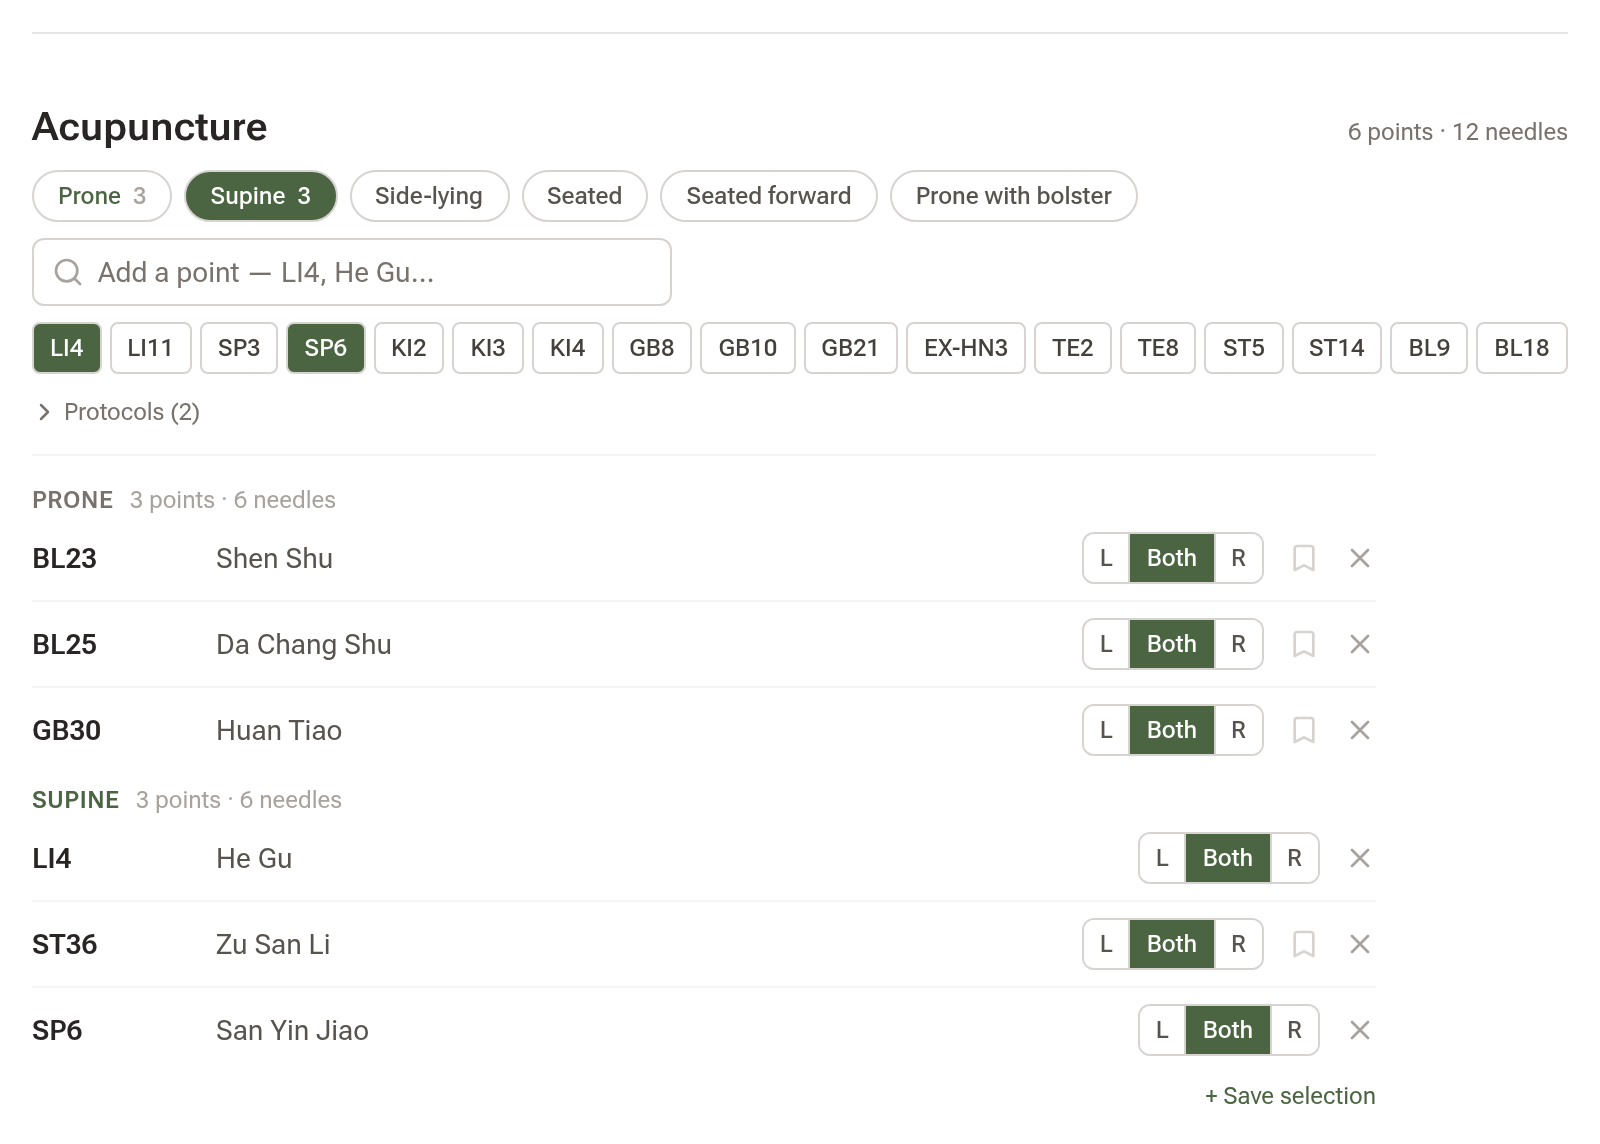
Tap a position before you needle, and the points you add file under it. Prone, Supine, Side-lying and Seated are always offered.
- A filled pill is the position you're charting into now.
- An outlined pill with a number beside it already holds that many points.
- A plain pill hasn't been used on this treatment yet.
Tapping a position switches to it if it already exists, and otherwise opens a new one. It never renames a position that already holds points — a needling recorded as prone stays prone.
Ignore the pills entirely and nothing changes. Points land in a single unlabelled list, exactly as they did before positions existed, and the note reads the same way. Charting in one position is not a lesser way of using the section.
A position you opened but didn't needle carries an × on its heading to clear it away. Once it holds points that × disappears — a charted position is clinical record, not scaffolding.
Your own positions
The four offered are fixed, but they aren't the whole vocabulary. In Settings > Clinical Resources tab > Acupuncture Points, the Treatment stages card takes any position you want alongside them. Type a name, press Enter to add it as a chip, then click Save at the foot of the page.
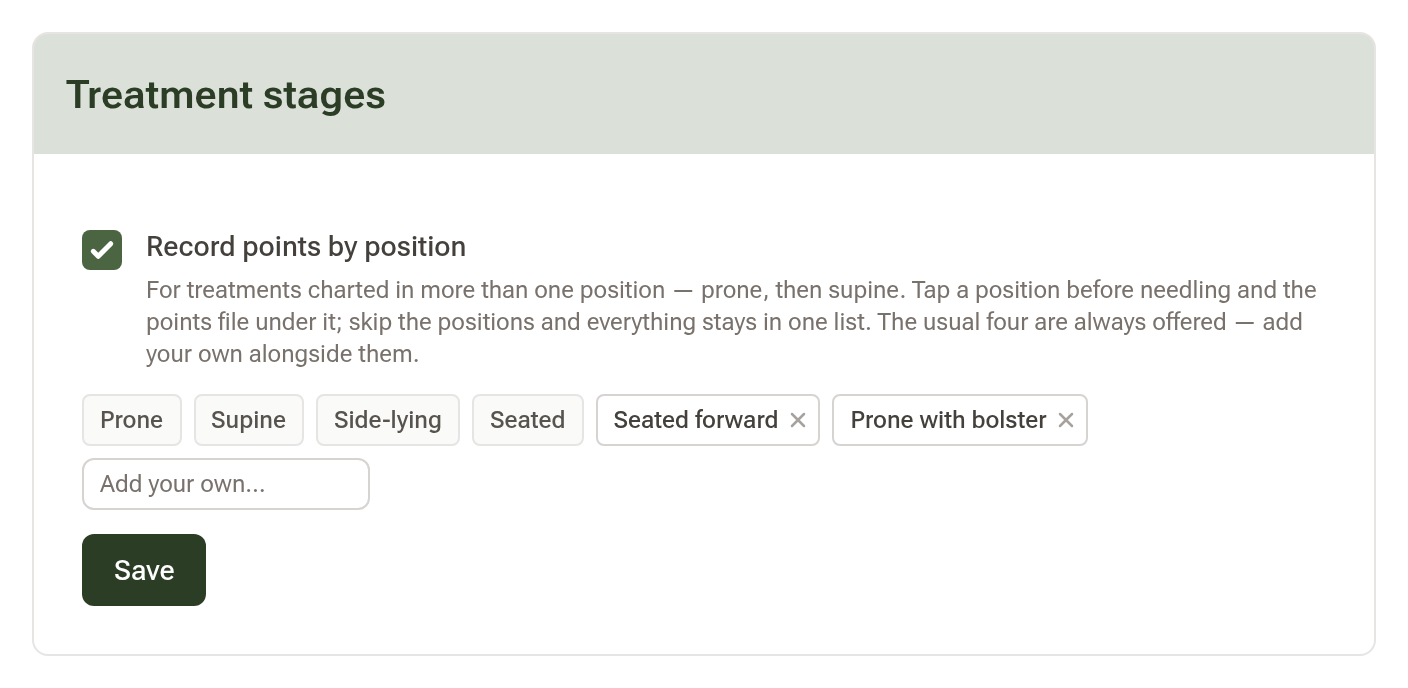
Untick "Record points by position" and the pills disappear from your consultations altogether.
Step 3: Save a Protocol
Select the points you use together, then click "+ Save selection" beneath the list and give it a name.
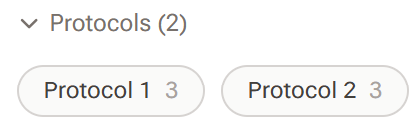
From then on the "Protocols" toggle opens your saved protocols, and one click adds every point in one. They apply additively, so two protocols stack rather than replace each other. A protocol saved across positions keeps that shape — it reads "Prone: BL23 · BL25 — Supine: LI4 · ST36" so you can tell it from a flat set at a glance, and it comes back in its positions. The search field filters protocols by name as well as filtering your chips, and whether the list sits open or closed is remembered for next time.
Step 4: Points That Aren't in the Library
When a search finds nothing anywhere in the library, two quiet options appear.

- Add "…" to my points — for a point you'll use again. Fill in the Code, Name and Region, and it joins your personal library, findable in every future consultation.
- Chart as one-off — for a true ashi point. It's recorded on this treatment only and leaves nothing behind in your library.
Your custom points are yours alone — colleagues at the same clinic don't see them.
Bringing In a Whole List
If your own point system lives in a spreadsheet, bring it in at once rather than a point at a time. Go to Settings > Clinical Resources tab > Acupuncture Points and click "Import a point list".
- Download the CSV template.
- Fill it in.
codeis required;pinyin_name,chinese_name,english_name,body_zoneandmidlineare optional. Body zones need to be one of the zones listed on that page — anything else is left blank rather than rejected. - Save it as UTF-8 CSV (in Excel: Save As → CSV UTF-8) and upload it.
Re-importing is safe: a row whose code you already have updates that point rather than duplicating it. Up to 1,000 rows per file. If some rows have problems the good ones still land, and the rest come back numbered the same way your spreadsheet is.
Managing Your Library
Settings > Clinical Resources tab > Acupuncture Points holds everything in one place.
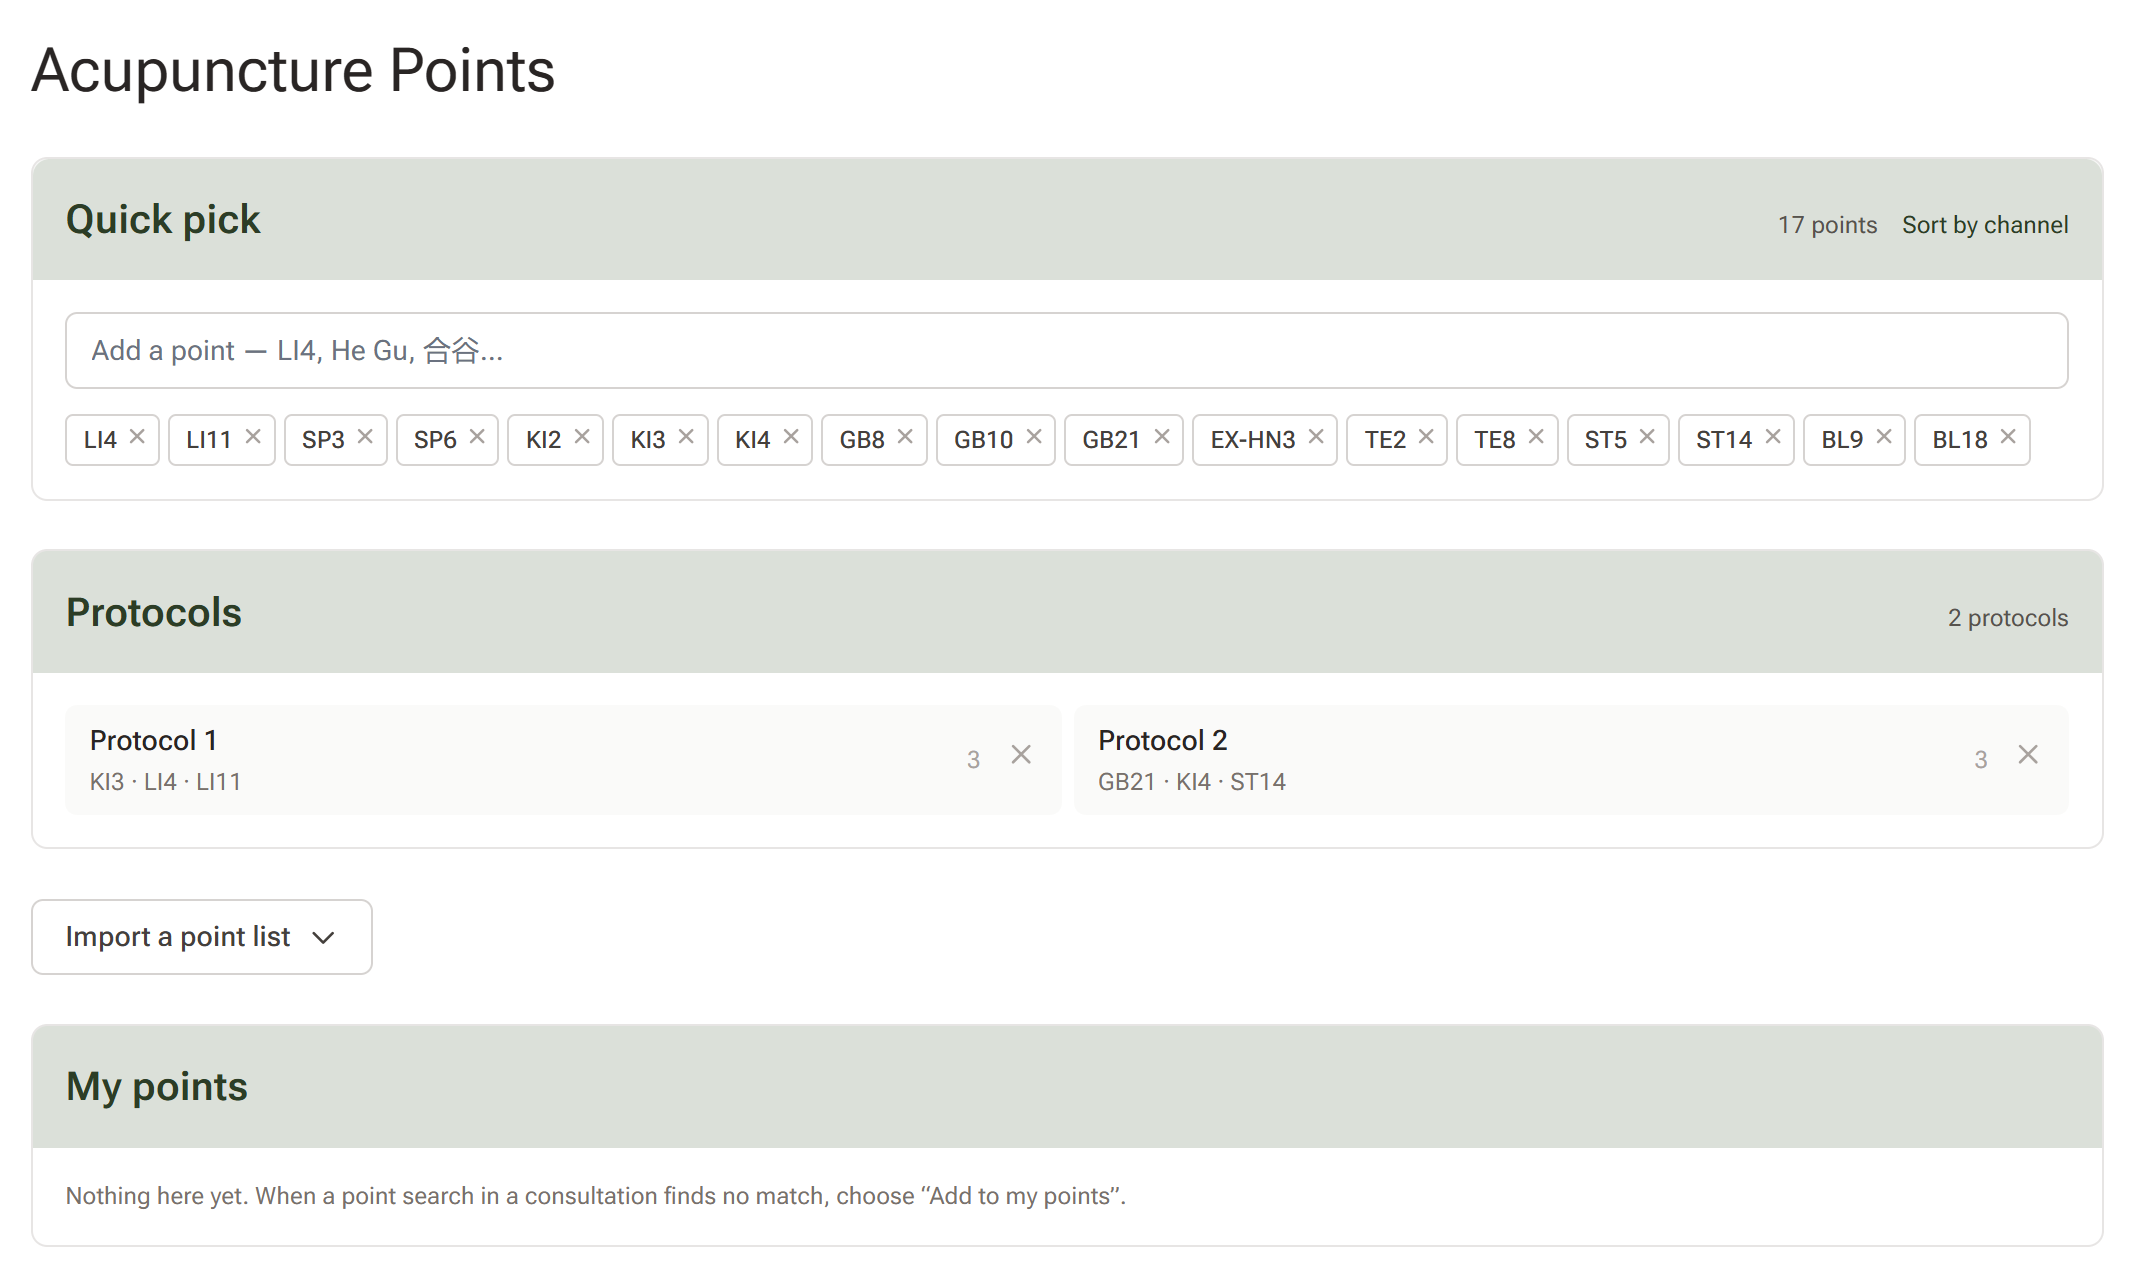
- Quick pick — search the library and add chips in bulk. The × on a chip is the only way to take a point off your palette: pinning happens inside consultations, unpinning happens here. "Sort by channel" tidies the whole palette into channel order in one go. It's a one-off tidy-up rather than a setting, so newly pinned points still land at the end and your arrangement stays where you left it.
- Protocols — your saved protocols with their points and counts, and a × to delete your own. A filter box appears once you have ten or more.
- Import a point list — collapsed behind a button until you need it.
- My points — your custom points. The pencil renames a point's code and name; the × removes it from your library, which archives rather than deletes it, so past consultations keep showing it. Filter box at ten or more.
Where Charted Points Show Up
- The finalised consultation lists them by position, then by body zone within each, with the needle count — and the consultation PDF carries the same section. A treatment charted in one unnamed position reads as a single list, as before. Each point shows its side, and its technique and moxa where you recorded them; a position's retention time sits beside its needle count.
- While you're writing or viewing notes, the Previous Records side panel shows the points from previous visits alongside those notes.
- The client's profile has an Acupuncture tab: their most-used points, a channel spread, and a visit-by-visit timeline linking back to each consultation. Master Tung points charted with their zone number as the code (22.05, or MT22.05) get a Master Tung zones panel of their own — 22 Hand, 77 Lower leg and so on. Your other own points are counted by the region you gave them, and one-offs on a line of their own.
- Data > Acupuncture shows the same picture across your clinic for any period — treatments with points, distinct points, needles, needles per treatment, most-used points, channel spread (with your own points and one-offs counted the same way as on the profile), Master Tung zones when you chart them, and a breakdown by practitioner. It exports to PDF.
- Letters gain an Acupuncture group of placeholders — points, points with names, points with laterality, a bulleted list, channels treated, point count, needle count — once you choose a consultation as the letter's context.
- Your data export carries an
acupuncture_pointscolumn on the consultations file, with each point's side, technique, moxa and retention time.